No edit summary |
No edit summary |
||
| Line 1: | Line 1: | ||
| + | __TOC__ |
||
| − | {{TOCright}} |
||
==Dungeon Information== |
==Dungeon Information== |
||
| + | {{Dungeon |
||
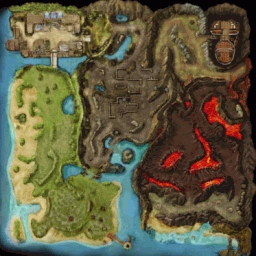
| − | {{location marker| map=Port Lux| x=203| y=30| item=Volcanic Citadel}} |
||
| ⚫ | |||
| − | {| {{STDT|#1B1C16}} width="80%" |
||
| + | | map = Port Lux |
||
| − | |- style="background: #AAB966;" |
||
| + | | xcoord = 203 |
||
| − | !width=100 |Dungeon Entry Item |
||
| + | | ycoord = 30 |
||
| − | !width=100 |Req. Character Level |
||
| + | | description = |
||
| − | !width=100 |Dungeon Duration |
||
| ⚫ | |||
| − | !width=100 |Mob Respawn Time |
||
| + | | entry image = [[image: ETC Volcanic.gif]] |
||
| − | !width=100 |Dungeon Failure Penalty |
||
| + | | char lev low = 95 |
||
| − | |-align="center" |
||
| + | | char lev high = 180 |
||
| ⚫ | |||
| + | | duration = 45 min. |
||
| − | |95 - 180 |
||
| + | | mob respawn = |
||
| − | |45 min. |
||
| ⚫ | |||
| − | | |
||
| + | |||
| − | | -10,000 exp |
||
| ⚫ | |||
==Quests Involved== |
==Quests Involved== |
||
| Line 24: | Line 23: | ||
==Video Walkthrough== |
==Video Walkthrough== |
||
| ⚫ | |||
{{#ev:youtube|BkmXWHuasV0}} |
{{#ev:youtube|BkmXWHuasV0}} |
||
Revision as of 23:30, 28 September 2011
Dungeon Information
| Volcanic Citadel | |||||
|---|---|---|---|---|---|
| |||||
| Details | |||||
| Entry Item: | File:ETC Volcanic.gif Seal of the Darkness | ||||
| Character Level: |
95 ~ 180 | ||||
| Duration: | 45 min. | ||||
| Reward for completion: |
None specified | ||||
| Penalty for failure: |
None specified | ||||
| Mob respawn time: | |||||
| Number of Participants: | None specified | ||||
| Daily Reward: | None specified | ||||
Quests Involved
- BSLV UP Special Training, 1
- BSLV UP Special Training, 2
- Mission: Volcanic Citadel
- Green Despair, Final
Video Walkthrough
Monsters
- Naga Warrior
- Tiraff (boss)
- La Vestima (boss)
- Volcanic Guardian
- Jakrr (boss)(chest)
- Dark Phalanx
- Volcanic Freezen Guard (boss)
- Bricry (boss) (chest)
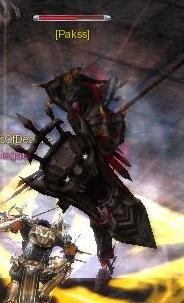
- Pakss (boss) (chest)
- Dark Warrior
- Dark Mage
- Dark Knight
- Pasin (boss) (chest)
- Prasir (boss) (chest)
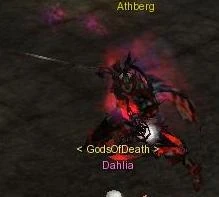
- Athberg (boss) (chest)
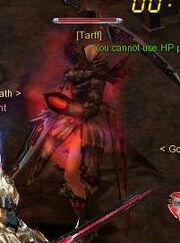
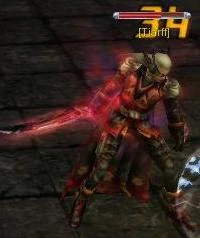
- Tarff (boss) (chest)
- Dark Assassin
- Dark Priest
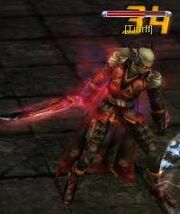
- Tiarff (boss) (chest)
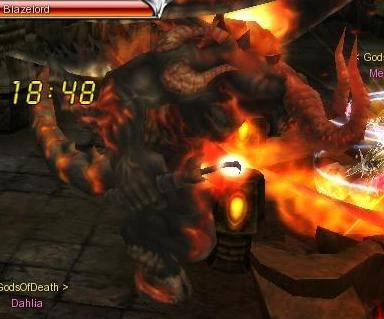
- BlazeLord (boss) (chest)
Dungeon Walkthrough
- 1. As soon as you walk in, there will be statue sitting right in front of you, click it to activate the start of the dungeon. As soon as you do, monsters will appear. Move onto the very end of the path, and you will come across a snake boss by the name of, Tiraff.

Citadel Stone


The Boss Tiraff
- 2.As soon as you finish killing Tiraff, there will be another statue that you have to press to move on. The statue was located behind Tiraff. Doing so will clear the wall and Blaze Hounds will be on the other side. Follow the path to the right all the way at the end. You will come across two pillars and a gate in the middle. Kill the two pillars to activate a pathway to the gate. Next, you must defeat the gate. Be careful, cannons will be shooting you wherever you go.


Two Pillars and the Gate
- 3.Enter the gate and the Force Archer boss, Karir will be alone. Defeat him and grab the chest. As soon as you're done defeating him, enter onto the next level.
The Boss, Karir
- 4.In the next room, you will find the next boss, Jakrr. You have to defeat him to activate the next room. Be sure to grab the chest after you defeat him. It's located inside the little room with the mirror gate. Just use your AOE skills to take out the chest.
The Boss, Jakrr.
- 5.Run across the lava platform to the other side where the phalanx are. You will find another boss by the name of Volcanic Freezen Guard. He will not drop a chest, but another boss will appear after him by the name of Bricry. Bricry will drop a chest, so after you get the chest head on over to the next pathway and onto the Huge Mirror Gate. Defeat the Huge Mirror Gate to get to the next room.


- 6.head on into the middle and the Phalanx group will start storming at you. After you defeat one mob, more will keep coming at you, until the boss Pakss shows up. Defeat him and a chest will appear. To open the gate, you must speak with the stone in front of the next gate. Head on over the volcanic steps again and at the end of the pathway, there will be a Huge Mirror Gate. Defeat the Mirror gate to get to the next room.

- 7.Follow the path, and you will see the next boss, Pasin. Grab the chest after you defeat him. The gate will take you to the final boss room. You'll find different rooms that you can go into. These rooms will take you to other bosses that you have to defeat to unleash the end boss.

- 8.First room to your left will be the Wizard boss, Prasir. Defeat her and she will drop the chest.
- 9.Second room will be the Force Shielder's room by the name of Athberg. He will also drop a chest.
- 10.Next room will take you to the Blader's room. Her name is Tarff. She will also drop a chest.
- 11.The next boss isn't in any room, but be sure to go inside where Tiarff is located, because if you are outside, the chest will be inside and you cannot get to it after you defeat the boss.
  | ||||
  | ||||
  |
- 12.Now it's time for the final boss, Balrog. Speak with the stone that is in front of the boss. As soon as the boss is done speaking, head close to him to aggro him. Be sure to have your party spread out, because blazelord's attacks are AOE. Once you defeat the boss, there will be a legacy chest at one of the edges of the room. Speak with the stone behind the chest to end the dungeon.
