No edit summary |
(→Bosses) |
||
| (18 intermediate revisions by 9 users not shown) | |||
| Line 1: | Line 1: | ||
| − | __TOC__ |
||
| − | ==Introduction== |
||
{{Dungeon |
{{Dungeon |
||
| name = Forgotten Temple B2F |
| name = Forgotten Temple B2F |
||
| Line 8: | Line 6: | ||
| description = |
| description = |
||
| entry = [[Muster Card : Forgotten Temple B2F]] |
| entry = [[Muster Card : Forgotten Temple B2F]] |
||
| − | | entry image = [[image: |
+ | | entry image = [[image: Muster-Card-Forgotten-Temple-B2F.jpg]] |
| char lev low = 125 |
| char lev low = 125 |
||
| char lev high = 180 |
| char lev high = 180 |
||
| − | | duration = |
+ | | duration = 1hr. |
| mob respawn = |
| mob respawn = |
||
| − | | reward = 10,000 Honor<br>9 |
+ | | reward = 10,000 [[Honor]]<br>9 [[Dungeon Points]] |
}} |
}} |
||
| + | __TOC__ |
||
| + | ==Introduction== |
||
| + | Also known as "FT2" this dungeon is one of the most difficult dungeons in the game. A full party of 7 people Level 160+ is recommended including at least 1 each of the following classes: |
||
| + | *'''[[Warrior]]:''' For [[Fury Shout]] & [[Morale Shout]] party buffs and [[Panic Cry]] debuff |
||
| + | *'''[[Wizard]]:''' For [[Raise Spirit]], and overall DPS |
||
| + | *'''[[Force Blader]]:''' For their various debuff and root skills |
||
| + | *'''[[Force Archer]]:''' For healing |
||
| + | == Drops == |
||
| − | {{Stub}} |
||
| + | Some of the better items that can drop in this dungeon include: |
||
| + | :* +7, +8 [[Epaulets]] |
||
| + | :* Perfect crafted Forcium weapons and armor |
||
| + | :* +7 [[Bracelets]] & [[Earrings]] |
||
| + | :* [[Slot Extender (High)]] & [[Slot Extender (Highest)]] |
||
| + | :* [[Astral Bike (Blue)]] & [[Astral Bike (RW3)]] |
||
| + | For a summary of drops see: [[Dungeon Drops#Forgotten Temple (B2F)|Forgotten Temple (B2F) Drops]]<br> |
||
| − | ''Please note that it is one of the hardest dungeons in the game and a full party is advised. A Wizard is mandatory and a Force Archer is highly recommended.'' |
||
| + | A comprehensive drop table from EST is found at: [[Forgotten Temple (B2F) Drop Table]] |
||
| + | ==Monsters== |
||
| + | {| |
||
| + | |valign="top"| |
||
| + | *[[Bruns]] |
||
| + | *[[Carabus]] |
||
| + | *[[Graydant]] |
||
| + | *[[Ingrozi]] |
||
| + | |valign="top"| |
||
| + | *[[Jayrion]] |
||
| + | *[[Macadum]] |
||
| + | *[[Mayozin]] |
||
| + | *[[Negrabei]] |
||
| + | |valign="top"| |
||
| + | *[[Prown]] |
||
| + | *[[Reddant]] |
||
| + | *[[Scarab Gate]] |
||
| + | *[[Scarabei]] |
||
| + | |valign="top"| |
||
| + | *[[Senilla]] |
||
| + | *[[Setizin]] |
||
| + | *[[Vallist]] |
||
| + | | |
||
| + | |} |
||
| + | ==Bosses== |
||
| − | '''More data to be entered. Guide will be added soon as well.''' |
||
| + | {{Mob Gallery |
||
| + | |width=150 |
||
| + | |height=150 |
||
| + | |lines=2 |
||
| + | |align=left |
||
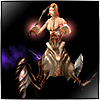
| + | |Image:dungeon107_01.gif|link1=Ariadney| |
||
| + | *[[Ariadney]] |
||
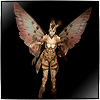
| + | |Image:dungeon107_03.gif|link2=Nadiell| |
||
| + | *[[Nadiell]] |
||
| + | |Image:dungeon107_02.gif|link3=Naheim| |
||
| + | *[[Naheim]] |
||
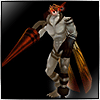
| + | |Image:dungeon107_04.gif|link4=Isipita| |
||
| + | *[[Isipita]] |
||
| + | |Image:dungeon107_05.gif|link5=Trugater| |
||
| + | *[[Trugater]] |
||
| + | |Image:dungeon107_06.gif|link6=Senilla| |
||
| + | *[[Senilla]] |
||
| + | |Image:dungeon107_07.gif|link7=Nola Ispita| |
||
| + | *[[Nola Ispita]] |
||
| + | |Image:dungeon107_08.gif|link8=Arzip| |
||
| + | *[[Arzip]] |
||
| + | |Image:dungeon107_09.gif|link9=Artoorbar| |
||
| + | *[[Artoorbar]] |
||
| + | |Image:dungeon107_10.gif|link10=Ariyak| |
||
| + | *[[Ariyak]] |
||
| + | |Image:dungeon107_11.gif|link11=Tyrant| |
||
| + | *[[Tyrant]] |
||
| + | *[[Tyrant|Leth Tyrant]] |
||
| + | }}<br clear=all> |
||
| + | ==Video Walkthrough== |
||
| + | [http://www.youtube.com/watch?v=gsaRexDEcfU Forgotten Temple B2F Video Guide] |
||
| + | {{#ev:youtube|gsaRexDEcfU}} |
||
| − | == Drop Table == |
||
| − | Drop information is derived from official Episode 7 drop tables provided by EST Korea. [http://image.cabal.co.kr/cabal/img/info/%EC%95%84%EC%9D%B4%ED%85%9C%20%EB%93%9C%EB%A1%AD%EB%A6%AC%EC%8A%A4%ED%8A%B8.xls]. |
||
| − | :*'''Upgrade Level:''' The upgrade level possible when dropped. Randomly determined when item drops. |
||
| − | :*'''Number of Slots:''' The number of slots in the item. Randomly determined when item drops. |
||
| − | :*'''Epic Availability:''' If crafted item is possible to be dropped. |
||
| − | :*'''Sub Epic:''' ? |
||
| − | :*'''Top Epic:''' Perfect craft? |
||
| − | |||
| − | {| class="wikitable sortable collapsible collapsed" {{STDT|#1B1C16}} |
||
| − | |- style="background: #AAB966;" |
||
| − | ! Item Name |
||
| − | ! Upgrade Level |
||
| − | ! Number of Slots |
||
| − | ! Epic Availability |
||
| − | ! Sub Epic |
||
| − | ! Top Epic |
||
| − | |-align="center" |
||
| − | | Upgrade Core (High) || || || || || |
||
| − | |-align="center" |
||
| − | | Force Core (High) || || || || || |
||
| − | |-align="center" |
||
| − | | Topaz Orb || 0~5 || 0~2 || X || || |
||
| − | |-align="center" |
||
| − | | Mythril Orb || 0~5 || 0~2 || X || || |
||
| − | |-align="center" |
||
| − | | Mythril Orb || 0~5 || 0~2 || O || 1~3 || |
||
| − | |-align="center" |
||
| − | | Topaz Crystal || 0~5 || 0~2 || X || || |
||
| − | |-align="center" |
||
| − | | Mythril Crystal || 0~5 || 0~2 || X || || |
||
| − | |-align="center" |
||
| − | | Mythril Crystal || 0~5 || 0~2 || O || 1~3 || |
||
| − | |-align="center" |
||
| − | | Redosmium Katana || 0~5 || 0~2 || X || || |
||
| − | |-align="center" |
||
| − | | Mythril Katana || 0~5 || 0~2 || X || || |
||
| − | |-align="center" |
||
| − | | Mythril Katana || 0~5 || 0~2 || O || 1~3 || |
||
| − | |-align="center" |
||
| − | | Redosmium Blade || 0~5 || 0~2 || X || || |
||
| − | |-align="center" |
||
| − | | Mythril Blade || 0~5 || 0~2 || X || || |
||
| − | |-align="center" |
||
| − | | Mythril Blade || 0~5 || 0~2 || O || 1~3 || |
||
| − | |-align="center" |
||
| − | | Redosmium Daikatana || 0~5 || 0~2 || X || || |
||
| − | |-align="center" |
||
| − | | Mythril Daikatana || 0~5 || 0~2 || X || || |
||
| − | |-align="center" |
||
| − | | Mythril Daikatana || 0~5 || 0~2 || O || 1~3 || |
||
| − | |-align="center" |
||
| − | | Redosmium Greatsword || 0~5 || 0~2 || X || || |
||
| − | |-align="center" |
||
| − | | Mythril Greatsword || 0~5 || 0~2 || X || || |
||
| − | |-align="center" |
||
| − | | Mythril Greatsword || 0~5 || 0~2 || O || 1~3 || |
||
| − | |-align="center" |
||
| − | | Shineguard Plate (WA) || 0~5 || 0~2 || X || || |
||
| − | |-align="center" |
||
| − | | Shineguard Plate (FS) || 0~5 || 0~2 || X || || |
||
| − | |-align="center" |
||
| − | | Mythril Plate (WA) || 0~5 || 0~2 || X || || |
||
| − | |-align="center" |
||
| − | | Mythril Plate (WA) || 0~5 || 0~2 || O || 1~3 || |
||
| − | |-align="center" |
||
| − | | Mythril Plate (FS) || 0~5 || 0~2 || X || || |
||
| − | |-align="center" |
||
| − | | Mythril Plate (FS) || 0~5 || 0~2 || O || 1~3 || |
||
| − | |-align="center" |
||
| − | | Terragrace Coat (FB) || 0~5 || 0~2 || X || || |
||
| − | |-align="center" |
||
| − | | Terragrace Coat (FA) || 0~5 || 0~2 || X || || |
||
| − | |-align="center" |
||
| − | | Mythril Coat (FB) || 0~5 || 0~2 || X || || |
||
| − | |-align="center" |
||
| − | | Mythril Coat (FB) || 0~5 || 0~2 || O || 1~3 || |
||
| − | |-align="center" |
||
| − | | Mythril Coat (FA) || 0~5 || 0~2 || X || || |
||
| − | |-align="center" |
||
| − | | Mythril Coat (FA) || 0~5 || 0~2 || O || 1~3 || |
||
| − | |-align="center" |
||
| − | | Mystic Suit (BL) || 0~5 || 0~2 || X || || |
||
| − | |-align="center" |
||
| − | | Mystic Suit (WI) || 0~5 || 0~2 || X || || |
||
| − | |-align="center" |
||
| − | | Mythril Suit (BL) || 0~5 || 0~2 || X || || |
||
| − | |-align="center" |
||
| − | | Mythril Suit (BL) || 0~5 || 0~2 || O || 1~3 || |
||
| − | |-align="center" |
||
| − | | Mythril Suit (WI) || 0~5 || 0~2 || X || || |
||
| − | |-align="center" |
||
| − | | Mythril Suit (WI) || 0~5 || 0~2 || O || 1~3 || |
||
| − | |-align="center" |
||
| − | | Shineguard Gauntlet (WA) || 0~5 || 0~2 || X || || |
||
| − | |-align="center" |
||
| − | | Shineguard Gauntlet (FS) || 0~5 || 0~2 || X || || |
||
| − | |-align="center" |
||
| − | | Mythril Gauntlet (WA) || 0~5 || 0~2 || X || || |
||
| − | |-align="center" |
||
| − | | Mythril Gauntlet (WA) || 0~5 || 0~2 || O || 1~3 || |
||
| − | |-align="center" |
||
| − | | Mythril Gauntlet (FS) || 0~5 || 0~2 || X || || |
||
| − | |-align="center" |
||
| − | | Mythril Gauntlet (FS) || 0~5 || 0~2 || O || 1~3 || |
||
| − | |-align="center" |
||
| − | | Terragrace Gloves (FB) || 0~5 || 0~2 || X || || |
||
| − | |-align="center" |
||
| − | | Terragrace Gloves (FA) || 0~5 || 0~2 || X || || |
||
| − | |-align="center" |
||
| − | | Mythril Gloves (FB) || 0~5 || 0~2 || X || || |
||
| − | |-align="center" |
||
| − | | Mythril Gloves (FB) || 0~5 || 0~2 || O || 1~3 || |
||
| − | |-align="center" |
||
| − | | Mythril Gloves (FA) || 0~5 || 0~2 || X || || |
||
| − | |-align="center" |
||
| − | | Mythril Gloves (FA) || 0~5 || 0~2 || O || 1~3 || |
||
| − | |-align="center" |
||
| − | | Mystic Hands (BL) || 0~5 || 0~2 || X || || |
||
| − | |-align="center" |
||
| − | | Mystic Hands (WI) || 0~5 || 0~2 || X || || |
||
| − | |-align="center" |
||
| − | | Mythril Hands (BL) || 0~5 || 0~2 || X || || |
||
| − | |-align="center" |
||
| − | | Mythril Hands (BL) || 0~5 || 0~2 || O || 1~3 || |
||
| − | |-align="center" |
||
| − | | Mythril Hands (WI) || 0~5 || 0~2 || X || || |
||
| − | |-align="center" |
||
| − | | Mythril Hands (WI) || 0~5 || 0~2 || O || 1~3 || |
||
| − | |-align="center" |
||
| − | | Shineguard Greaves (WA) || 0~5 || 0~2 || X || || |
||
| − | |-align="center" |
||
| − | | Shineguard Greaves (FS) || 0~5 || 0~2 || X || || |
||
| − | |-align="center" |
||
| − | | Mythril Greaves (WA) || 0~5 || 0~2 || X || || |
||
| − | |-align="center" |
||
| − | | Mythril Greaves (WA) || 0~5 || 0~2 || O || 1~3 || |
||
| − | |-align="center" |
||
| − | | Mythril Greaves (FS) || 0~5 || 0~2 || X || || |
||
| − | |-align="center" |
||
| − | | Mythril Greaves (FS) || 0~5 || 0~2 || O || 1~3 || |
||
| − | |-align="center" |
||
| − | | Terragrace Boots (FB) || 0~5 || 0~2 || X || || |
||
| − | |-align="center" |
||
| − | | Terragrace Boots (FA) || 0~5 || 0~2 || X || || |
||
| − | |-align="center" |
||
| − | | Mythril Boots (FB) || 0~5 || 0~2 || X || || |
||
| − | |-align="center" |
||
| − | | Mythril Boots (FB) || 0~5 || 0~2 || O || 1~3 || |
||
| − | |-align="center" |
||
| − | | Mythril Boots (FA) || 0~5 || 0~2 || X || || |
||
| − | |-align="center" |
||
| − | | Mythril Boots (FA) || 0~5 || 0~2 || O || 1~3 || |
||
| − | |-align="center" |
||
| − | | Mystic Shoes (BL) || 0~5 || 0~2 || X || || |
||
| − | |-align="center" |
||
| − | | Mystic Shoes (WI) || 0~5 || 0~2 || X || || |
||
| − | |-align="center" |
||
| − | | Mythril Shoes (BL) || 0~5 || 0~2 || X || || |
||
| − | |-align="center" |
||
| − | | Mythril Shoes (BL) || 0~5 || 0~2 || O || 1~3 || |
||
| − | |-align="center" |
||
| − | | Mythril Shoes (WI) || 0~5 || 0~2 || X || || |
||
| − | |-align="center" |
||
| − | | Mythril Shoes (WI) || 0~5 || 0~2 || O || 1~3 || |
||
| − | |-align="center" |
||
| − | | Shineguard Visor (WA) || 0~5 || 0~2 || X || || |
||
| − | |-align="center" |
||
| − | | Shineguard Visor (FS) || 0~5 || 0~2 || X || || |
||
| − | |-align="center" |
||
| − | | Mythril Visor (WA) || 0~5 || 0~2 || X || || |
||
| − | |-align="center" |
||
| − | | Mythril Visor (WA) || 0~5 || 0~2 || O || 1~3 || |
||
| − | |-align="center" |
||
| − | | Mythril Visor (FS) || 0~5 || 0~2 || X || || |
||
| − | |-align="center" |
||
| − | | Mythril Visor (FS) || 0~5 || 0~2 || O || 1~3 || |
||
| − | |-align="center" |
||
| − | | Terragrace Headgear (FB) || 0~5 || 0~2 || X || || |
||
| − | |-align="center" |
||
| − | | Terragrace Headgear (FA) || 0~5 || 0~2 || X || || |
||
| − | |-align="center" |
||
| − | | Mythril Headgear (FB) || 0~5 || 0~2 || X || || |
||
| − | |-align="center" |
||
| − | | Mythril Headgear (FB) || 0~5 || 0~2 || O || 1~3 || |
||
| − | |-align="center" |
||
| − | | Mythril Headgear (FA) || 0~5 || 0~2 || X || || |
||
| − | |-align="center" |
||
| − | | Mythril Headgear (FA) || 0~5 || 0~2 || O || 1~3 || |
||
| − | |-align="center" |
||
| − | | Mystic Headpiece (BL) || 0~5 || 0~2 || X || || |
||
| − | |-align="center" |
||
| − | | Mystic Headpiece (WI) || 0~5 || 0~2 || X || || |
||
| − | |-align="center" |
||
| − | | Mythril Headpiece (BL) || 0~5 || 0~2 || X || || |
||
| − | |-align="center" |
||
| − | | Mythril Headpiece (BL) || 0~5 || 0~2 || O || 1~3 || |
||
| − | |-align="center" |
||
| − | | Mythril Headpiece (WI) || 0~5 || 0~2 || X || || |
||
| − | |-align="center" |
||
| − | | Mythril Headpiece (WI) || 0~5 || 0~2 || O || 1~3 || |
||
| − | |-align="center" |
||
| − | | Ring of Fighter +7 || || || || || |
||
| − | |-align="center" |
||
| − | | Ring of Sage +7 || || || || || |
||
| − | |-align="center" |
||
| − | | Ring of Champion +7 || || || || || |
||
| − | |-align="center" |
||
| − | | Critical Ring +2 || || || || || |
||
| − | |-align="center" |
||
| − | | Ring of Luck +2 || || || || || |
||
| − | |-align="center" |
||
| − | | Force Absorb Ring +2 || || || || || |
||
| − | |-align="center" |
||
| − | | Life Absorb Ring +3 || || || || || |
||
| − | |-align="center" |
||
| − | | Mana Absorb Ring +3 || || || || || |
||
| − | |-align="center" |
||
| − | | Amulet of Bless +3 || || || || || |
||
| − | |-align="center" |
||
| − | | Force Regeneration Amulet +2 || || || || || |
||
| − | |-align="center" |
||
| − | | Amulet of Guard +7 || || || || || |
||
| − | |-align="center" |
||
| − | | Epaulet of Guardian +7 || || || || || |
||
| − | |-align="center" |
||
| − | | Epaulet of Fighter +7 || || || || || |
||
| − | |-align="center" |
||
| − | | Epaulet of Sage +7 || || || || || |
||
| − | |-align="center" |
||
| − | | Powerless Core || || || || || |
||
| − | |-align="center" |
||
| − | | Astral Bike Card - Blue || 0 || 0~2 || X || || |
||
| − | |-align="center" |
||
| − | | Astral Bike Card - RW3 || 0 || 0~2 || X || || |
||
| − | |-align="center" |
||
| − | | Familiar Mineral || || || || || |
||
| − | |-align="center" |
||
| − | | STR이 느껴지는 핵 || || || || || |
||
| − | |-align="center" |
||
| − | | Quartz Core (Mythril) || || || || || |
||
| − | |-align="center" |
||
| − | | Quartz Core (Blue Mythril) || || || || || |
||
| − | |-align="center" |
||
| − | | Material Core (Mythril) || || || || || |
||
| − | |-align="center" |
||
| − | | Material Core (Blue Mythril) || || || || || |
||
| − | |-align="center" |
||
| − | | Formula Card No. 80 Astral Core (Mythril) || || || || || |
||
| − | |-align="center" |
||
| − | | Formula Card No. 100 Astral Core (Blue Mythril) || || || || || |
||
| − | |-align="center" |
||
| − | | Formula Card No. 56 C.A. Unit - Regard for H.Age || || || || || |
||
| − | |-align="center" |
||
| − | | Formula Card No. 102 HP Potion (Lv 3) || || || || || |
||
| − | |-align="center" |
||
| − | | Formula Card No. 105 MP Potion (Lv 3) || || || || || |
||
| − | |-align="center" |
||
| − | | Formula Card No. 108 Return Stone || || || || || |
||
| − | |-align="center" |
||
| − | | Slot Extender (High) || || || || || |
||
| − | |-align="center" |
||
| − | | Flame Disk (Highest) || || || || || |
||
| − | |-align="center" |
||
| − | | Dark Disk (Highest) || || || || || |
||
| − | |-align="center" |
||
| − | | Holy Disk (Highest) || || || || || |
||
| − | |-align="center" |
||
| − | | Air Disk (Highest) || || || || || |
||
| − | |-align="center" |
||
| − | | Thunder Disk (Highest) || || || || || |
||
| − | |-align="center" |
||
| − | | Bloody Disk (Highest) || || || || || |
||
| − | |-align="center" |
||
| − | | Earth Disk (Highest) || || || || || |
||
| − | |-align="center" |
||
| − | | Aqua Disk (Highest) || || || || || |
||
| − | |-align="center" |
||
| − | | Soul Disk (Highest) || || || || || |
||
| − | |-align="center" |
||
| − | | Shape Cartridge (Sword/Highest) || || || || || |
||
| − | |-align="center" |
||
| − | | Shape Cartridge (Armorset/Highest) || || || || || |
||
| − | |-align="center" |
||
| − | | Shape Cartridge (Battleset/Highest) || || || || || |
||
| − | |-align="center" |
||
| − | | Shape Cartridge (Martialset/Highest) || || || || || |
||
| − | |-align="center" |
||
| − | | Shape Cartridge (Artifact/Highest) || || || || || |
||
| − | |-align="center" |
||
| − | | Shining Yellow Powder || || || || || |
||
| − | |-align="center" |
||
| − | | Bracelet of Fighter +3 || || || || || |
||
| − | |-align="center" |
||
| − | | Bracelet of Fighter +4 || 0 || 0 || O || 2 || |
||
| − | |-align="center" |
||
| − | | Bracelet of Sage +3 || || || || || |
||
| − | |-align="center" |
||
| − | | Bracelet of Sage +4 || 0 || 0 || O || 2 || |
||
| − | |-align="center" |
||
| − | | Extortion Bracelet +3 || || || || || |
||
| − | |-align="center" |
||
| − | | Extortion Bracelet +4 || 0 || 0 || O || 2 || |
||
| − | |-align="center" |
||
| − | | Earring of Guard +3 || || || || || |
||
| − | |-align="center" |
||
| − | | Earring of Guard +4 || 0 || 0 || O || 2 || |
||
| − | |-align="center" |
||
| − | | Force Regeneration Earring +3 || || || || || |
||
| − | |-align="center" |
||
| − | | Force Regeneration Earring +4 || 0 || 0 || O || 2 || |
||
| − | |-align="center" |
||
| − | | Vampiric Earring +3 || || || || || |
||
| − | |-align="center" |
||
| − | | Vampiric Earring +4 || 0 || 0 || O || 2 || |
||
| − | |-align="center" |
||
| − | | Epaulet of Guardian +8 || || || || || |
||
| − | |-align="center" |
||
| − | | Epaulet of Fighter +8 || || || || || |
||
| − | |-align="center" |
||
| − | | Epaulet of Sage +8 || || || || || |
||
| − | |-align="center" |
||
| − | | Upgrade Core (Highest) || || || || || |
||
| − | |-align="center" |
||
| − | | Force Core (Highest) || || || || || |
||
| − | |-align="center" |
||
| − | | Slot Extender (Highest) || || || || || |
||
| − | |-align="center" |
||
| − | | Earring of Guard +5 || || || || || |
||
| − | |-align="center" |
||
| − | | Earring of Guard +7 || || || || || |
||
| − | |-align="center" |
||
| − | | Force Regeneration Earring +5 || || || || || |
||
| − | |-align="center" |
||
| − | | Force Regeneration Earring +7 || || || || || |
||
| − | |-align="center" |
||
| − | | Vampiric Earring +5 || || || || || |
||
| − | |-align="center" |
||
| − | | Vampiric Earring +7 || || || || || |
||
| − | |-align="center" |
||
| − | | Bracelet of Fighter +5 || || || || || |
||
| − | |-align="center" |
||
| − | | Bracelet of Fighter +7 || || || || || |
||
| − | |-align="center" |
||
| − | | Bracelet of Sage +5 || || || || || |
||
| − | |-align="center" |
||
| − | | Bracelet of Sage +7 || || || || || |
||
| − | |-align="center" |
||
| − | | Extortion Bracelet +5 || || || || || |
||
| − | |-align="center" |
||
| − | | Extortion Bracelet +7 || || || || || |
||
| − | |-align="center" |
||
| − | | Sigmetal Orb || 0~5 || 0~2 || X || || |
||
| − | |-align="center" |
||
| − | | Sigmetal Crystal || 0~5 || 0~2 || X || || |
||
| − | |-align="center" |
||
| − | | Sigmetal Katana || 0~5 || 0~2 || X || || |
||
| − | |-align="center" |
||
| − | | Sigmetal Blade || 0~5 || 0~2 || X || || |
||
| − | |-align="center" |
||
| − | | Sigmetal Daikatana || 0~5 || 0~2 || X || || |
||
| − | |-align="center" |
||
| − | | Sigmetal Greatsword || 0~5 || 0~2 || X || || |
||
| − | |-align="center" |
||
| − | | Sigmetal Plate (WA) || 0~5 || 0~2 || X || || |
||
| − | |-align="center" |
||
| − | | Sigmetal Plate (FS) || 0~5 || 0~2 || X || || |
||
| − | |-align="center" |
||
| − | | Sigmetal Coat (FB) || 0~5 || 0~2 || X || || |
||
| − | |-align="center" |
||
| − | | Sigmetal Coat (FA) || 0~5 || 0~2 || X || || |
||
| − | |-align="center" |
||
| − | | Sigmetal Suit (BL) || 0~5 || 0~2 || X || || |
||
| − | |-align="center" |
||
| − | | Sigmetal Suit (WI) || 0~5 || 0~2 || X || || |
||
| − | |-align="center" |
||
| − | | Sigmetal Gauntlet (WA) || 0~5 || 0~2 || X || || |
||
| − | |-align="center" |
||
| − | | Sigmetal Gauntlet (FS) || 0~5 || 0~2 || X || || |
||
| − | |-align="center" |
||
| − | | Sigmetal Gloves (FB) || 0~5 || 0~2 || X || || |
||
| − | |-align="center" |
||
| − | | Sigmetal Gloves (FA) || 0~5 || 0~2 || X || || |
||
| − | |-align="center" |
||
| − | | Sigmetal Hands (BL) || 0~5 || 0~2 || X || || |
||
| − | |-align="center" |
||
| − | | Sigmetal Hands (WI) || 0~5 || 0~2 || X || || |
||
| − | |-align="center" |
||
| − | | Sigmetal Greaves (WA) || 0~5 || 0~2 || X || || |
||
| − | |-align="center" |
||
| − | | Sigmetal Greaves (FS) || 0~5 || 0~2 || X || || |
||
| − | |-align="center" |
||
| − | | Sigmetal Boots (FB) || 0~5 || 0~2 || X || || |
||
| − | |-align="center" |
||
| − | | Sigmetal Boots (FA) || 0~5 || 0~2 || X || || |
||
| − | |-align="center" |
||
| − | | Sigmetal Shoes (BL) || 0~5 || 0~2 || X || || |
||
| − | |-align="center" |
||
| − | | Sigmetal Shoes (WI) || 0~5 || 0~2 || X || || |
||
| − | |-align="center" |
||
| − | | Sigmetal Headgear (FB) || 0~5 || 0~2 || X || || |
||
| − | |-align="center" |
||
| − | | Sigmetal Headgear (FA) || 0~5 || 0~2 || X || || |
||
| − | |-align="center" |
||
| − | | Sigmetal Headpiece (BL) || 0~5 || 0~2 || X || || |
||
| − | |-align="center" |
||
| − | | Sigmetal Headpiece (WI) || 0~5 || 0~2 || X || || |
||
| − | |-align="center" |
||
| − | | Essence Rune (Skill Experience) || || || || || |
||
| − | |-align="center" |
||
| − | | Essence Rune (MP) || || || || || |
||
| − | |-align="center" |
||
| − | | Essence Rune (Sword Skill Amp) || || || || || |
||
| − | |-align="center" |
||
| − | | Essence Rune (Magic Skill Amp) || || || || || |
||
| − | |-align="center" |
||
| − | | Belt of Prevent +4 || || || || || |
||
| − | |-align="center" |
||
| − | | Belt of Damp +4 || || || || || |
||
| − | |-align="center" |
||
| − | | Quartz Core (Sigmetal) || || || || || |
||
| − | |-align="center" |
||
| − | | Material Core (Sigmetal) || || || || || |
||
| − | |-align="center" |
||
| − | | Mythril Orb || || || || || |
||
| − | |-align="center" |
||
| − | | Mythril Crystal || || || || || |
||
| − | |-align="center" |
||
| − | | Mythril Katana || 0~5 || 0~2 || O || || 1 |
||
| − | |-align="center" |
||
| − | | Mythril Blade || 0~5 || 0~2 || O || || 1 |
||
| − | |-align="center" |
||
| − | | Mythril Daikatana || 0~5 || 0~2 || O || || 1 |
||
| − | |-align="center" |
||
| − | | Mythril Greatsword || 0~5 || 0~2 || O || || 1 |
||
| − | |-align="center" |
||
| − | | Mythril Plate (WA) || 0~5 || 0~2 || O || || 1 |
||
| − | |-align="center" |
||
| − | | Mythril Plate (FS) || 0~5 || 0~2 || O || || 1 |
||
| − | |-align="center" |
||
| − | | Mythril Coat (FB) || 0~5 || 0~2 || O || || 1 |
||
| − | |-align="center" |
||
| − | | Mythril Coat (FA) || 0~5 || 0~2 || O || || 1 |
||
| − | |-align="center" |
||
| − | | Mythril Suit (BL) || 0~5 || 0~2 || O || || 1 |
||
| − | |-align="center" |
||
| − | | Mythril Suit (WI) || 0~5 || 0~2 || O || || 1 |
||
| − | |-align="center" |
||
| − | | Mythril Gauntlet (WA) || 0~5 || 0~2 || O || || 1 |
||
| − | |-align="center" |
||
| − | | Mythril Gauntlet (FS) || 0~5 || 0~2 || O || || 1 |
||
| − | |-align="center" |
||
| − | | Mythril Gloves (FB) || 0~5 || 0~2 || O || || 1 |
||
| − | |-align="center" |
||
| − | | Mythril Gloves (FA) || 0~5 || 0~2 || O || || 1 |
||
| − | |-align="center" |
||
| − | | Mythril Hands (BL) || 0~5 || 0~2 || O || || 1 |
||
| − | |-align="center" |
||
| − | | Mythril Hands (WI) || 0~5 || 0~2 || O || || 1 |
||
| − | |-align="center" |
||
| − | | Mythril Greaves (WA) || 0~5 || 0~2 || O || || 1 |
||
| − | |-align="center" |
||
| − | | Mythril Greaves (FS) || 0~5 || 0~2 || O || || 1 |
||
| − | |-align="center" |
||
| − | | Mythril Boots (FB) || 0~5 || 0~2 || O || || 1 |
||
| − | |-align="center" |
||
| − | | Mythril Boots (FA) || 0~5 || 0~2 || O || || 1 |
||
| − | |-align="center" |
||
| − | | Mythril Shoes (BL) || 0~5 || 0~2 || O || || 1 |
||
| − | |-align="center" |
||
| − | | Mythril Shoes (WI) || 0~5 || 0~2 || O || || 1 |
||
| − | |-align="center" |
||
| − | | Mythril Visor (WA) || 0~5 || 0~2 || O || || 1 |
||
| − | |-align="center" |
||
| − | | Mythril Visor (FS) || 0~5 || 0~2 || O || || 1 |
||
| − | |-align="center" |
||
| − | | Mythril Headgear (FB) || 0~5 || 0~2 || O || || 1 |
||
| − | |-align="center" |
||
| − | | Mythril Headgear (FA) || 0~5 || 0~2 || O || || 1 |
||
| − | |-align="center" |
||
| − | | Mythril Headpiece (BL) || 0~5 || 0~2 || O || || 1 |
||
| − | |-align="center" |
||
| − | | Mythril Headpiece (WI) || 0~5 || 0~2 || O || || 1 |
||
| − | |} |
||
| + | {{Dungeon navbar}} |
||
[[Category:Dungeons]][[Category:Guides]] |
[[Category:Dungeons]][[Category:Guides]] |
||
Latest revision as of 11:24, 27 July 2021
| Forgotten Temple B2F | |||||
|---|---|---|---|---|---|
| |||||
| Details | |||||
| Entry Item: |  Muster Card : Forgotten Temple B2F | ||||
| Character Level: |
125 ~ 180 | ||||
| Duration: | 1hr. | ||||
| Reward for completion: |
10,000 Honor 9 Dungeon Points | ||||
| Penalty for failure: |
None specified | ||||
| Mob respawn time: | |||||
| Number of Participants: | None specified | ||||
| Daily Reward: | None specified | ||||
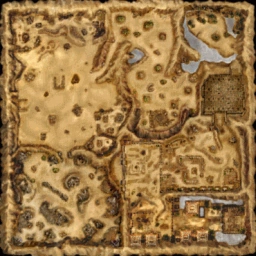
Introduction[ | ]
Also known as "FT2" this dungeon is one of the most difficult dungeons in the game. A full party of 7 people Level 160+ is recommended including at least 1 each of the following classes:
- Warrior: For Fury Shout & Morale Shout party buffs and Panic Cry debuff
- Wizard: For Raise Spirit, and overall DPS
- Force Blader: For their various debuff and root skills
- Force Archer: For healing
Drops[ | ]
Some of the better items that can drop in this dungeon include:
- +7, +8 Epaulets
- Perfect crafted Forcium weapons and armor
- +7 Bracelets & Earrings
- Slot Extender (High) & Slot Extender (Highest)
- Astral Bike (Blue) & Astral Bike (RW3)
For a summary of drops see: Forgotten Temple (B2F) Drops
A comprehensive drop table from EST is found at: Forgotten Temple (B2F) Drop Table
Monsters[ | ]
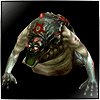
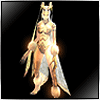
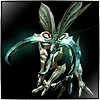
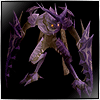
Bosses[ | ]
|


Video Walkthrough[ | ]
Forgotten Temple B2F Video Guide
| Mission Dungeon | Lake in Dusk (W) • Ruina Station (W) • Tower of the Dead (B1F) (W) • Volcanic Citadel • Tower of the Dead (B2F) • Forgotten Temple (B1F) • Forgotten Temple (B2F) (A) • Forbidden Island (A) • Illusion Castle Underworld • Illusion Castle Radiant Hall • Holy WindMill • Altar of Siena (B1F) • Altar of Siena (B2F) • Maquinas Outpost • Holy Keldrasil • Tower of the Undead (B3F) • Flame Dimension • Abandoned City • Legend Arena • Devil's Tower • Glacies Inferna • Edge of Phantom • Forgotten Temple B3F • Acheron Arena • Devi's Tower (Part2) • Pandemonium • Flame Nest • Ancient Tomb • Frozen Canyon • Mirage Island (A) • Labyrinth |
| DX Dungeon | Panic Cave (A) • Steamer Crazy • Catacomb Frost • Lava Hellfire • Hazardous Valley |
| Chaos Arena | Chaos Arena Lv. 1 • Chaos Arena Lv. 2 • Chaos Arena Lv. 3 • Chaos Arena Lv. 4 • Chaos Arena Lv. 5 • Chaos Arena Lv. 6 • Chaos Arena Lv. 7 • Eternal Chaos Arena |
| Related links | Dungeon Entry Items |