No edit summary |
mNo edit summary |
||
| Line 56: | Line 56: | ||
|} |
|} |
||
===Boss=== |
===Boss=== |
||
| + | {{Mob Gallery |
||
| − | {| |
||
| + | |width=100 |
||
| − | |valign="top"| |
||
| + | |height=100 |
||
| − | *[[Ariadney]] |
||
| + | |lines=1 |
||
| − | *[[Ariyak]] |
||
| + | |align=center |
||
| − | *[[Arzip]] |
||
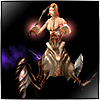
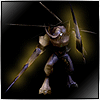
| + | |Image:dungeon107_01.gif|link1=Ariadney|[[Ariadney]] |
||
| − | |valign="top"| |
||
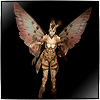
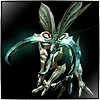
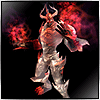
| + | |Image:dungeon107_03.gif|link1=Nadiell|[[Nadiell]] |
||
| − | *[[Isipita (1st)]] |
||
| + | |Image:dungeon107_02.gif|link1=Naheim|[[Naheim]] |
||
| − | *[[Isipita (2nd)]] |
||
| + | |Image:dungeon107_04.gif|link1=Isipita|[[Isipita]] |
||
| − | *[[Isipita (3rd)]] |
||
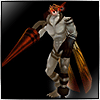
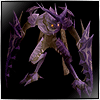
| + | |Image:dungeon107_05.gif|link1=Trugater|[[Trugater]] |
||
| − | |valign="top"| |
||
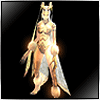
| + | |Image:dungeon107_06.gif|link1=Senilla|[[Senilla]] |
||
| − | *[[Leth Tyrant]] |
||
| + | |Image:dungeon107_07.gif|link1=Nola Ispida|[[Nola Ispida]] |
||
| − | *[[Nadiell]] |
||
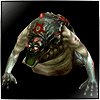
| + | |Image:dungeon107_08.gif|link1=Arzip|[[Arzip]] |
||
| − | *[[Naheim]] |
||
| + | |Image:dungeon107_09.gif|link1=Artoorbar|[[Artoorbar]] |
||
| − | |valign="top"| |
||
| + | |Image:dungeon107_10.gif|link1=Ariyak|[[Ariyak]] |
||
| − | *[[Trugater]] |
||
| − | + | |Image:dungeon107_11.gif|link1=Tyrant|[[Tyrant]] |
|
| ⚫ | |||
| − | | |
||
| ⚫ | |||
==Walkthrough== |
==Walkthrough== |
||
Revision as of 19:52, 10 October 2011
| Forgotten Temple B2F | |||||
|---|---|---|---|---|---|
| |||||
| Details | |||||
| Entry Item: |  Muster Card : Forgotten Temple B2F | ||||
| Character Level: |
125 ~ 180 | ||||
| Duration: | 1hr. | ||||
| Reward for completion: |
10,000 Honor 9 Dungeon Points | ||||
| Penalty for failure: |
None specified | ||||
| Mob respawn time: | |||||
| Number of Participants: | None specified | ||||
| Daily Reward: | None specified | ||||
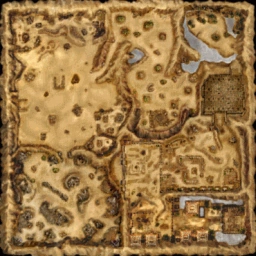
Introduction
Also known as "FT2" this dungeon is one of the most difficult dungeons in the game. A full party of 7 people Level 160+ is recommended including at least 1 each of the following classes:
- Warrior: For Fury Shout & Morale Shout party buffs and Panic Cry debuff
- Wizard: For Raise Spirit, and overall DPS
- Force Blader: For their various debuff and root skills
- Force Archer: For healing
Drops
Some of the better items that can drop in this dungeon include:
- +7, +8 Epaulets
- Perfect crafted Forcium weapons and armor
- +7 Bracelets & Earrings
- Slot Extender (High) & Slot Extender (Highest)
- Astral Bike (Blue) & Astral Bike (RW3)
A comprehensive drop table is found at: Forgotten Temple (B2F) Drop Table
Monsters
Normal
Boss
|


Walkthrough
| Mission Dungeon | Lake in Dusk (W) • Ruina Station (W) • Tower of the Dead (B1F) (W) • Volcanic Citadel • Tower of the Dead (B2F) • Forgotten Temple (B1F) • Forgotten Temple (B2F) (A) • Forbidden Island (A) • Illusion Castle Underworld • Illusion Castle Radiant Hall • Holy WindMill • Altar of Siena (B1F) • Altar of Siena (B2F) • Maquinas Outpost • Holy Keldrasil • Tower of the Undead (B3F) • Flame Dimension • Abandoned City • Legend Arena • Devil's Tower • Glacies Inferna • Edge of Phantom • Forgotten Temple B3F • Acheron Arena • Devi's Tower (Part2) • Pandemonium • Flame Nest • Ancient Tomb • Frozen Canyon • Mirage Island (A) • Labyrinth |
| DX Dungeon | Panic Cave (A) • Steamer Crazy • Catacomb Frost • Lava Hellfire • Hazardous Valley |
| Chaos Arena | Chaos Arena Lv. 1 • Chaos Arena Lv. 2 • Chaos Arena Lv. 3 • Chaos Arena Lv. 4 • Chaos Arena Lv. 5 • Chaos Arena Lv. 6 • Chaos Arena Lv. 7 • Eternal Chaos Arena |
| Related links | Dungeon Entry Items |