im>Zojj No edit summary |
(undo valdalism) |
||
| (41 intermediate revisions by 18 users not shown) | |||
| Line 1: | Line 1: | ||
| + | {{Dungeon |
||
| ⚫ | |||
| + | | name = Forgotten Temple B1F |
||
| + | | map = Forgotten Ruin |
||
| + | | xcoord = 193 |
||
| + | | ycoord = 36 |
||
| + | | description = |
||
| ⚫ | |||
| + | | entry image = [[image: Muster-Card-Forgotten-Temple-B1F_90x90_thumb.jpg]] |
||
| + | | char lev low = 115 |
||
| + | | char lev high = 180 |
||
| + | | duration = 50 min. |
||
| + | | mob respawn = No respawn |
||
| + | }} |
||
| + | __TOC__ |
||
| + | ==Introduction== |
||
| + | Also known as "FT1" this dungeon is difficult for players <120. It is a relatively short dungeon and a party of 2-5 people is recommended depending on how strong the party members are. You can begin to solo this dungeon ~level 160 depending on your strength. |
||
| + | == Crafting == |
||
| − | Duration: 50 min |
||
| + | NPCs within this dungeon allow you to craft Forcium grade weapons and armor. See [[Forcium Craft (Instant Formula Cards)|Forcium crafting]] for more details. |
||
| + | == Drops == |
||
| − | Note: Dungeon mobs won’t respawn in this dungeon |
||
| + | Some of the better items that can drop in this dungeon include: |
||
| + | :* +7 [[Epaulets]] |
||
| + | :* +6 [[Epaulets]] |
||
| + | :* Crafted Redosmium grade weapons and armor |
||
| + | :* [[Slot Extender (High)]] |
||
| + | :* [[Slot Extender (Medium)]] |
||
| + | :* [[Astral Bike (Blue)]], [[Astral Bike (RW3)]] |
||
| + | For a summary of drops see: [[Dungeon Drops]]<br> |
||
| + | A comprehensive drop table from EST is found at: [[Forgotten Temple (B2F) Drop Table]] |
||
| + | kontol kontolan |
||
| − | ---- |
||
| − | [[Image:0001.jpg]] |
||
| − | *Press on the hour glass to turn off the fire wall |
||
| ⚫ | |||
| ⚫ | |||
| − | [[Image:0002.jpg]] |
||
| ⚫ | |||
| − | [[Image:0003.jpg]] |
||
| ⚫ | |||
| − | [[Image:0004.jpg]] |
||
| ⚫ | |||
| − | [[Image:0005.jpg]] |
||
| − | *After you kill all the oblivion. Go forward until u get to the next wall of fire. Click on the snake monument on the right to advance ur quest and teleport in. Note: each member has to click on the right monument to teleport in. Don’t try to run pass the wall of fire it wont happen |
||
| − | [[Image:0006.jpg]] |
||
| ⚫ | |||
| − | [[Image:0007.jpg]] |
||
| − | *After you kill the boss. Click on the altar in the middle of the room to open the way to the next hallway. Go forward and clear the hallway to get quest items |
||
| ⚫ | |||
| − | [[Image:0008.jpg]] |
||
| + | ==NPCs== |
||
| ⚫ | |||
| + | :*[[Mutant Researcher]] |
||
| − | [[Image:0009.jpg]] |
||
| + | :*[[Mutant's Black Market]] |
||
| − | [[Image:0010.jpg]] |
||
| ⚫ | |||
| − | [[Image:0011.jpg]] |
||
| ⚫ | |||
| − | [[Image:0012.jpg]] |
||
| ⚫ | |||
| − | [[Image:0013.jpg]] |
||
| ⚫ | |||
| − | [[Image:0014.jpg]] |
||
| ⚫ | |||
| − | [[Image:0015.jpg]] |
||
| ⚫ | |||
| − | [[Image:0016.jpg]] |
||
| ⚫ | |||
| − | [[Image:0017.jpg]] |
||
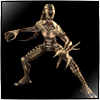
| + | == Monsters == |
||
| ⚫ | |||
| + | {{Mob Gallery |
||
| − | [[Image:0018.jpg]] |
||
| + | |width=100 |
||
| ⚫ | |||
| + | |height=100 |
||
| − | [[Image:0019.jpg]] |
||
| + | |lines=1 |
||
| + | |align=center |
||
| + | |Image:dungeon106_01.gif|link1=Grik| |
||
| + | *[[Grik]] |
||
| + | |Image:dungeon106_02.gif|link2=Obidiant| |
||
| + | *[[Obidiant]] |
||
| + | |Image:dungeon106_04.gif|link3=Felichra| |
||
| + | *[[Felichra]] |
||
| + | |Image:dungeon106_05.gif|link4=Vigest| |
||
| + | *[[Vigest]] |
||
| + | |Image:dungeon106_07.gif|link5=Druga| |
||
| + | *[[Druga]] |
||
| + | |Image:dungeon106_08.gif|link6=Granite Golem| |
||
| + | *[[Granite Golem]] |
||
| + | |Image:dungeon106_09.gif|link7=Serpent| |
||
| + | *[[Serpent]] |
||
| + | |Image:dungeon106_10.gif|link8=Groga| |
||
| + | *[[Groga]] |
||
| + | |Image:Image wanted|link9=Fire Gate| |
||
| + | *[[Fire Gate]] |
||
| + | |Image:Image wanted|link10=Vice Felichra| |
||
| + | *[[Vice Felichra]] |
||
| + | |Image:Image wanted|link11=Vice Vigest| |
||
| + | *[[Vice Vigest]] |
||
| + | |Image:Image wanted|link12=Vigest Guard| |
||
| + | *[[Vigest Guard]] |
||
| + | }} |
||
| + | ===Boss=== |
||
| + | {{Mob Gallery |
||
| + | |width=100 |
||
| + | |height=100 |
||
| + | |lines=2 |
||
| + | |align=left |
||
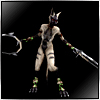
| + | |Image:dungeon106_03.gif|link1=Nesbite| |
||
| + | *[[Nesbite]] |
||
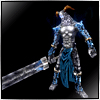
| + | |Image:dungeon106_06.gif|link2=Chakris| |
||
| + | *[[Chakris]] |
||
| + | |Image:dungeon106_11.gif|link3=Orca| |
||
| + | *[[Orca]] |
||
| + | }}<br clear=all> |
||
| + | ==Video Walkthrough== |
||
| ⚫ | |||
| + | {{#ev:youtube|jBSmMdBp5dg}} |
||
| + | [http://www.youtube.com/watch?v=jBSmMdBp5dg Forgotten Temple B1f Video Guide] |
||
| + | |||
| + | == Step by Step Walkthrough== |
||
| + | |||
| + | Click '''[Show]''' to expand the walkthrough below. |
||
| + | {| {{STDT|#1B1C16|class=expandable}} width=70% |
||
| + | |- |
||
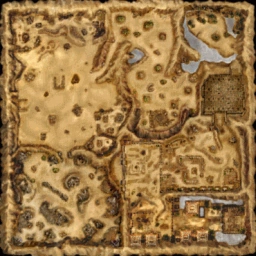
| + | !colspan=2| Map of the dungeon |
||
| + | |- |
||
| + | |colspan=2|[[Image:Forgottentempleb1fcd7.gif|70%]] |
||
| + | |- style="background: #AAB966; color:black;" |
||
| + | ! Image |
||
| + | ! Description |
||
| + | |- |
||
| ⚫ | |||
| + | |- |
||
| ⚫ | |||
| + | |- |
||
| ⚫ | |||
| + | |- |
||
| ⚫ | |||
| + | |- |
||
| ⚫ | |||
| + | |- |
||
| ⚫ | |[[Image: 0007.jpg|300px]]||In the next room, you have to kill the mini boss - Nesbite. At the same time in each corner of the room, there will be a Serpent that spawn. You will have about 5 seconds to kill the serpent, or it will activate the laser and most likely 1 hit you. The serpent spawn goes in clockwise manner. So you dont have to guess where he will spawn next. If you are solo-ing you can drag the boss around clockwise. If you are in a party you can drag him or have 1-2 people work clockwise to kill the serpent. After you kill the boss. Click on the altar in the middle of the room to open the way to the next hallway. Go forward and clear the hallway to get quest items. |
||
| + | |- |
||
| ⚫ | |||
| + | |- |
||
| + | |[[Image: 0009.jpg|300px]]||After you get ur mutant record work ur way backward. |
||
| + | |- |
||
| ⚫ | |||
| + | |- |
||
| ⚫ | |||
| + | |- |
||
| ⚫ | |[[Image: 0012.jpg|300px]]||After you can go into the next room. Make sure you have at least 2 SP bars (if not 3). This next boss requires u to kill him in certain amount of time or he will fully regenerate. He will also turn on a shield occasionally. Once he turns on his shield, get off the platform to the stairs. Kill all the mobs that respawn at the stairs and then attack the boss again. Just keep doing that back and forth, and he should die. Furthermore, once his shield is turned on, the faster you kill the guards, the more time you will have to hit the boss before the shield goes back up (shield respawns every 45 seconds) |
||
| + | |- |
||
| ⚫ | |||
| + | |- |
||
| ⚫ | |||
| + | |- |
||
| ⚫ | |[[Image: 0015.jpg|250px]]||This long hallway has fire cannons that will shoot at you while you run by. With a defense of 800-900, they will hit you for about 200-300. If you need to, you might want to turn on BM and/or aura to run by. Once you get to the end of the hallway, you will need to break a wall of fire down to go into the next room (while being shot at by the cannons) |
||
| + | |- |
||
| ⚫ | |||
| + | |- |
||
| ⚫ | |||
| + | |- |
||
| ⚫ | |[[Image: 0018.jpg|300px]]||Once you clear the Groga, you can enter the next hallway to the last boss’ room. Make you have enough SP (2 maybe 3) before going in. The last boss you have couple minutes to kill him. If you don’t kill him, he will disappear and a bunch of mobs will spawn. Once the boss respawn, the boss will get stronger. The boss will get stronger by each respawn. |
||
| + | |- |
||
| ⚫ | |[[Image: 0019.jpg|300px]]||After you kill the boss, there is an altar at the back of the room. When you click it the dungeon will be over and you will be teleported back out. Make sure you get ur chests (if u have picked up keys along the way). There are 3 possible keys (red, blue, green). Each key has a different serie of box to click before u can open the chest room. The location of the chest room is between the Mutant Record and Research |
||
| + | |} |
||
| + | |||
| + | {{Dungeon navbar}} |
||
| ⚫ | |||
Revision as of 09:18, 29 August 2020
| Forgotten Temple B1F | |||||
|---|---|---|---|---|---|
| |||||
| Details | |||||
| Entry Item: |  Muster Card: Forgotten Temple B1F | ||||
| Character Level: |
115 ~ 180 | ||||
| Duration: | 50 min. | ||||
| Reward for completion: |
None specified | ||||
| Penalty for failure: |
None specified | ||||
| Mob respawn time: | No respawn | ||||
| Number of Participants: | None specified | ||||
| Daily Reward: | None specified | ||||
Introduction
Also known as "FT1" this dungeon is difficult for players <120. It is a relatively short dungeon and a party of 2-5 people is recommended depending on how strong the party members are. You can begin to solo this dungeon ~level 160 depending on your strength.
Crafting
NPCs within this dungeon allow you to craft Forcium grade weapons and armor. See Forcium crafting for more details.
Drops
Some of the better items that can drop in this dungeon include:
- +7 Epaulets
- +6 Epaulets
- Crafted Redosmium grade weapons and armor
- Slot Extender (High)
- Slot Extender (Medium)
- Astral Bike (Blue), Astral Bike (RW3)
For a summary of drops see: Dungeon Drops
A comprehensive drop table from EST is found at: Forgotten Temple (B2F) Drop Table
kontol kontolan
NPCs
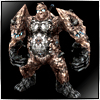
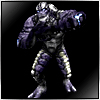
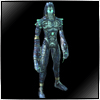
Monsters
|
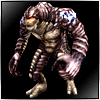


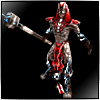
Boss
|
Video Walkthrough
Forgotten Temple B1f Video Guide
Step by Step Walkthrough
Click [Show] to expand the walkthrough below.
| Map of the dungeon | |
|---|---|
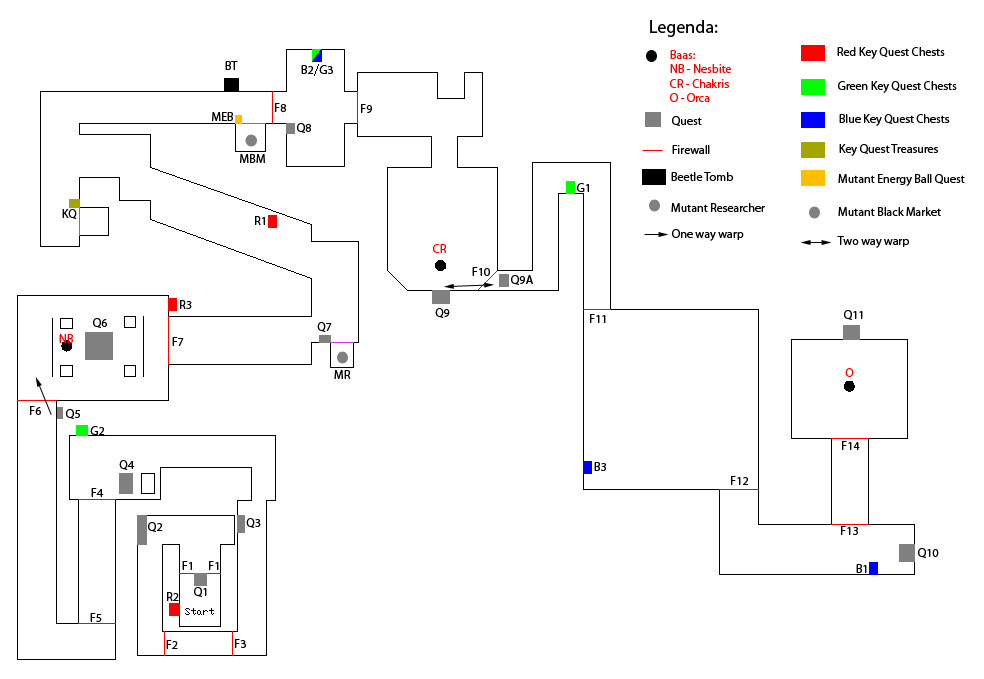
| |
| Image | Description |
 |
Press on the hour glass to turn off the fire wall. As you step up the stairs on the left there is a figure you can click on [sorry no picture for this one] |
 |
Keep going forward, you will meet a wall of fire that is blocking a bridge. Just wait until it goes down and pass by. Then keep moving forward until you cannot go forward anymore. Click on the monument on the left |
 |
Keep moving forward. Press on this next monument |
 |
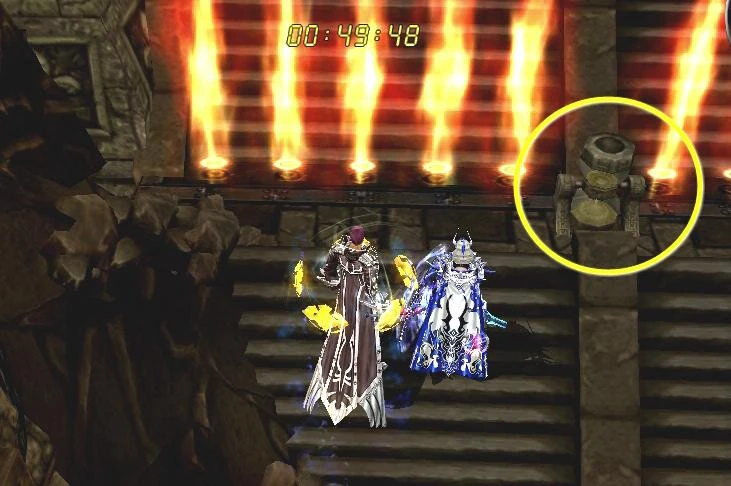
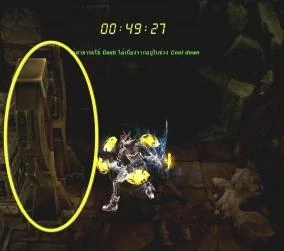
This next part. If you have less than 1000 defense u should turn on BM+aura. You will need to break down the wall of fire while being shot at by monuments on the sides |
 |
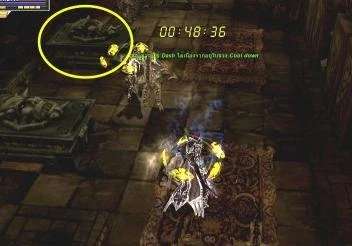
After you destroy the wall of fire. Keep moving forward and kill the oblivion to continue with the quest. These mobs have high def and can melee/range; however, their atk rate arent that great |
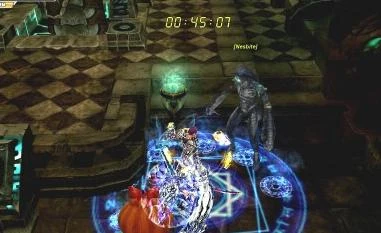 |
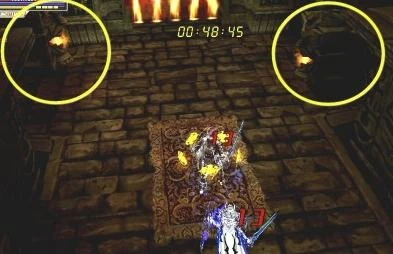
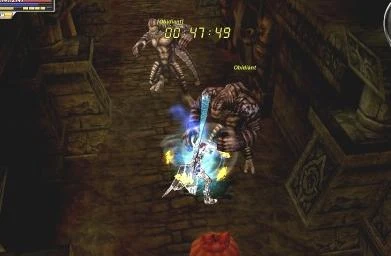
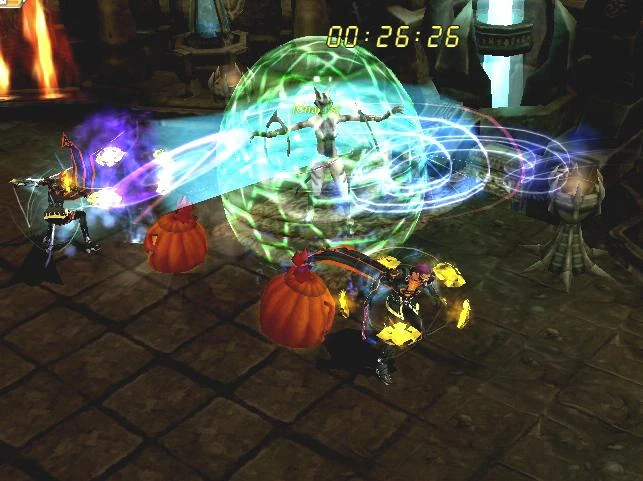
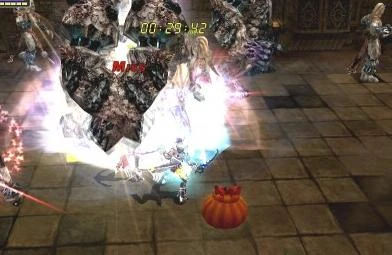
In the next room, you have to kill the mini boss - Nesbite. At the same time in each corner of the room, there will be a Serpent that spawn. You will have about 5 seconds to kill the serpent, or it will activate the laser and most likely 1 hit you. The serpent spawn goes in clockwise manner. So you dont have to guess where he will spawn next. If you are solo-ing you can drag the boss around clockwise. If you are in a party you can drag him or have 1-2 people work clockwise to kill the serpent. After you kill the boss. Click on the altar in the middle of the room to open the way to the next hallway. Go forward and clear the hallway to get quest items. |
 |
Once you get to the end of the hallway look on the left side there is a beetle box. Break it to get the Mutant Record. Note: each member in the party needs one. |
 |
After you get ur mutant record work ur way backward. |
 |
Talk to the monument to open a door. Talk to the researcher behind the door. Pay him 1 mil and get the Epaulet +300 Hps and +500 def. |
 |
Once you get ur epaulet. Go back and into the room to kill all the mobs that will spawn. Occasionally click on the wall of fires to try to break them. Break them when you can. |
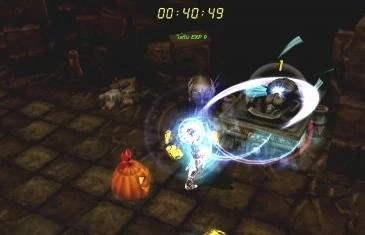
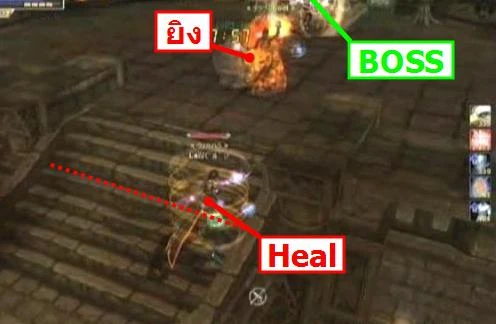
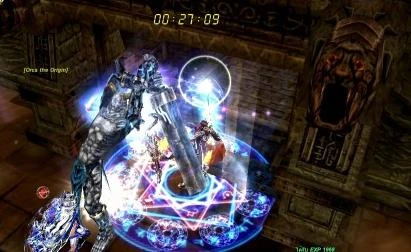
| File:0012.jpg | After you can go into the next room. Make sure you have at least 2 SP bars (if not 3). This next boss requires u to kill him in certain amount of time or he will fully regenerate. He will also turn on a shield occasionally. Once he turns on his shield, get off the platform to the stairs. Kill all the mobs that respawn at the stairs and then attack the boss again. Just keep doing that back and forth, and he should die. Furthermore, once his shield is turned on, the faster you kill the guards, the more time you will have to hit the boss before the shield goes back up (shield respawns every 45 seconds) |
 |
Here’s possible position for people to stand while fighting the boss |
 |
After you kill the boss, take off the Purify Epaulet and use ur A.C. Transmutter to break it to get a quest item. Talk to the stone behind where the boss stood to teleport you to the next room. |
 |
This long hallway has fire cannons that will shoot at you while you run by. With a defense of 800-900, they will hit you for about 200-300. If you need to, you might want to turn on BM and/or aura to run by. Once you get to the end of the hallway, you will need to break a wall of fire down to go into the next room (while being shot at by the cannons) |
 |
Once you get into the next room. Find a corner to get all of your party gather there. All those stone monuments mobs will spawn in different batch and just clear the room |
 |
After the room is clear go into the next hallway and kill all the Groga |
 |
Once you clear the Groga, you can enter the next hallway to the last boss’ room. Make you have enough SP (2 maybe 3) before going in. The last boss you have couple minutes to kill him. If you don’t kill him, he will disappear and a bunch of mobs will spawn. Once the boss respawn, the boss will get stronger. The boss will get stronger by each respawn. |
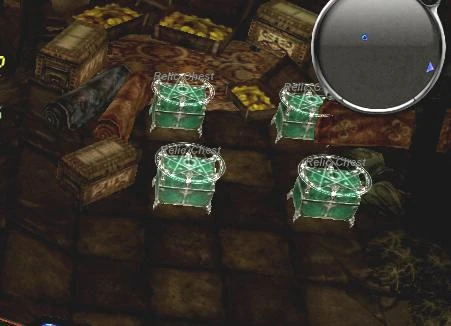 |
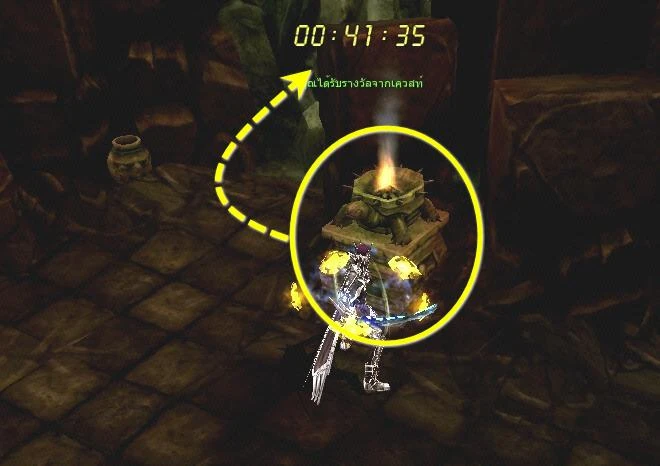
After you kill the boss, there is an altar at the back of the room. When you click it the dungeon will be over and you will be teleported back out. Make sure you get ur chests (if u have picked up keys along the way). There are 3 possible keys (red, blue, green). Each key has a different serie of box to click before u can open the chest room. The location of the chest room is between the Mutant Record and Research |
| Mission Dungeon | Lake in Dusk (W) • Ruina Station (W) • Tower of the Dead (B1F) (W) • Volcanic Citadel • Tower of the Dead (B2F) • Forgotten Temple (B1F) • Forgotten Temple (B2F) (A) • Forbidden Island (A) • Illusion Castle Underworld • Illusion Castle Radiant Hall • Holy WindMill • Altar of Siena (B1F) • Altar of Siena (B2F) • Maquinas Outpost • Holy Keldrasil • Tower of the Undead (B3F) • Flame Dimension • Abandoned City • Legend Arena • Devil's Tower • Glacies Inferna • Edge of Phantom • Forgotten Temple B3F • Acheron Arena • Devi's Tower (Part2) • Pandemonium • Flame Nest • Ancient Tomb • Frozen Canyon • Mirage Island (A) • Labyrinth |
| DX Dungeon | Panic Cave (A) • Steamer Crazy • Catacomb Frost • Lava Hellfire • Hazardous Valley |
| Chaos Arena | Chaos Arena Lv. 1 • Chaos Arena Lv. 2 • Chaos Arena Lv. 3 • Chaos Arena Lv. 4 • Chaos Arena Lv. 5 • Chaos Arena Lv. 6 • Chaos Arena Lv. 7 • Eternal Chaos Arena |
| Related links | Dungeon Entry Items |