| Altar of Siena (B2F) | |||||
|---|---|---|---|---|---|
| |||||
| Details | |||||
| Entry Item: |  Siena's Crest B2F | ||||
| Character Level: |
135 ~ 180 Battlestyle Lv 11 | ||||
| Duration: | 80 minutes | ||||
| Reward for completion: |
20,000 Honor 7 Dungeon Points | ||||
| Penalty for failure: |
None specified | ||||
| Mob respawn time: | |||||
| Number of Participants: | None specified | ||||
| Daily Reward: | None specified | ||||
Introduction[ | ]
Also known as "AOS2" this dungeon is difficult for players <150 however the drops can make it worth running. It is a rather long dungeon and a party of 3-5 people is recommended depending on how strong the party members are.
Drops[ | ]
Some of the better items that can drop in this dungeon include:
- +7, +8 Epaulets
- Perfect crafted Forcium weapons and armor
- +6 Bracelets & Earrings
- Slot Extender (High)
For a summary of drops see: Altar of Siena (B2F) Drops
A comprehensive drop table from EST is found at: Altar of Siena (B2F) Drop Table
Monsters[ | ]
Bosses[ | ]
|


Video Walkthrough[ | ]
Step by Step Walkthrough[ | ]
Click [Collapse] to hide the walkthrough below.
| Image | Description |
|---|---|
 |
After you entered the dungeon turn around and talk to the Statue to get rid of the wall which is
blocking your way. |
 |
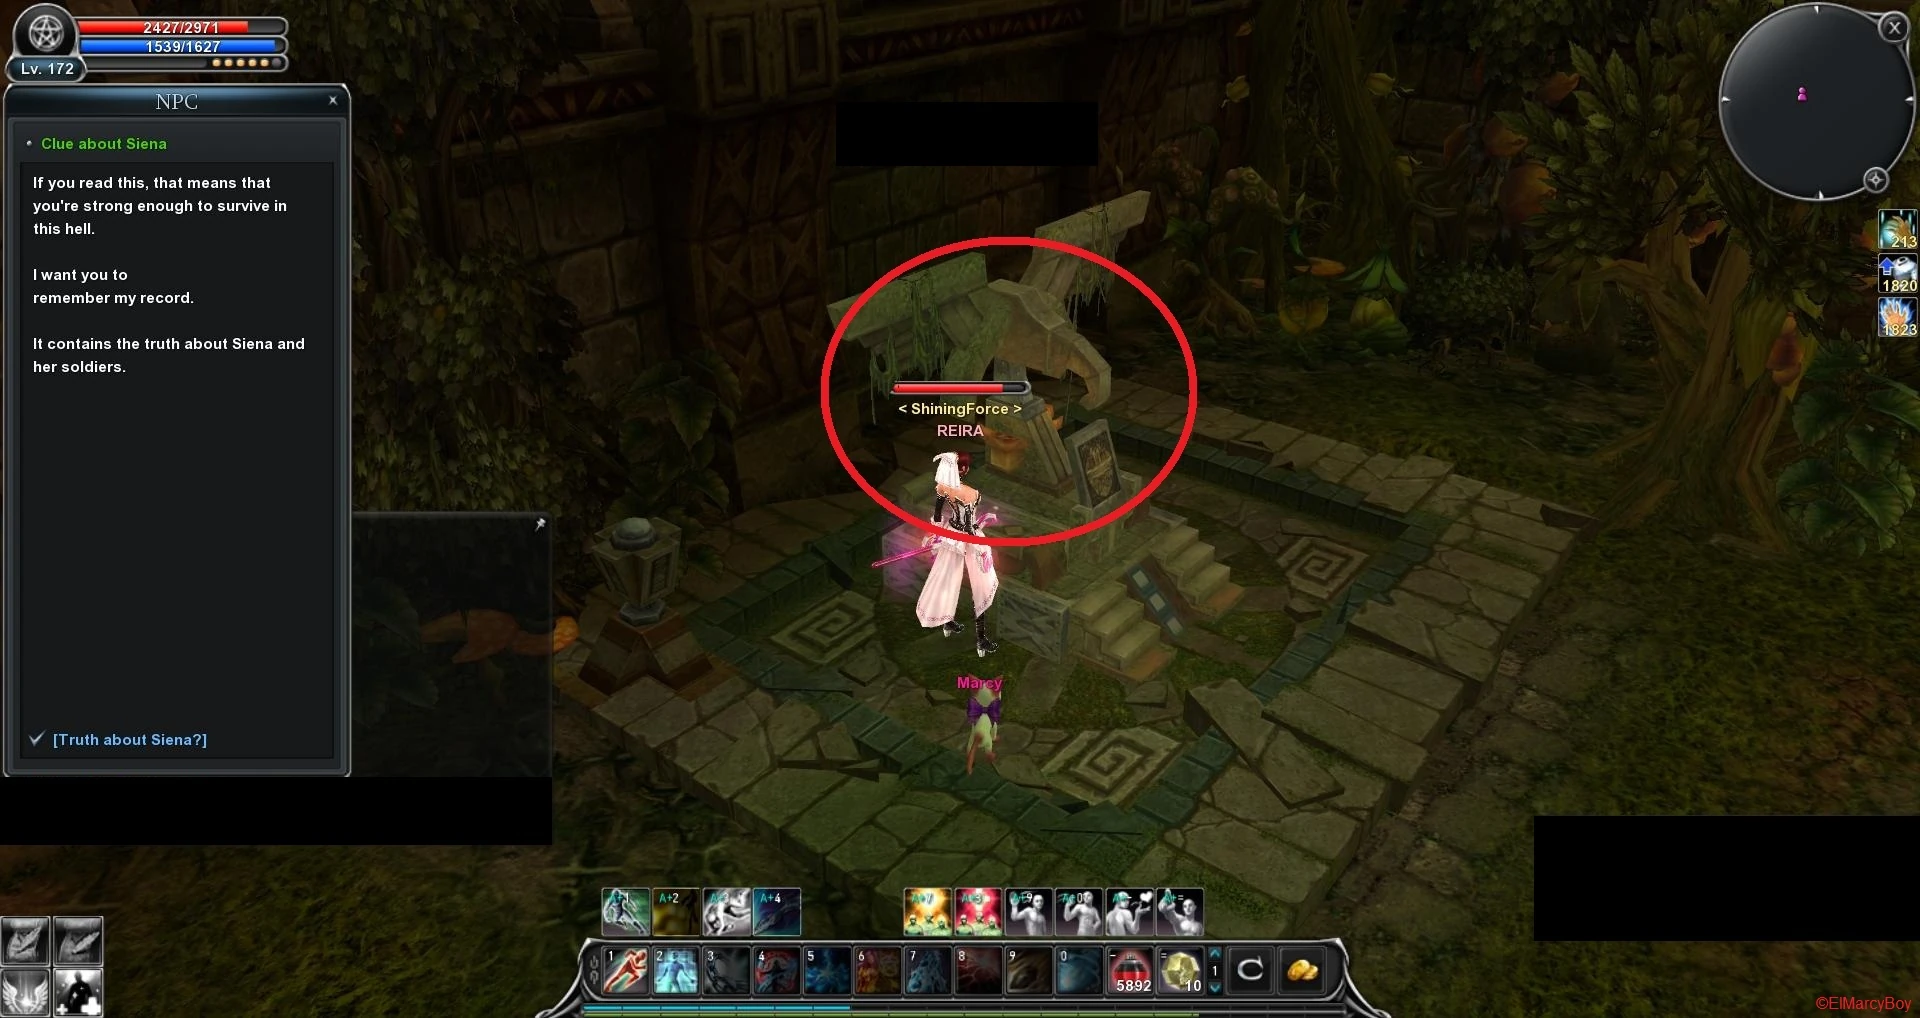
Defeat the Mushids in the next room and you’ll be able to use the warp.
Note: Those mobs are easy to kill and you can do one of the Best Plate Of Honour quests by killing them. |
 |
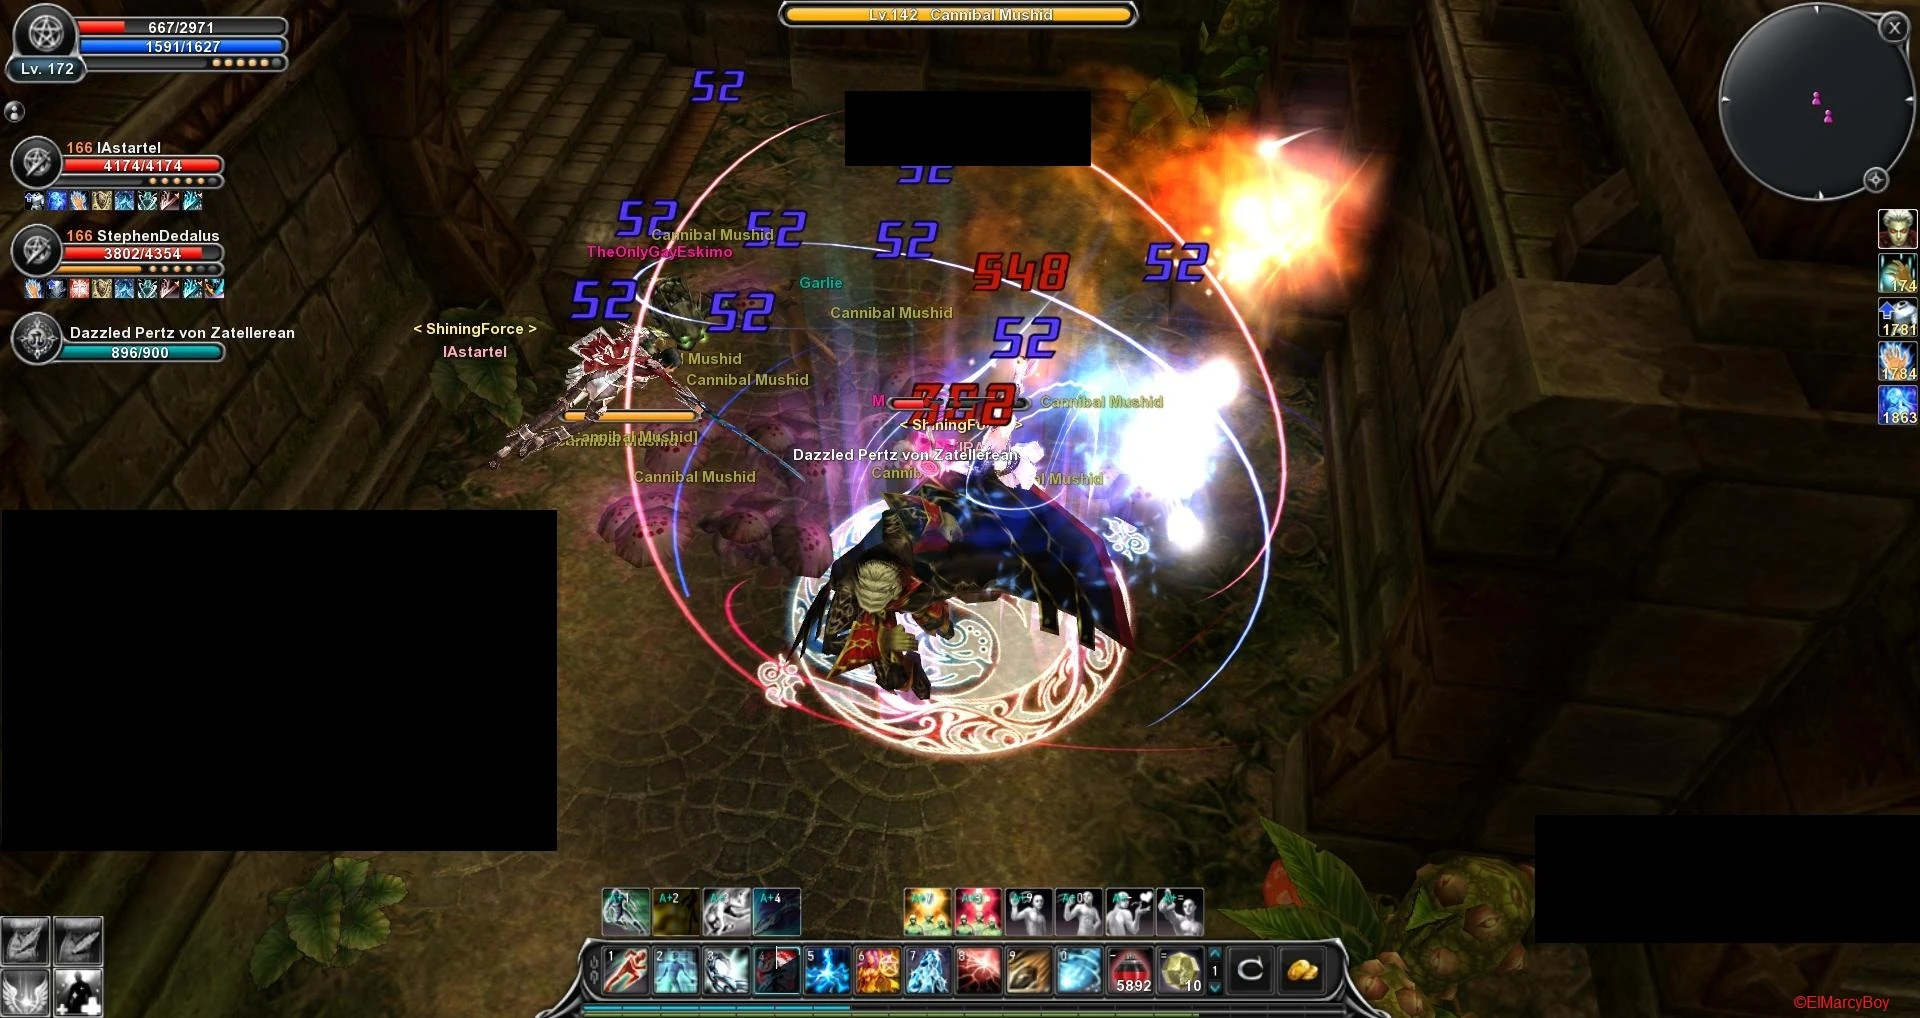
This part is a bit tricky but as WI/Fa is pretty easy in bm2. You have to kill both Marps at mostly
the same time otherwise you won’t be able to use the next warp gate. If you are another class just damage both until they have mostly no HP left and kill the first one and after the second one as fast as you can. |
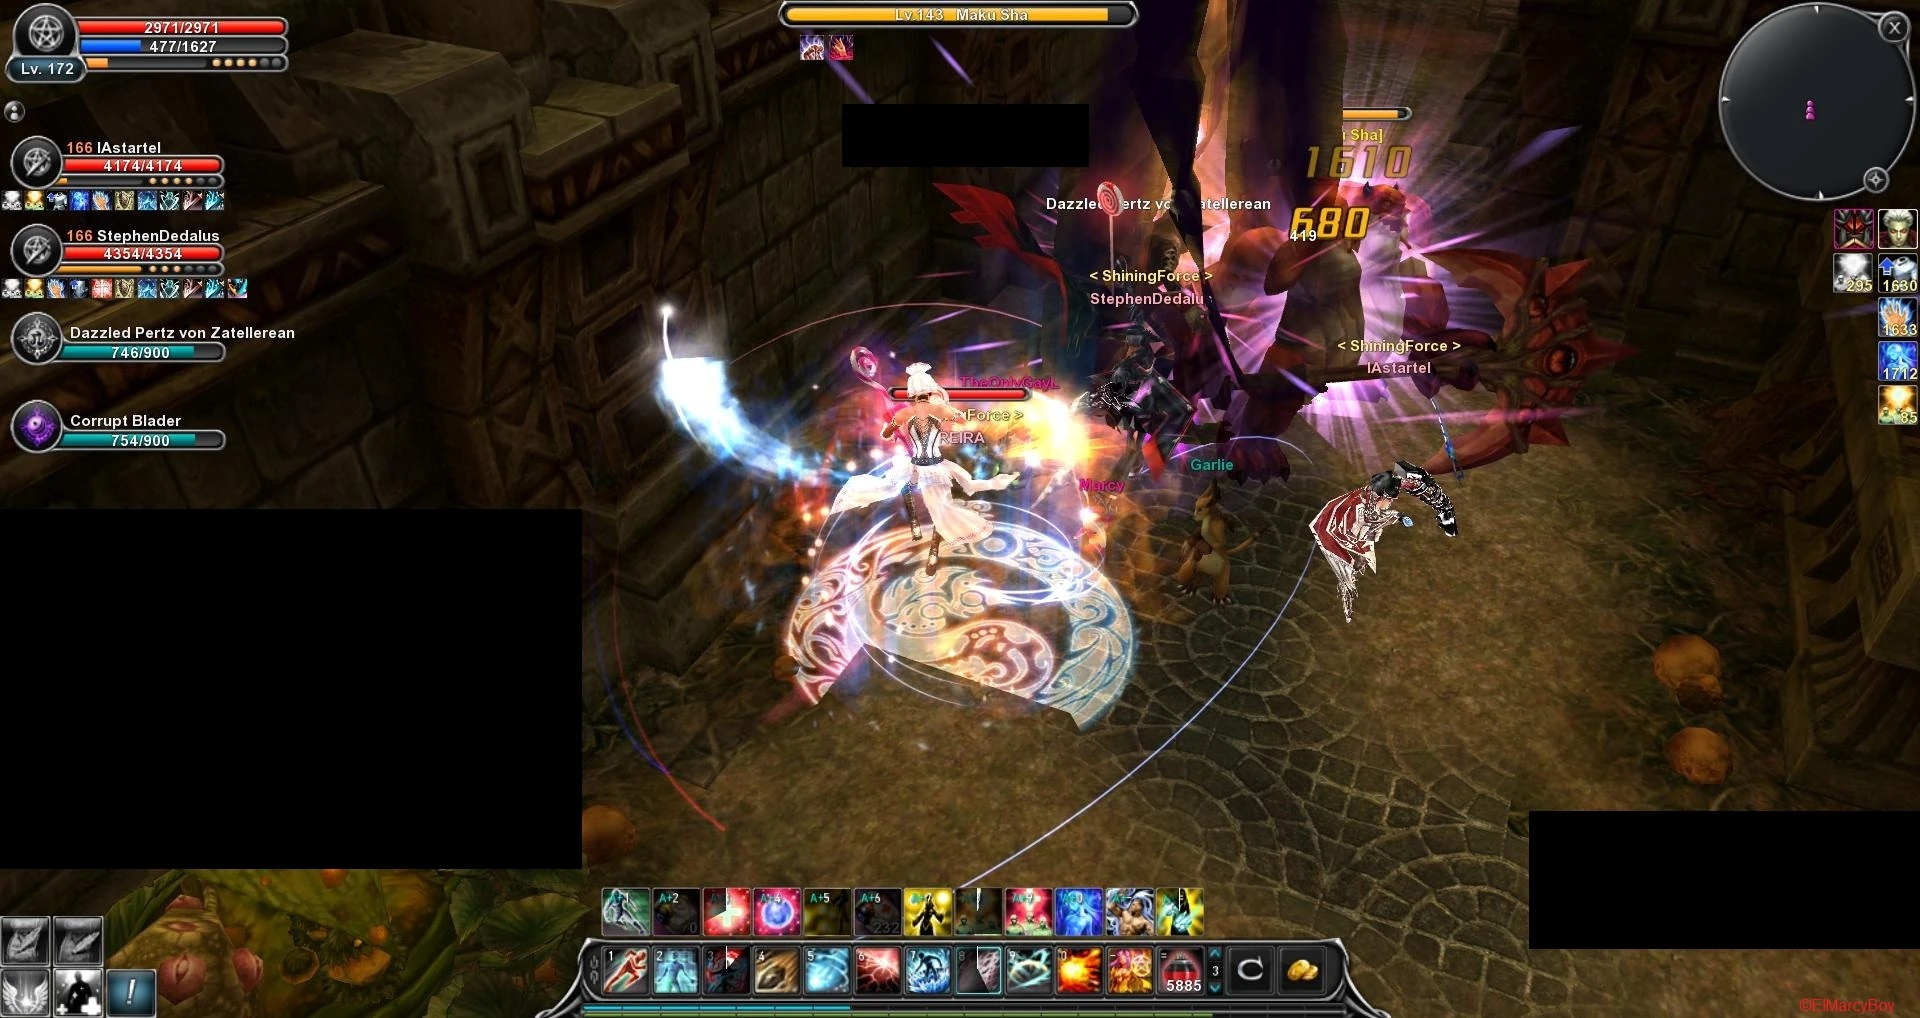 |
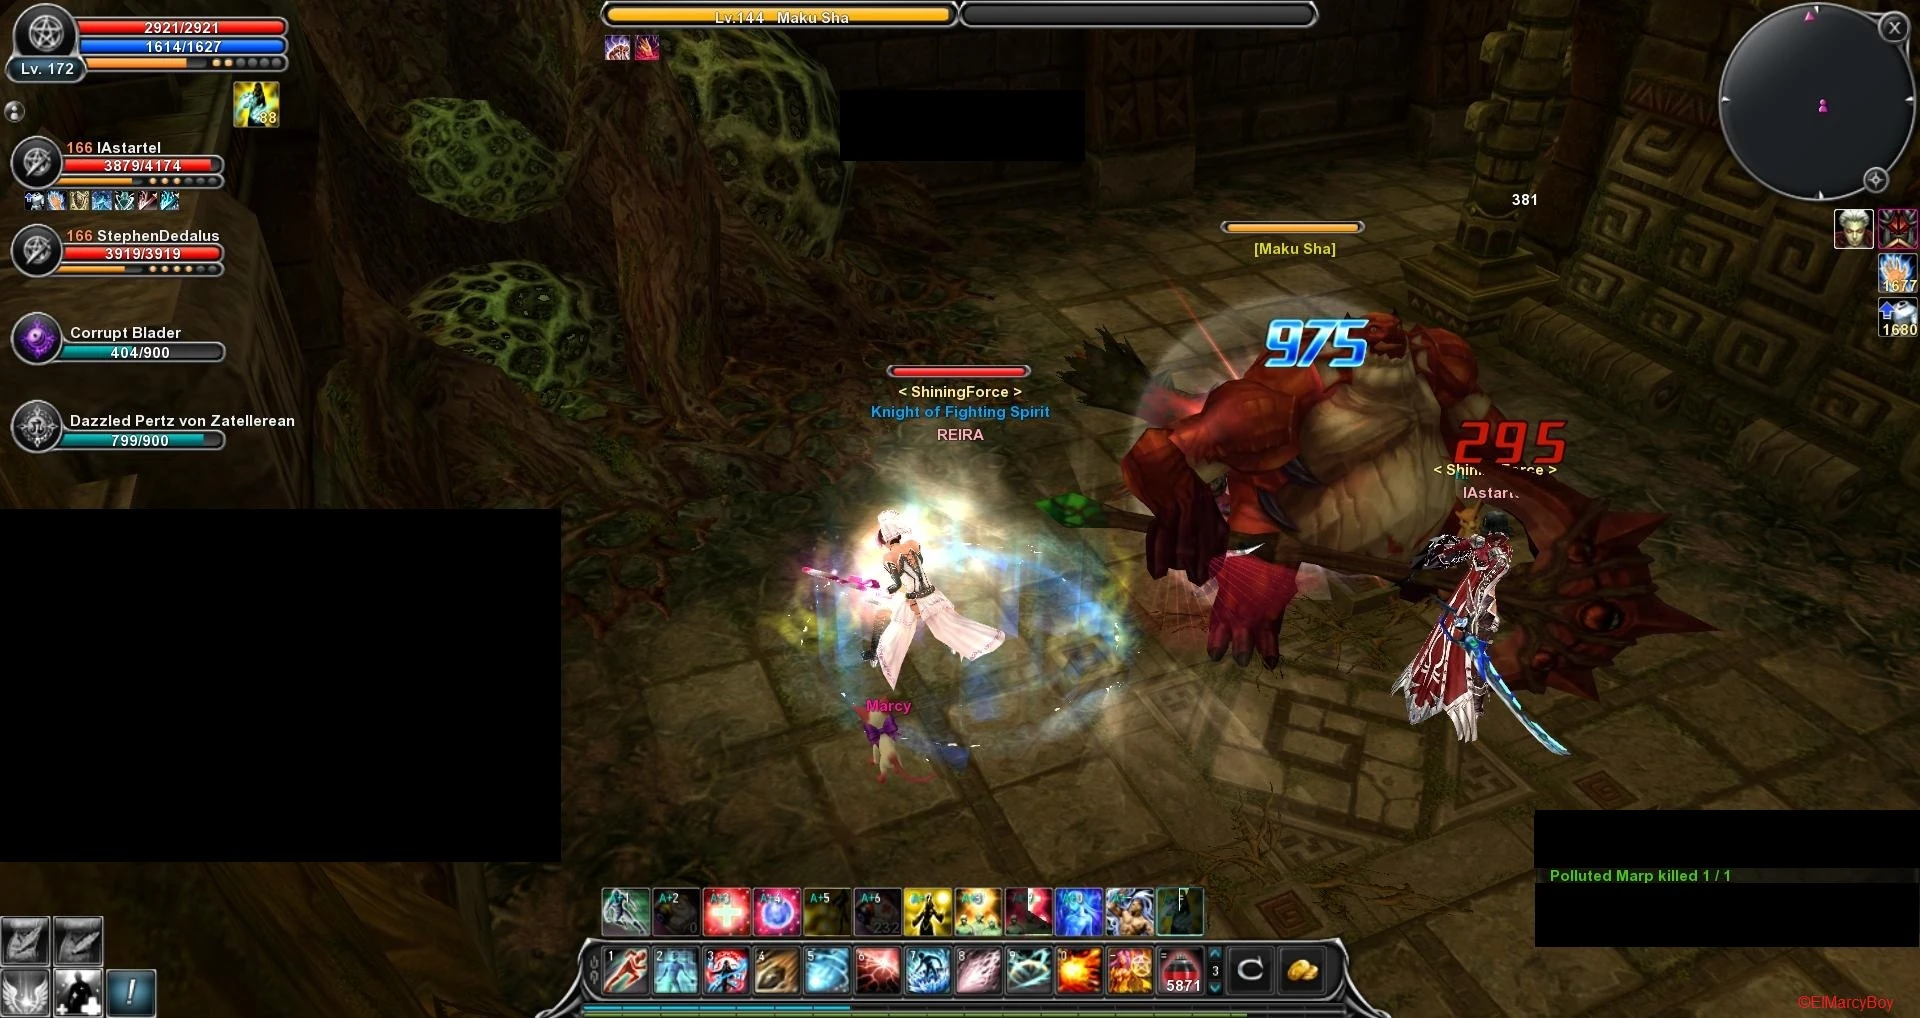
Destroy the wall which is in your way and Maku Sha will spawn, you can easily combo him. |
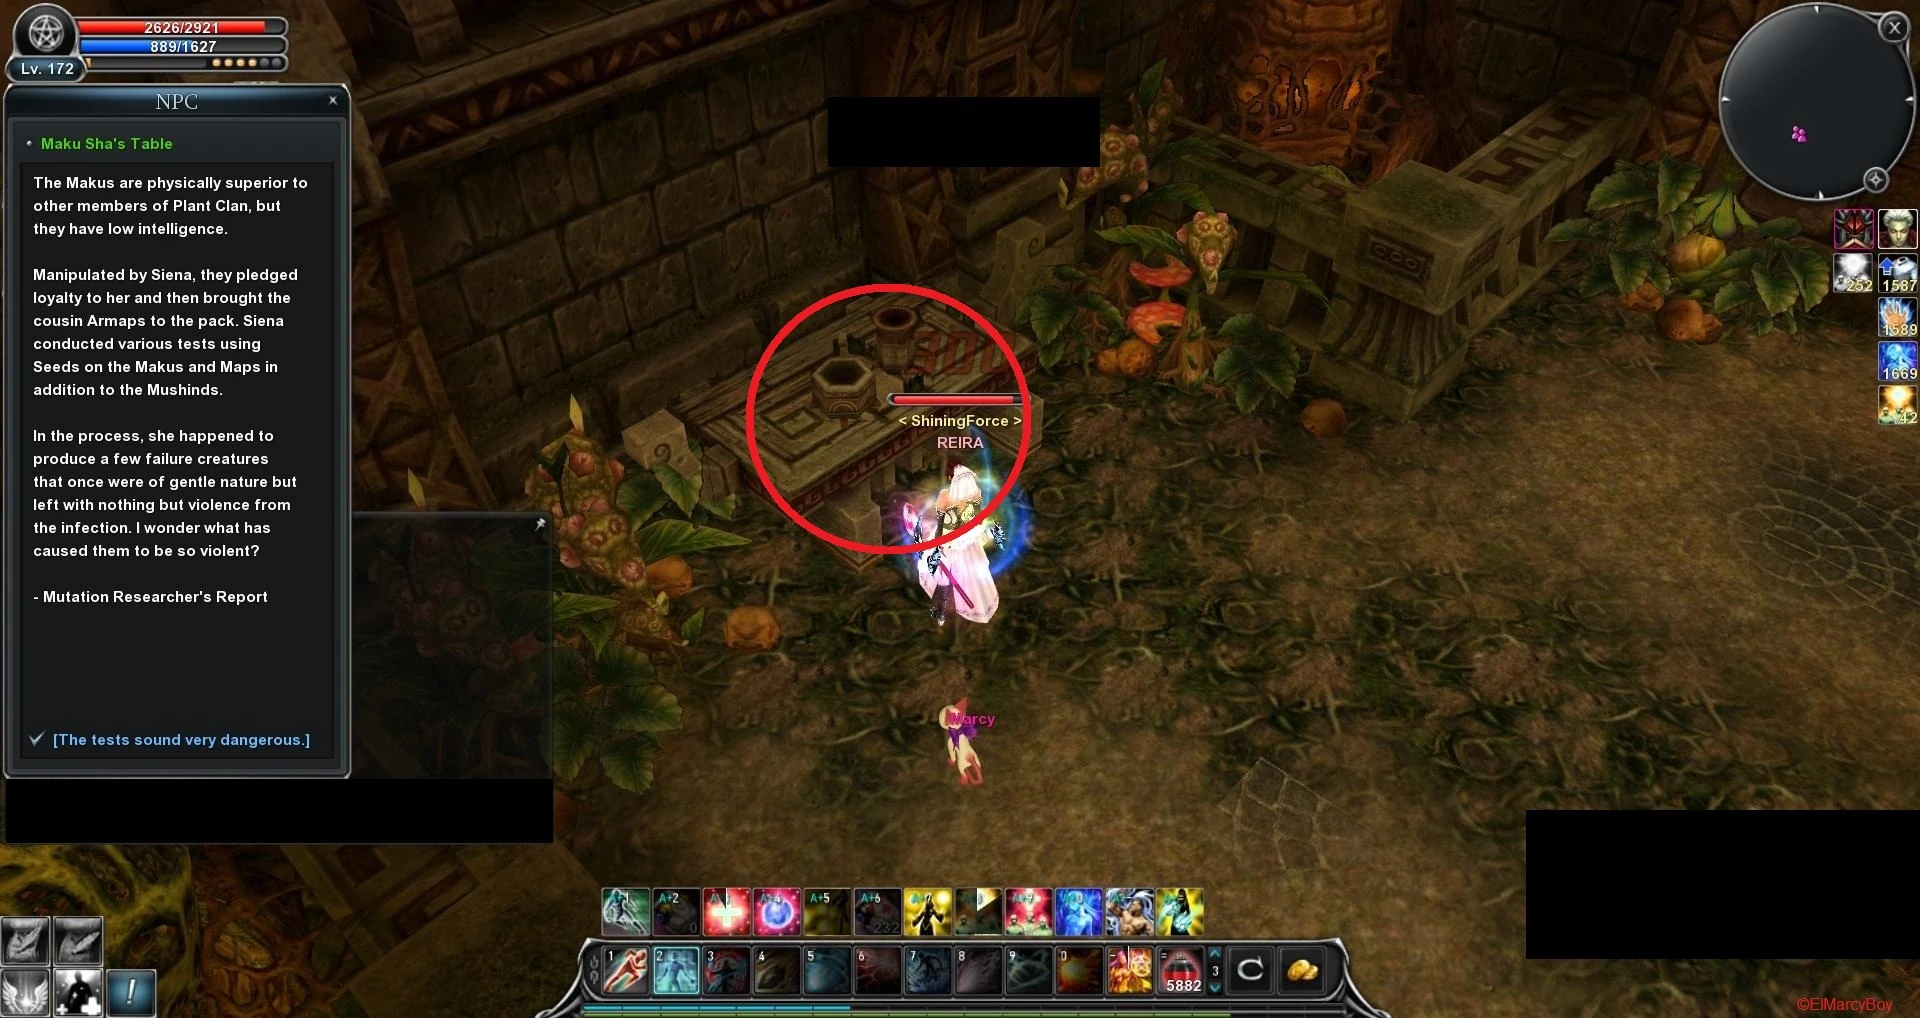 |
Talk to the table and your way will be clear. Destroy the fire gate which will block your way. |
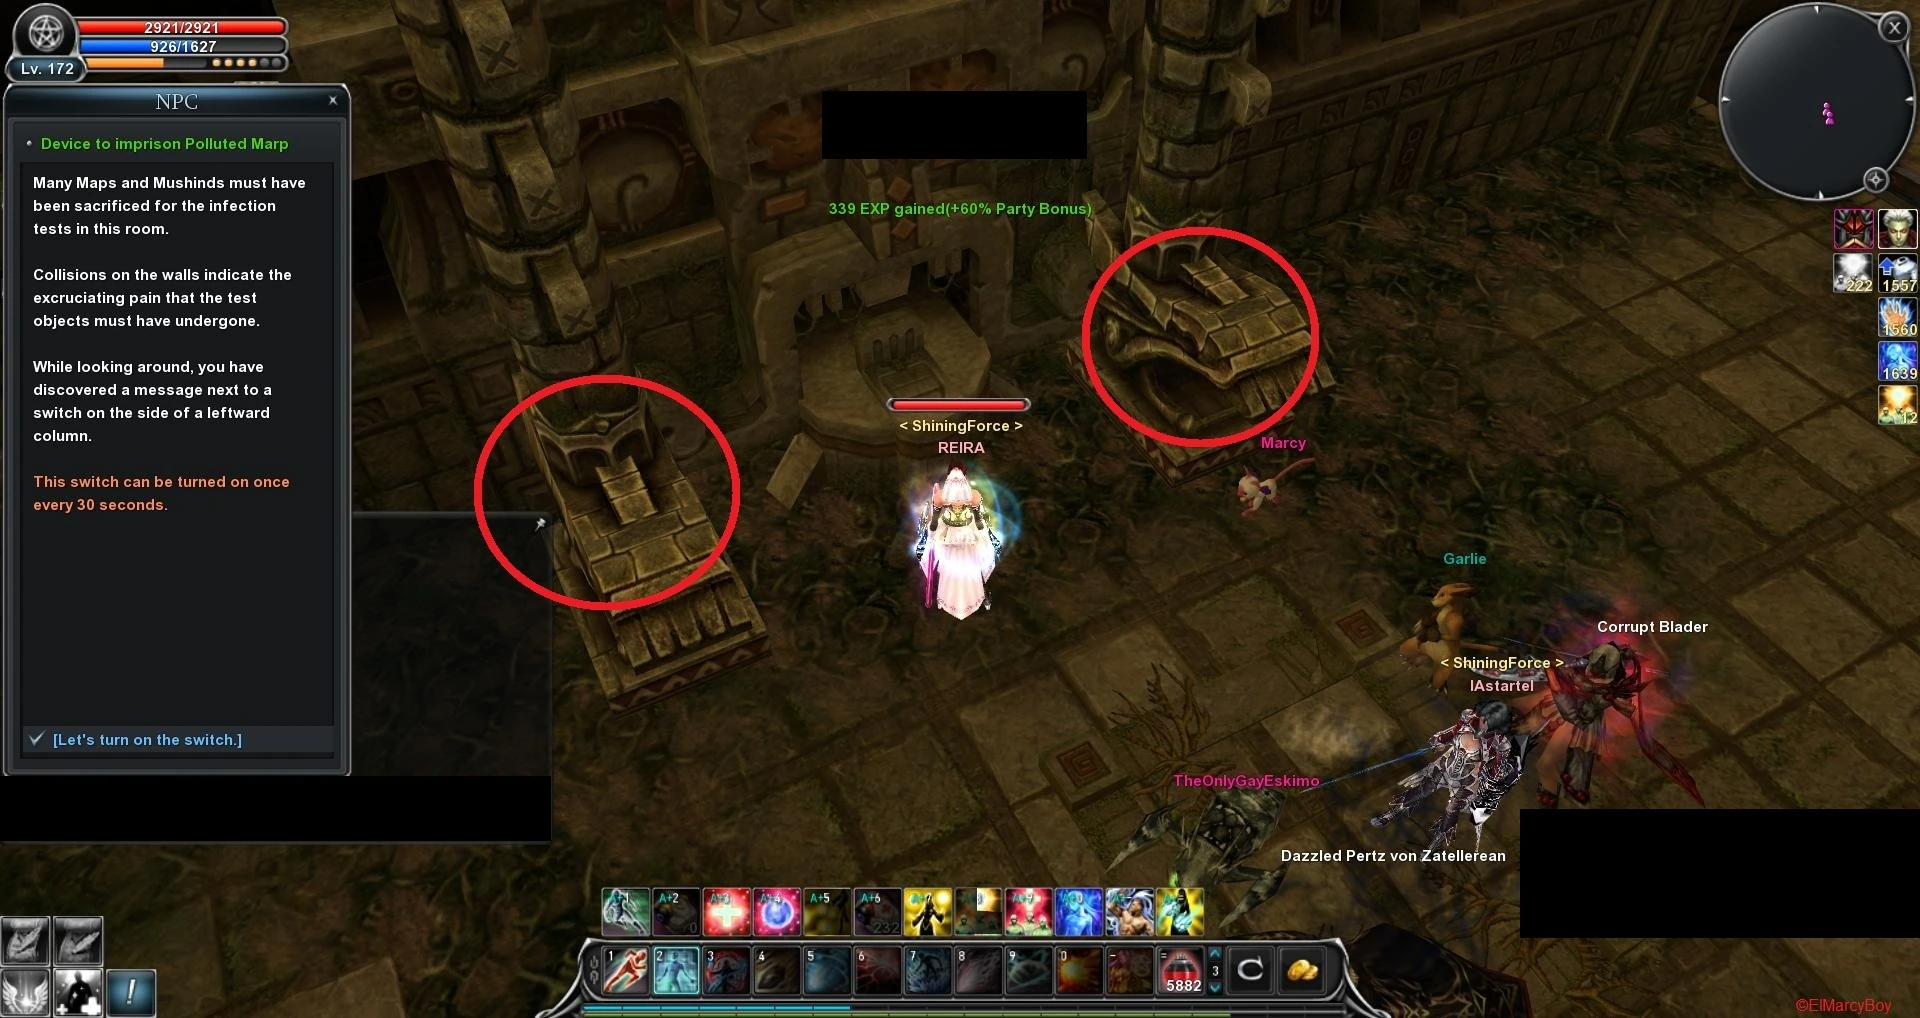 |
Now you have to collect 10 quest items (5/5) from 2 different mob kinds. You can spawn them by
clicking on the 2 Columns. When you are done click on the table which is between them. |
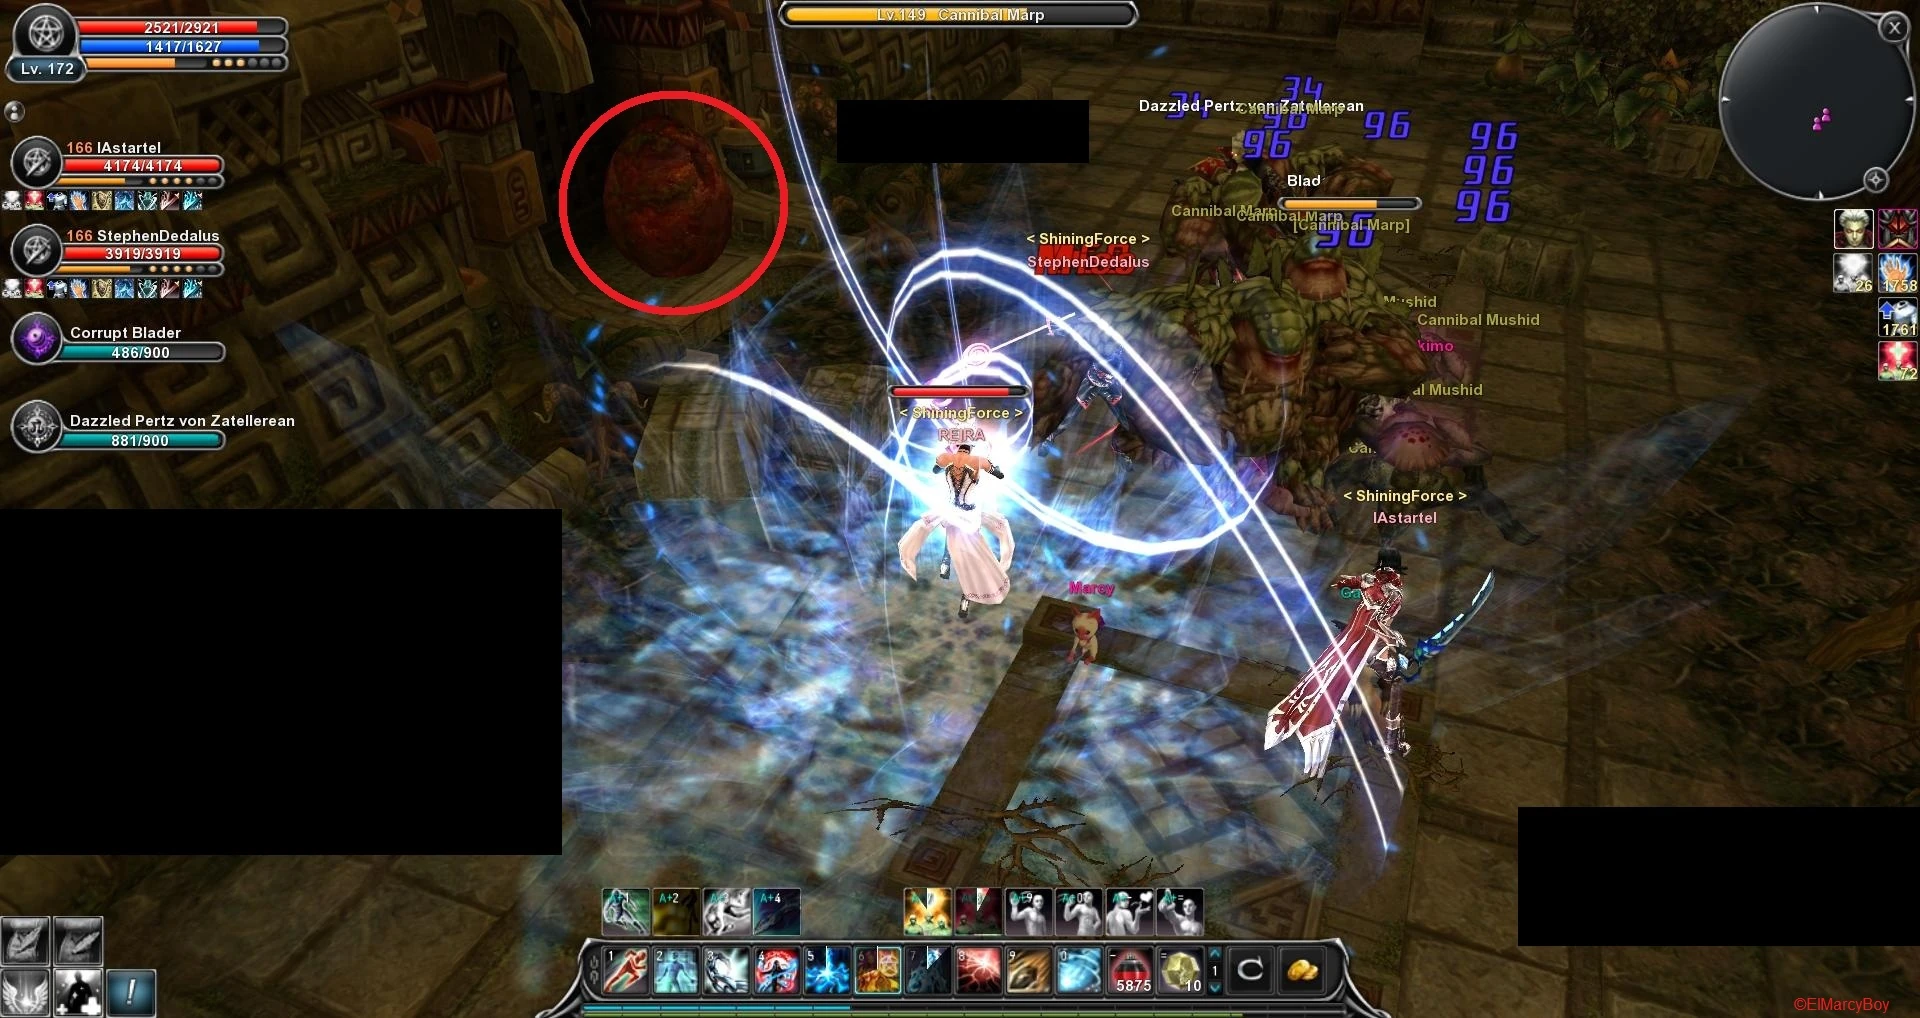 |
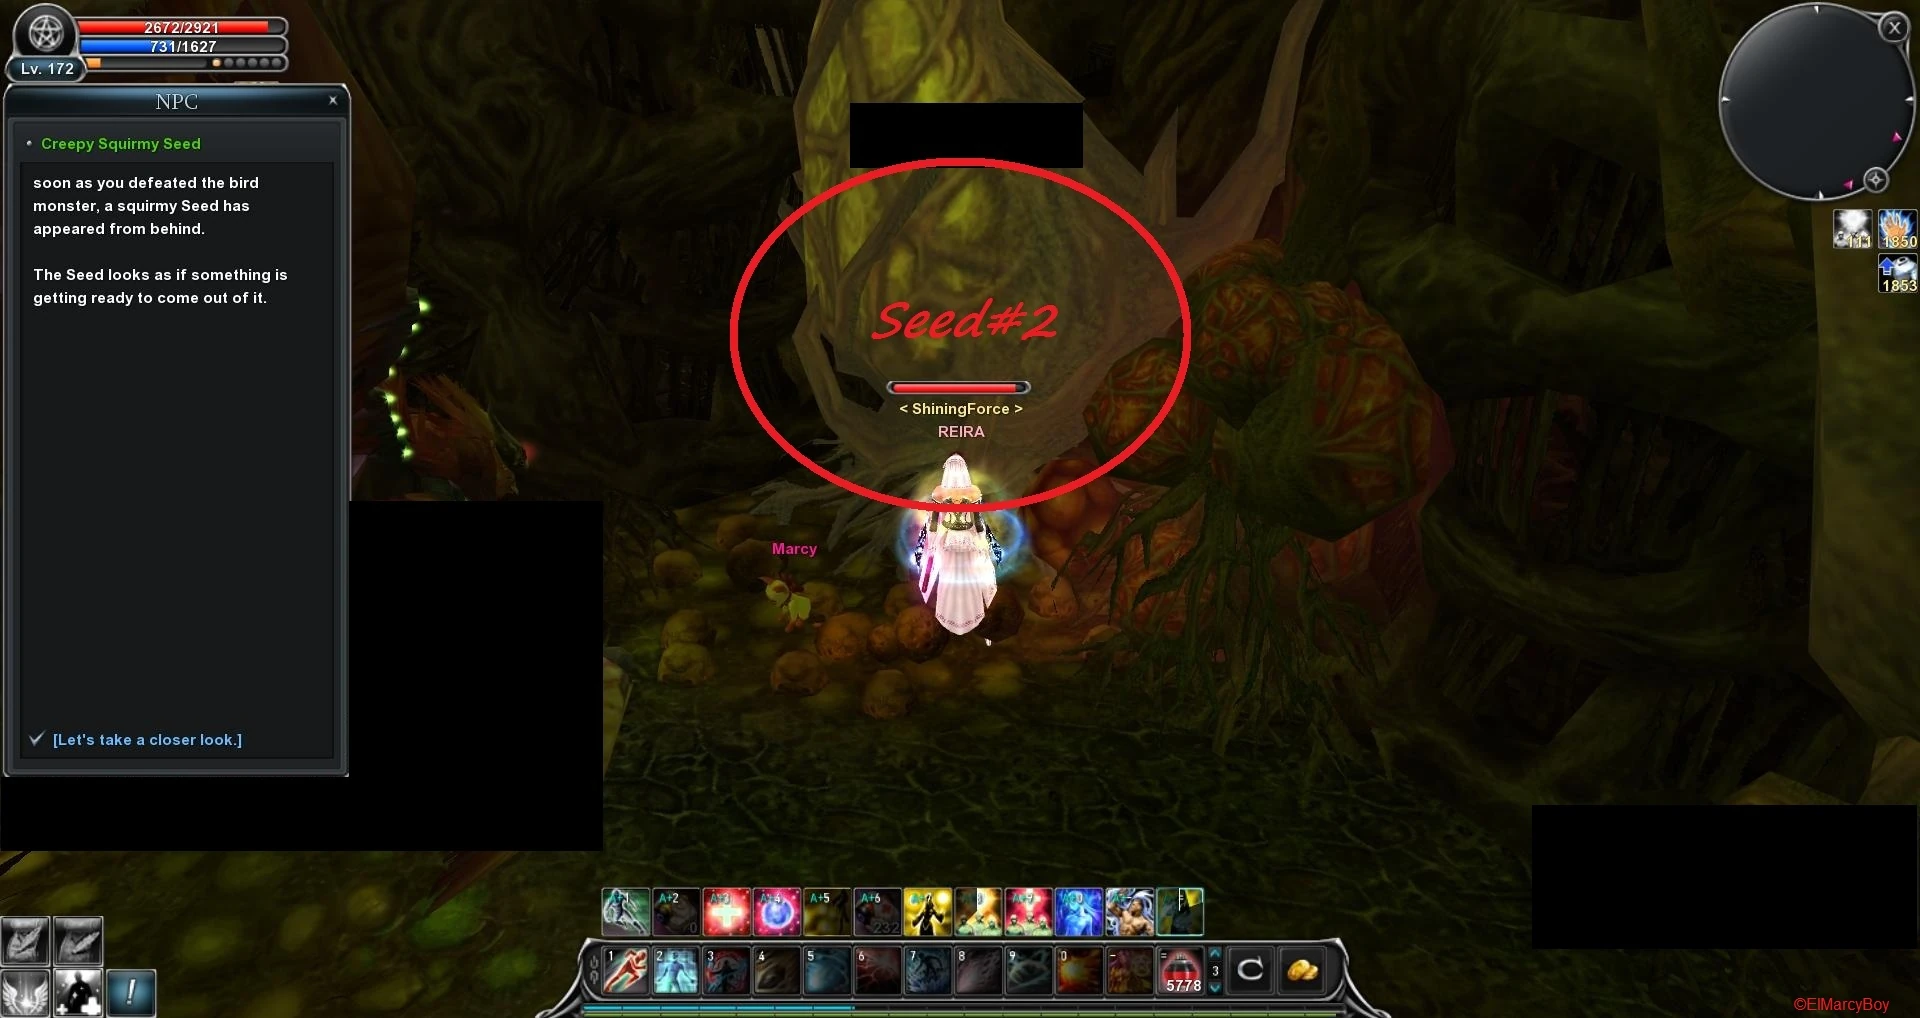
Go on and you will find a Seed on the right side, click on it and more mobs will spawn. |
 |
You just have to kill the Polluted Marp/Mushid and Maku Sha will spawn again. After you killed him
click on the Seed again to receive 500 honour points and continue. |
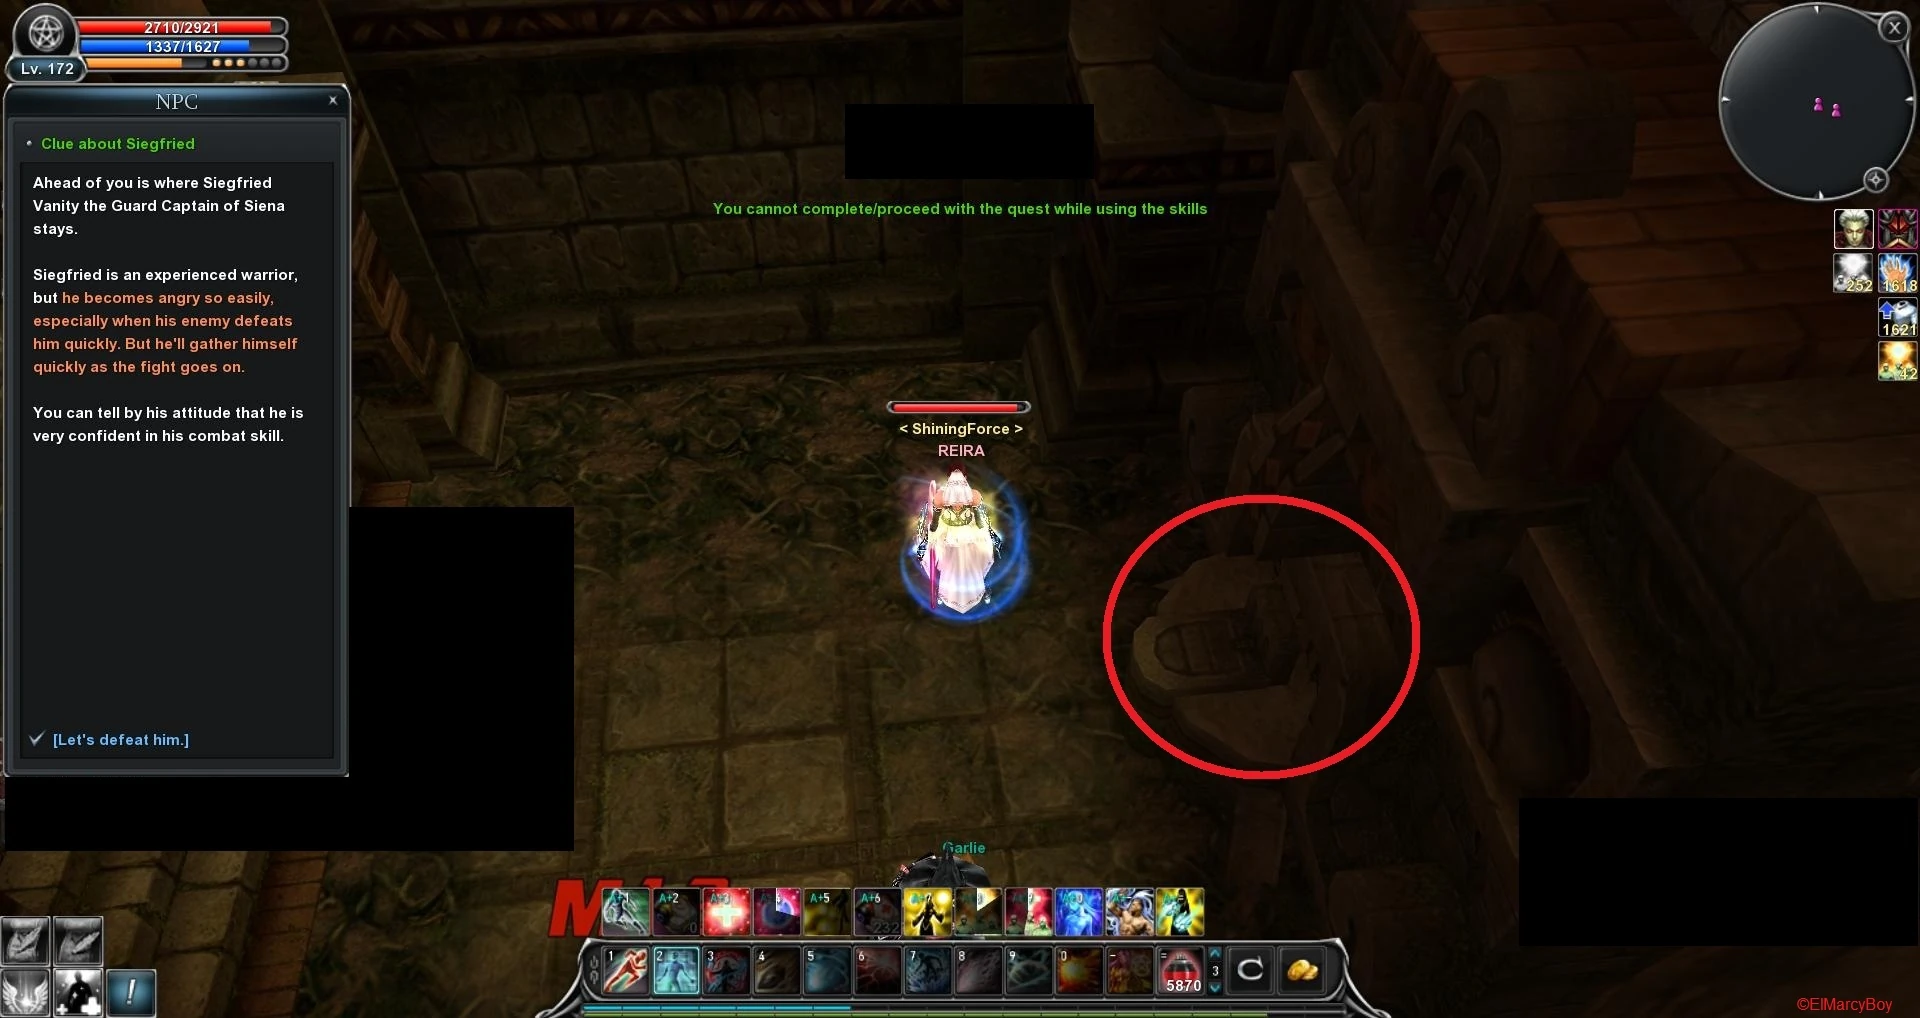 |
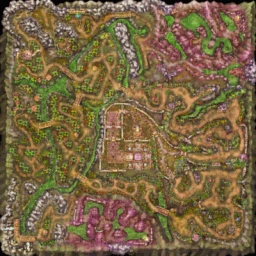
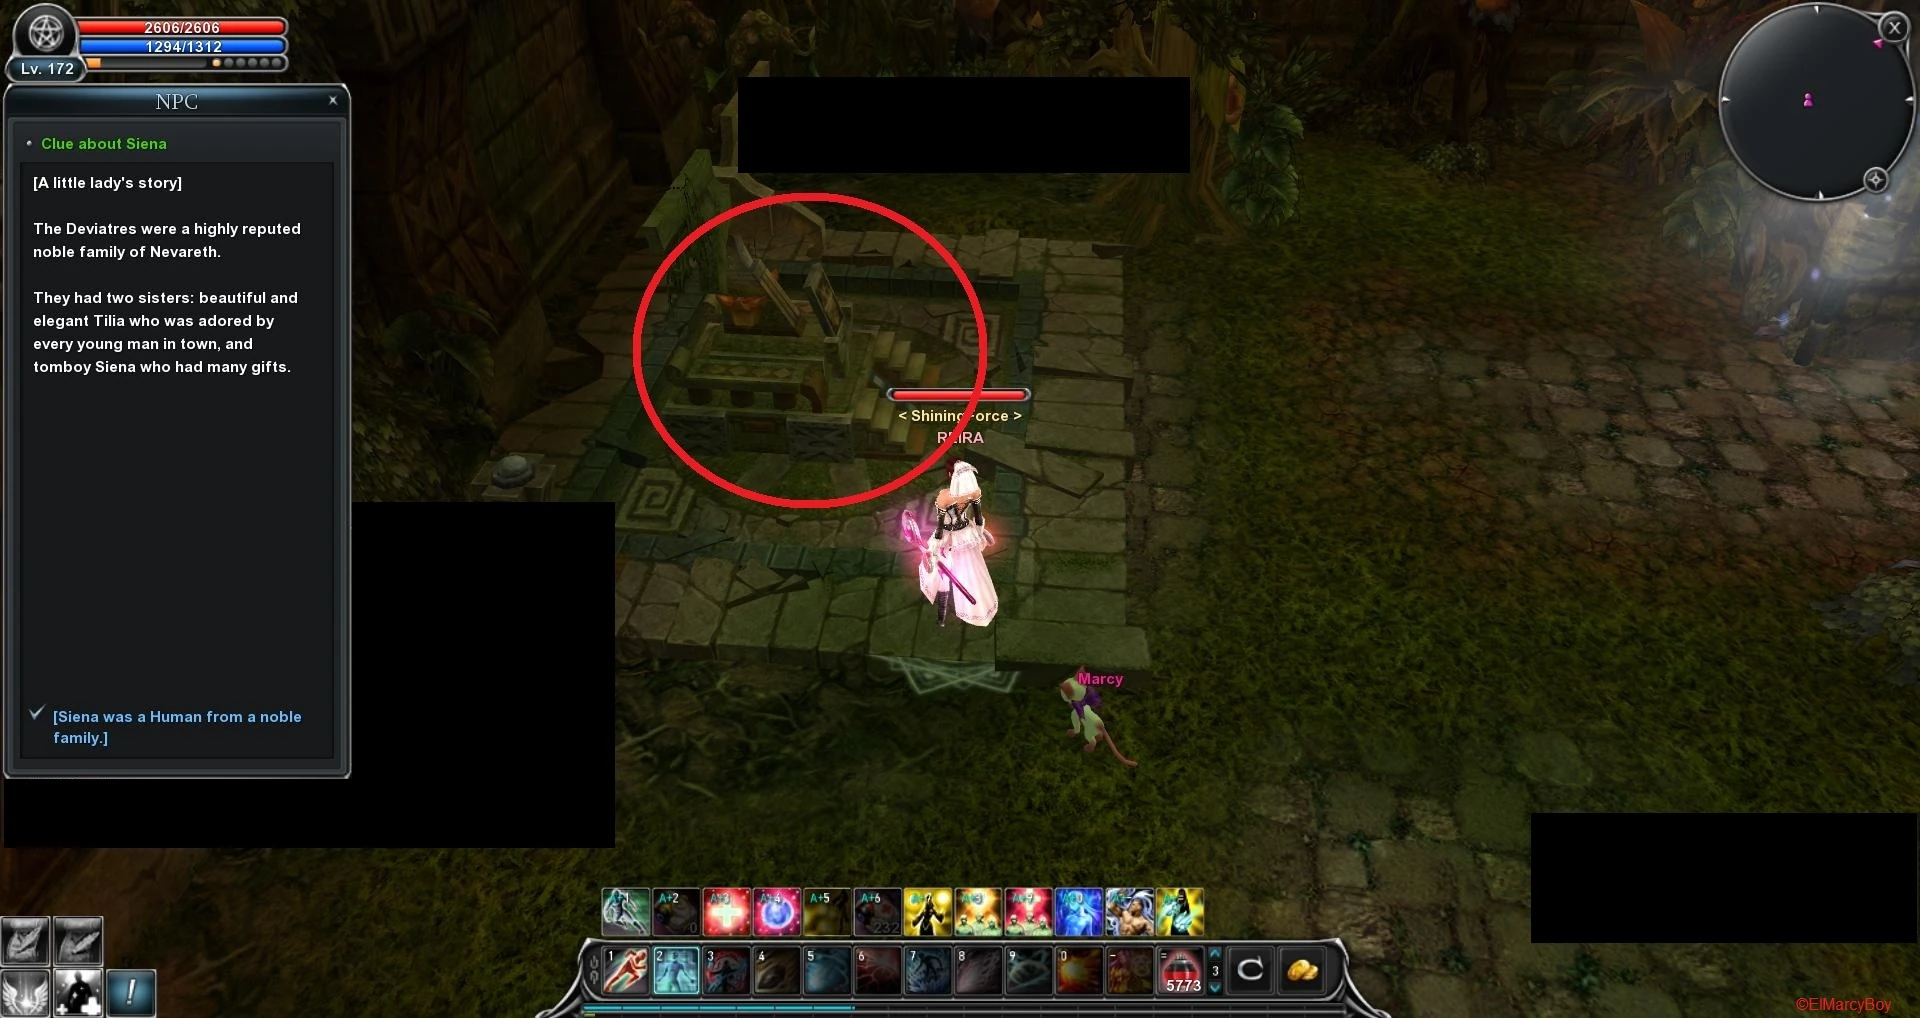
After you passed the warp gate you will find yourself in the fire tunnel dash fast through it and go as close to the wall which is opposite of the fire tunnel to not receive damage. When your party is ready turn on bm2 and click on the “Clue about Siegfried”. |
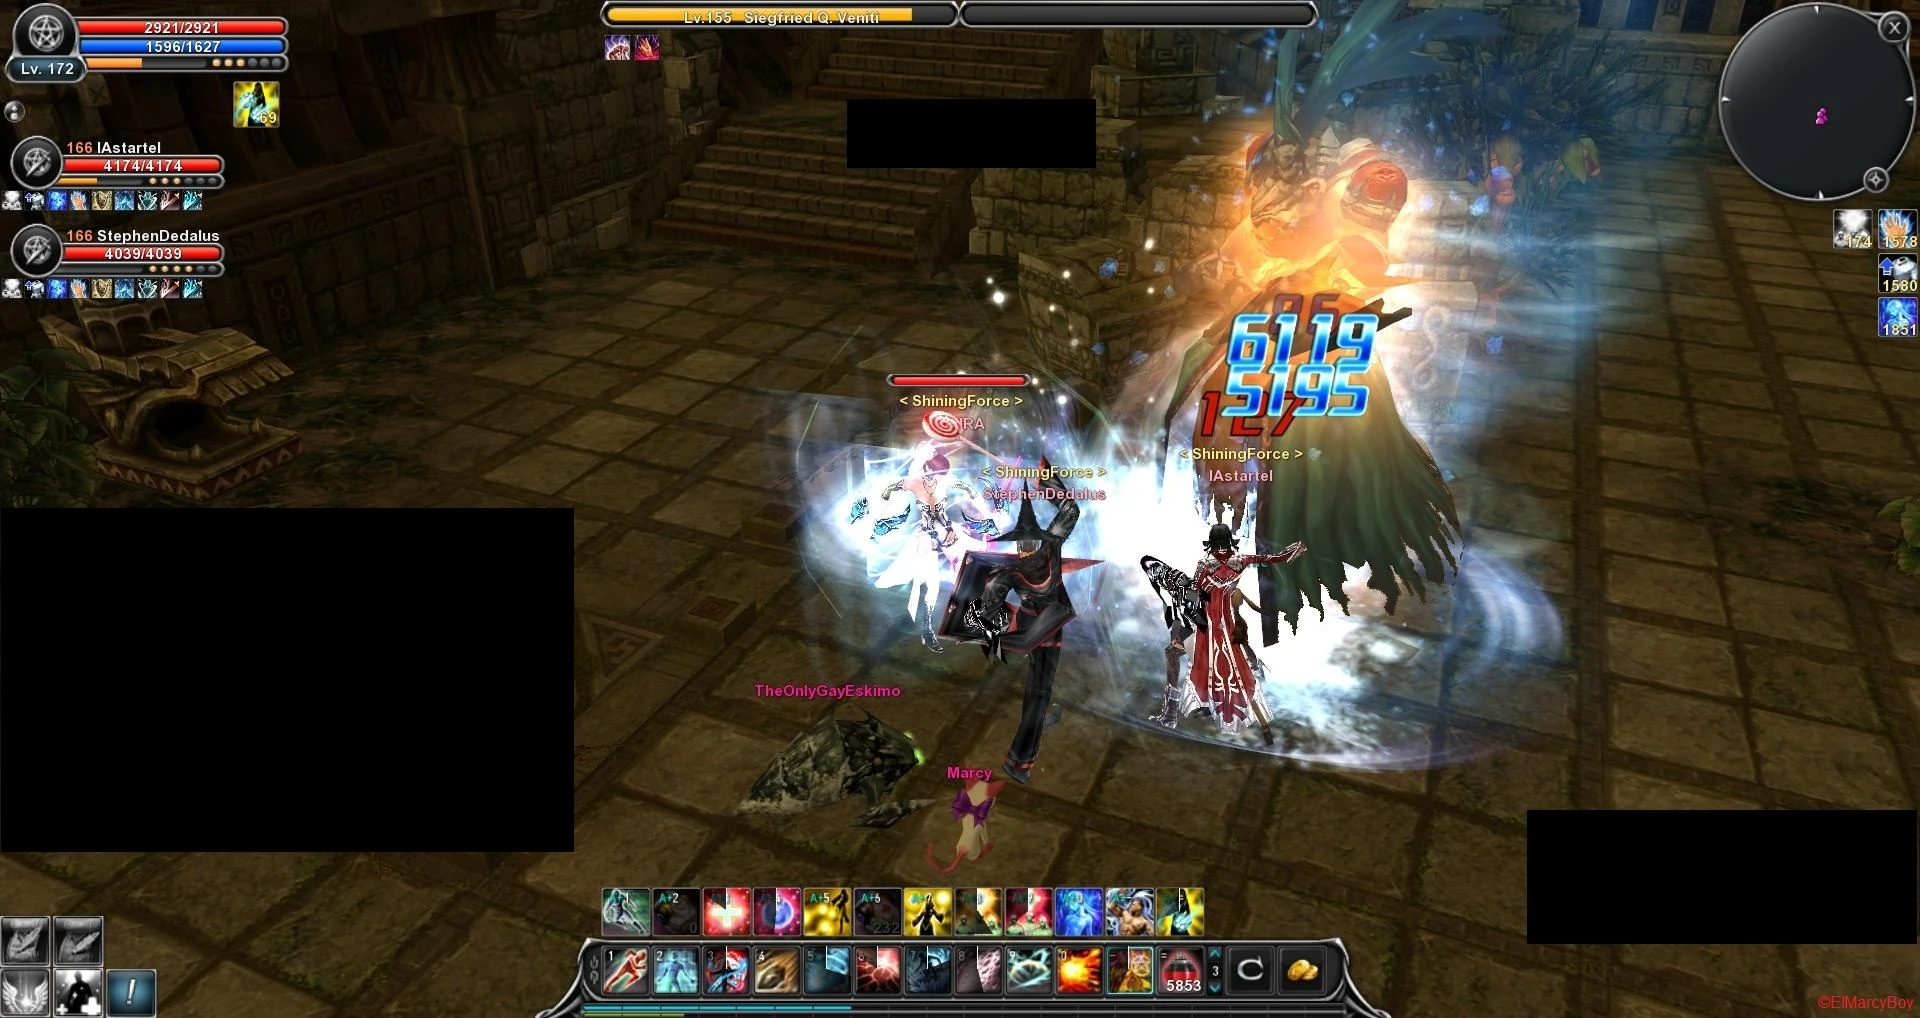
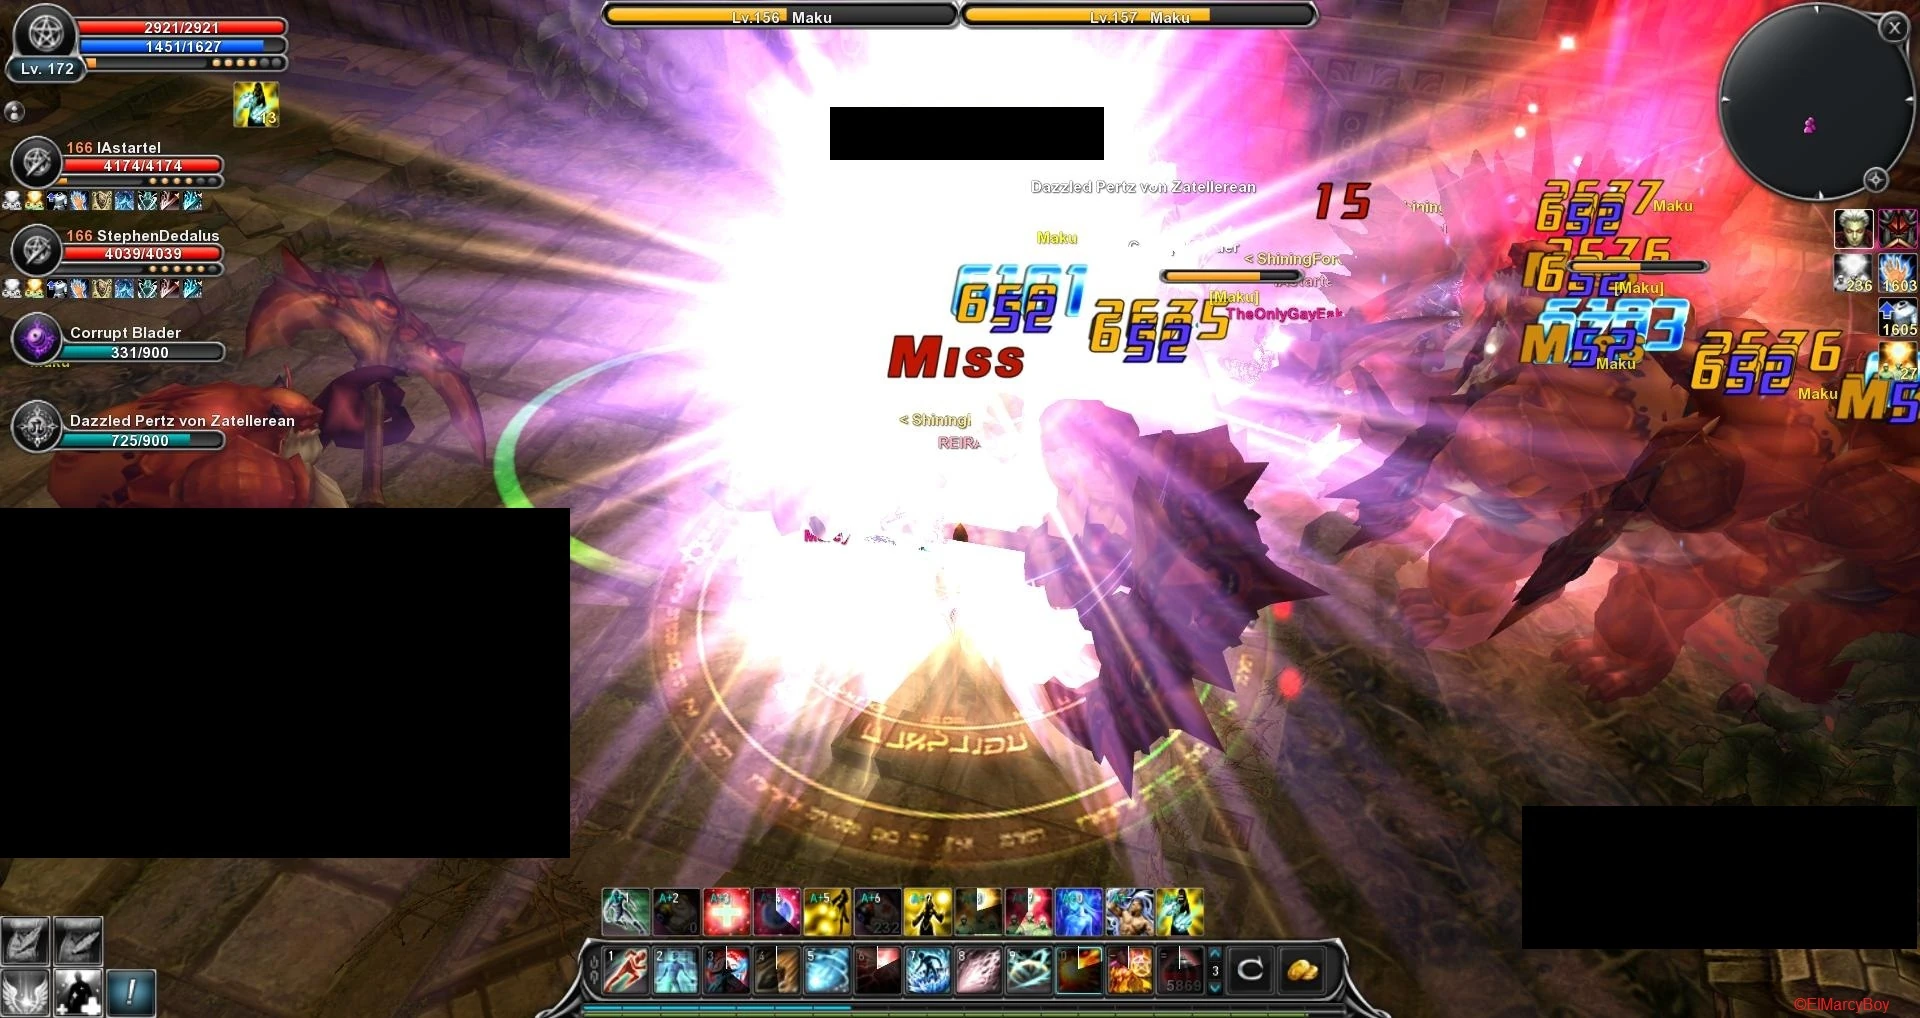 |
Kill all the Makus, after you killed a certain Maku Siegfried will spawn. |
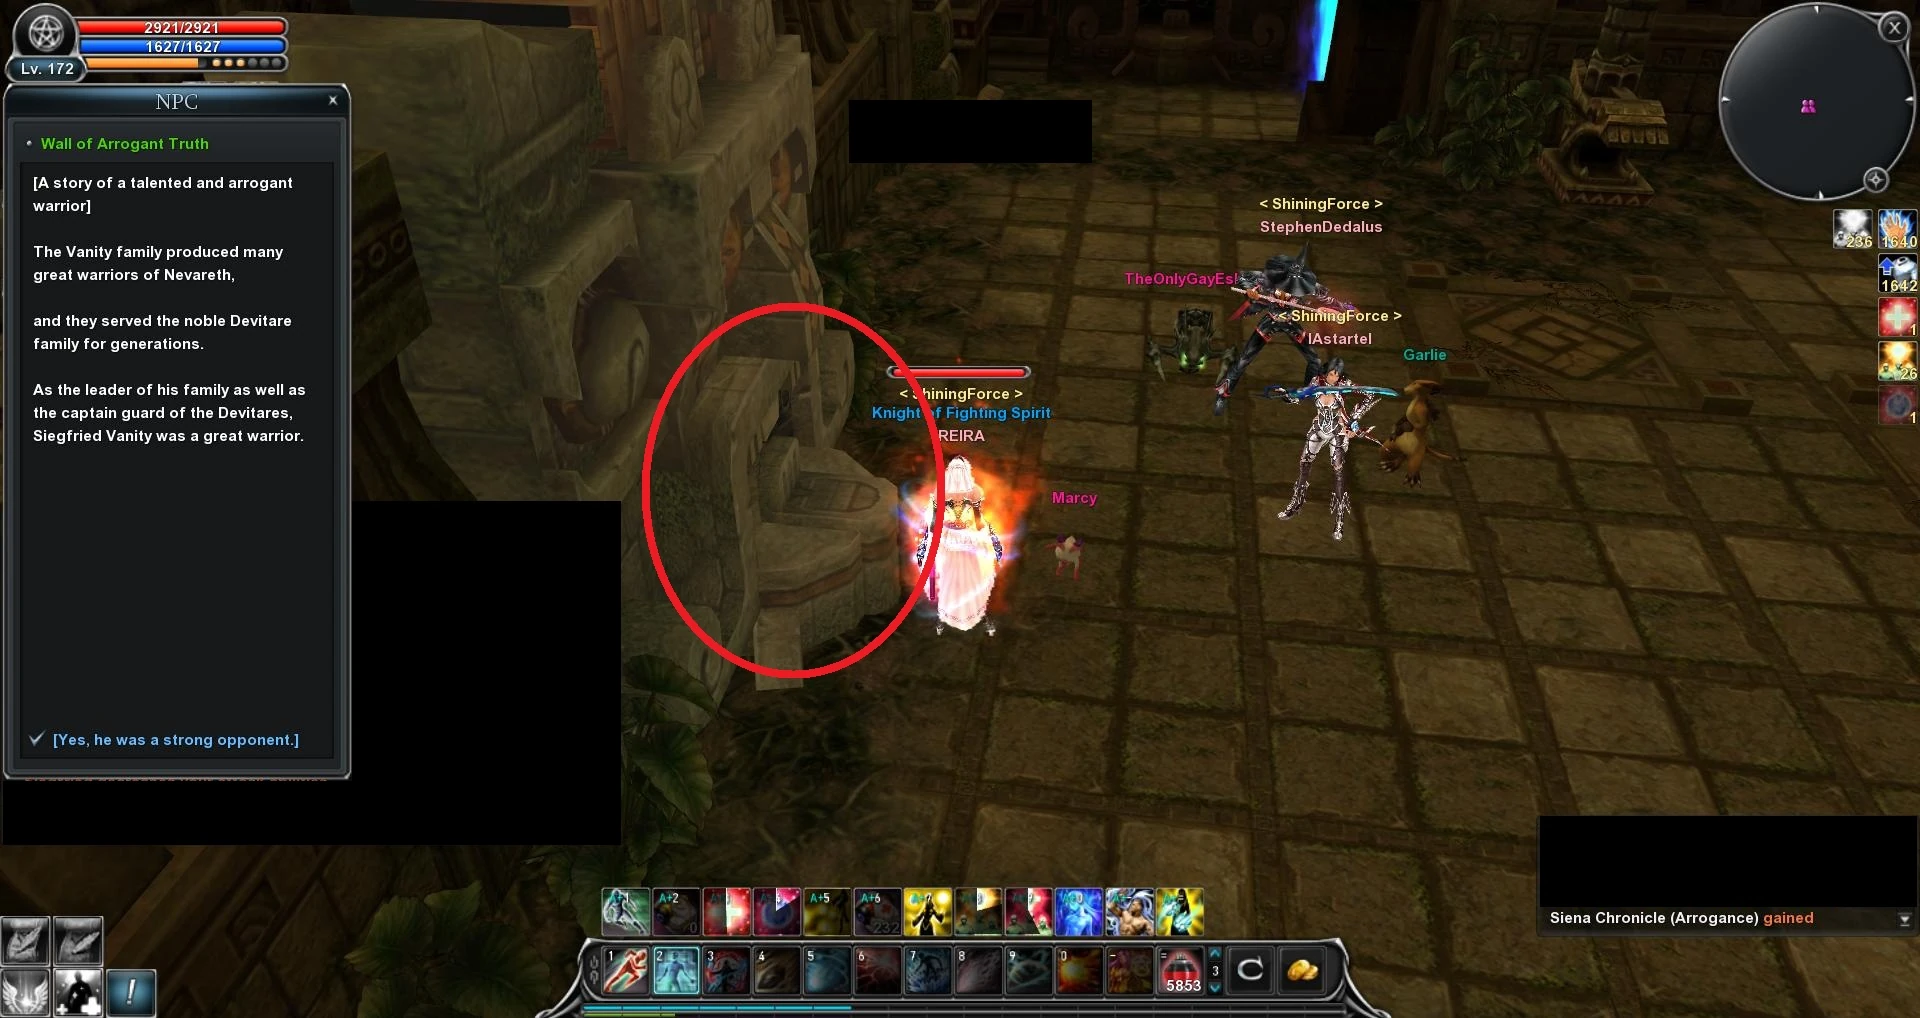 |
After you are done with the first form of Siegfried click on the statue to spawn the second form of
him. |
 |
Don’t forget to click on the statue again after you killed him to claim your 2.000 Honour points and a bonus chest.
Note: If you don’t do it or fail to do it the quest line will change a bit. |
 |
A few fire gates will block your way, kill each one 3 times and they won’t respawn anymore. |
 |
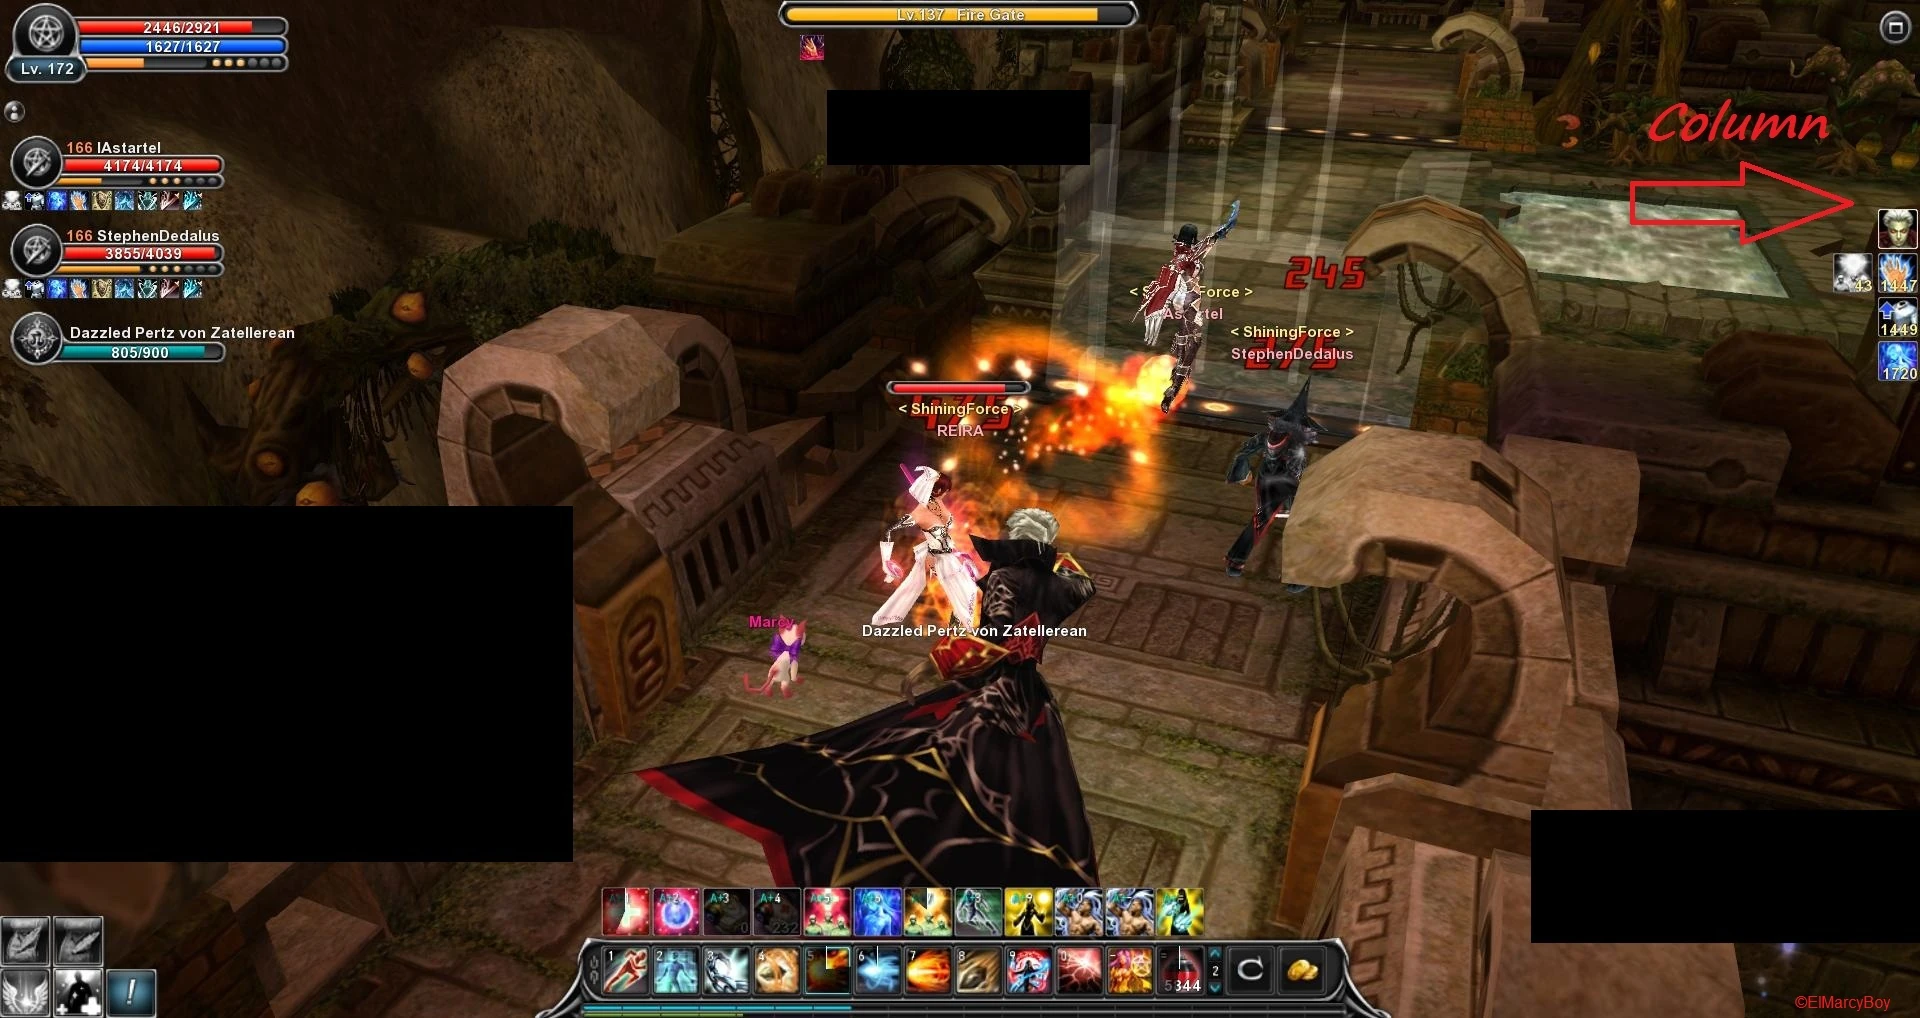
Click on the right column and continue.
Note: If you were not able to spawn the second form of Siegfried or it might took too much time then the quest line will be slightly different here. You have to click always on the left column and after you have done the Seed quest on the table instead of the Brazier. |
 |
Click again on the right column and the fire gate will disappear. |
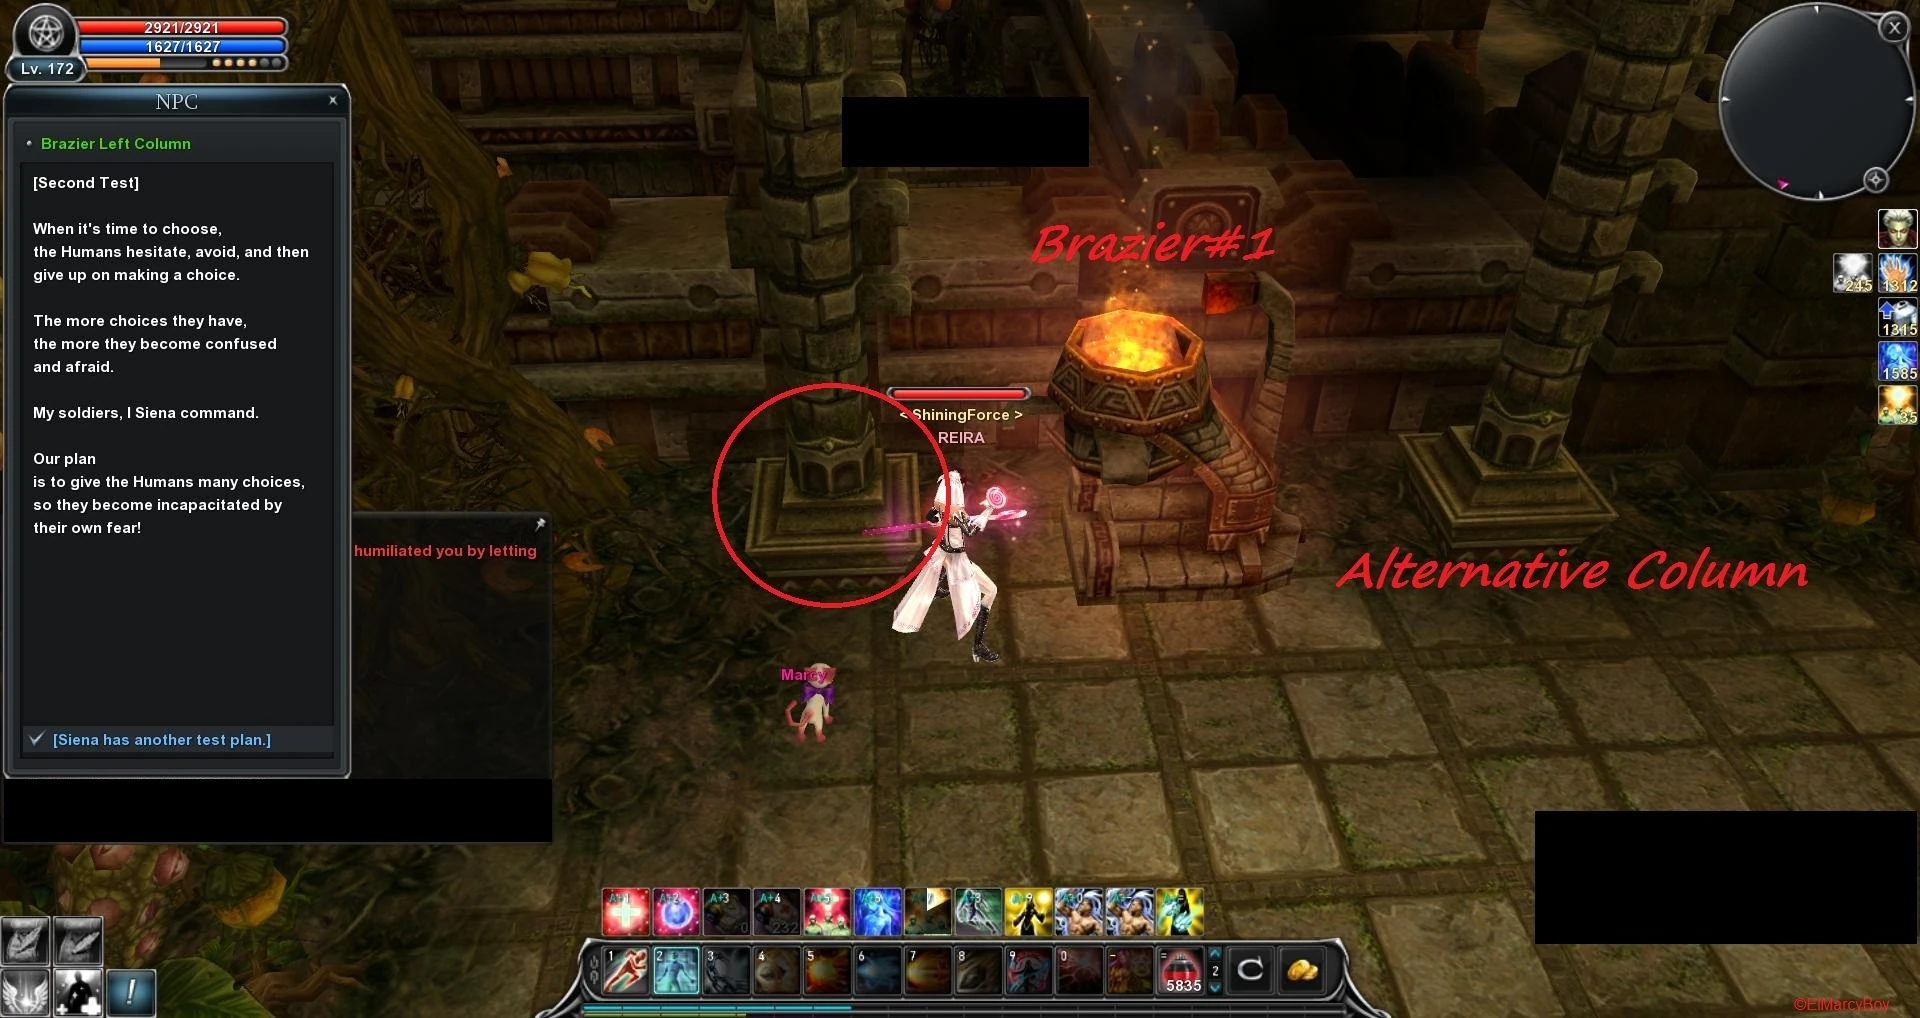
 |
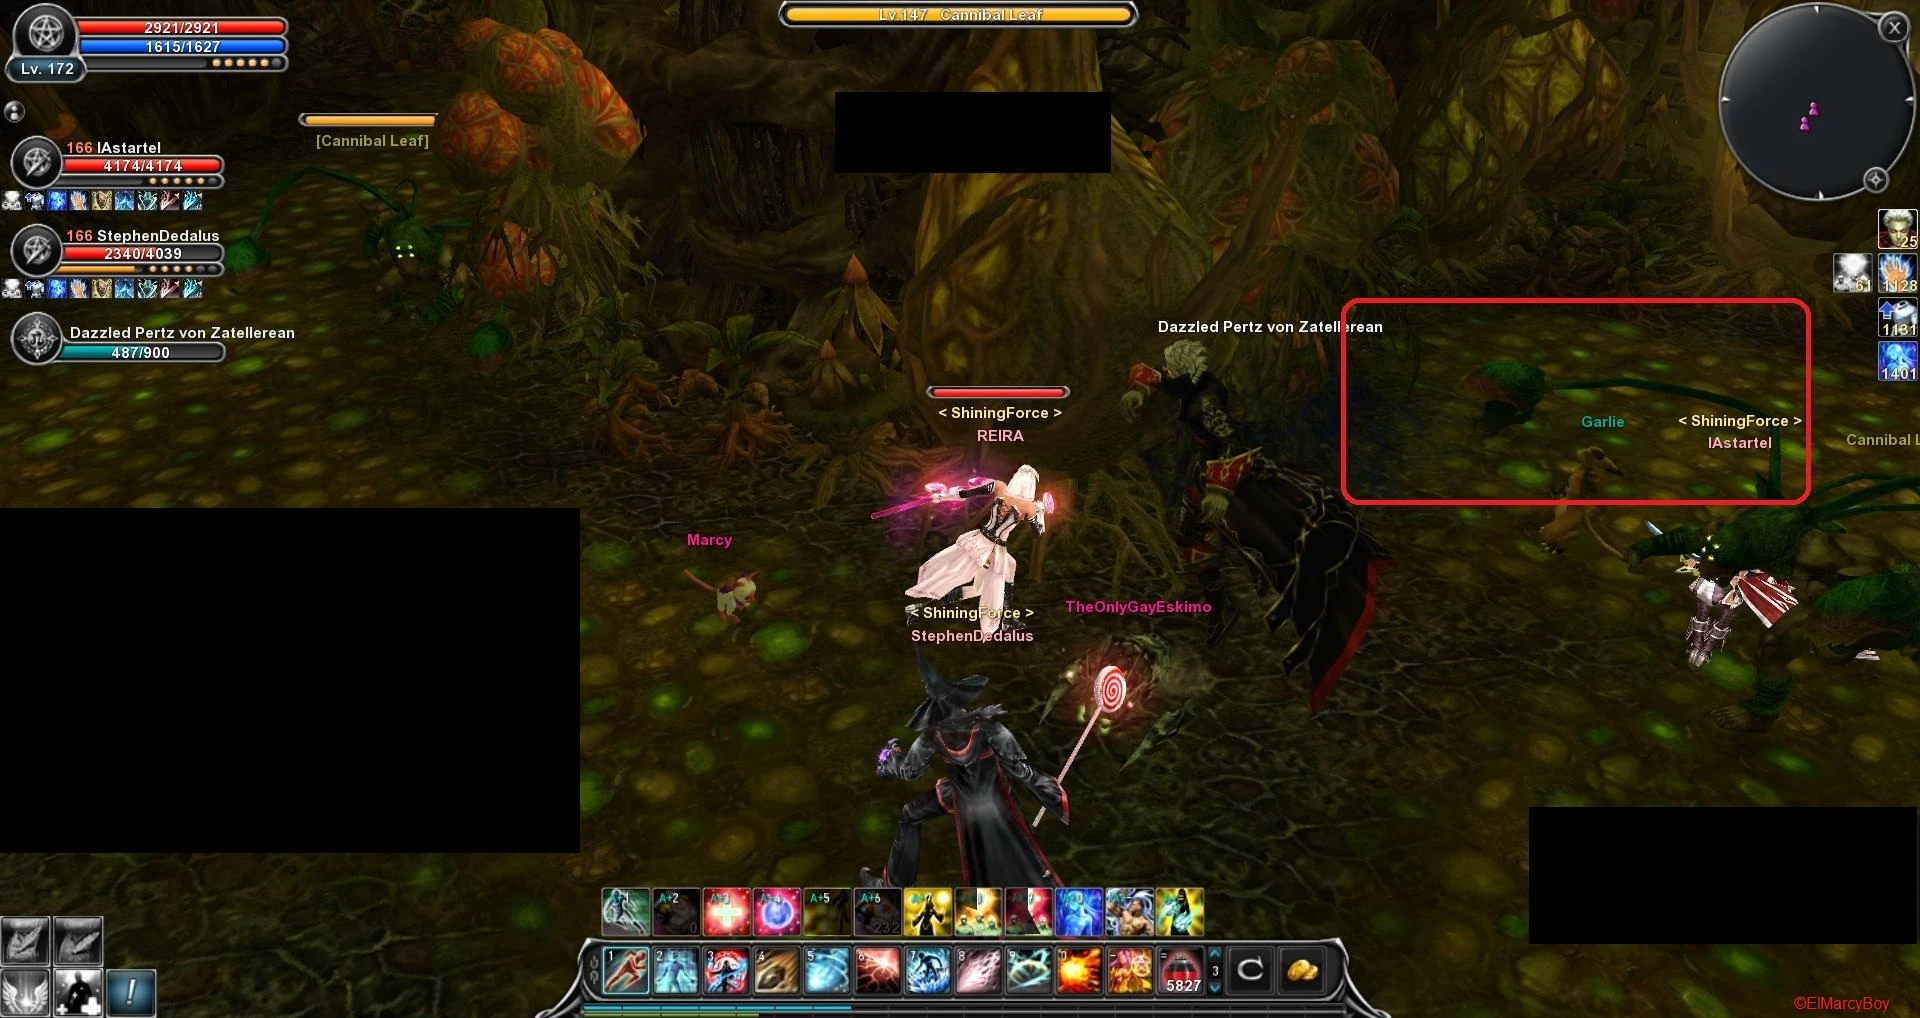
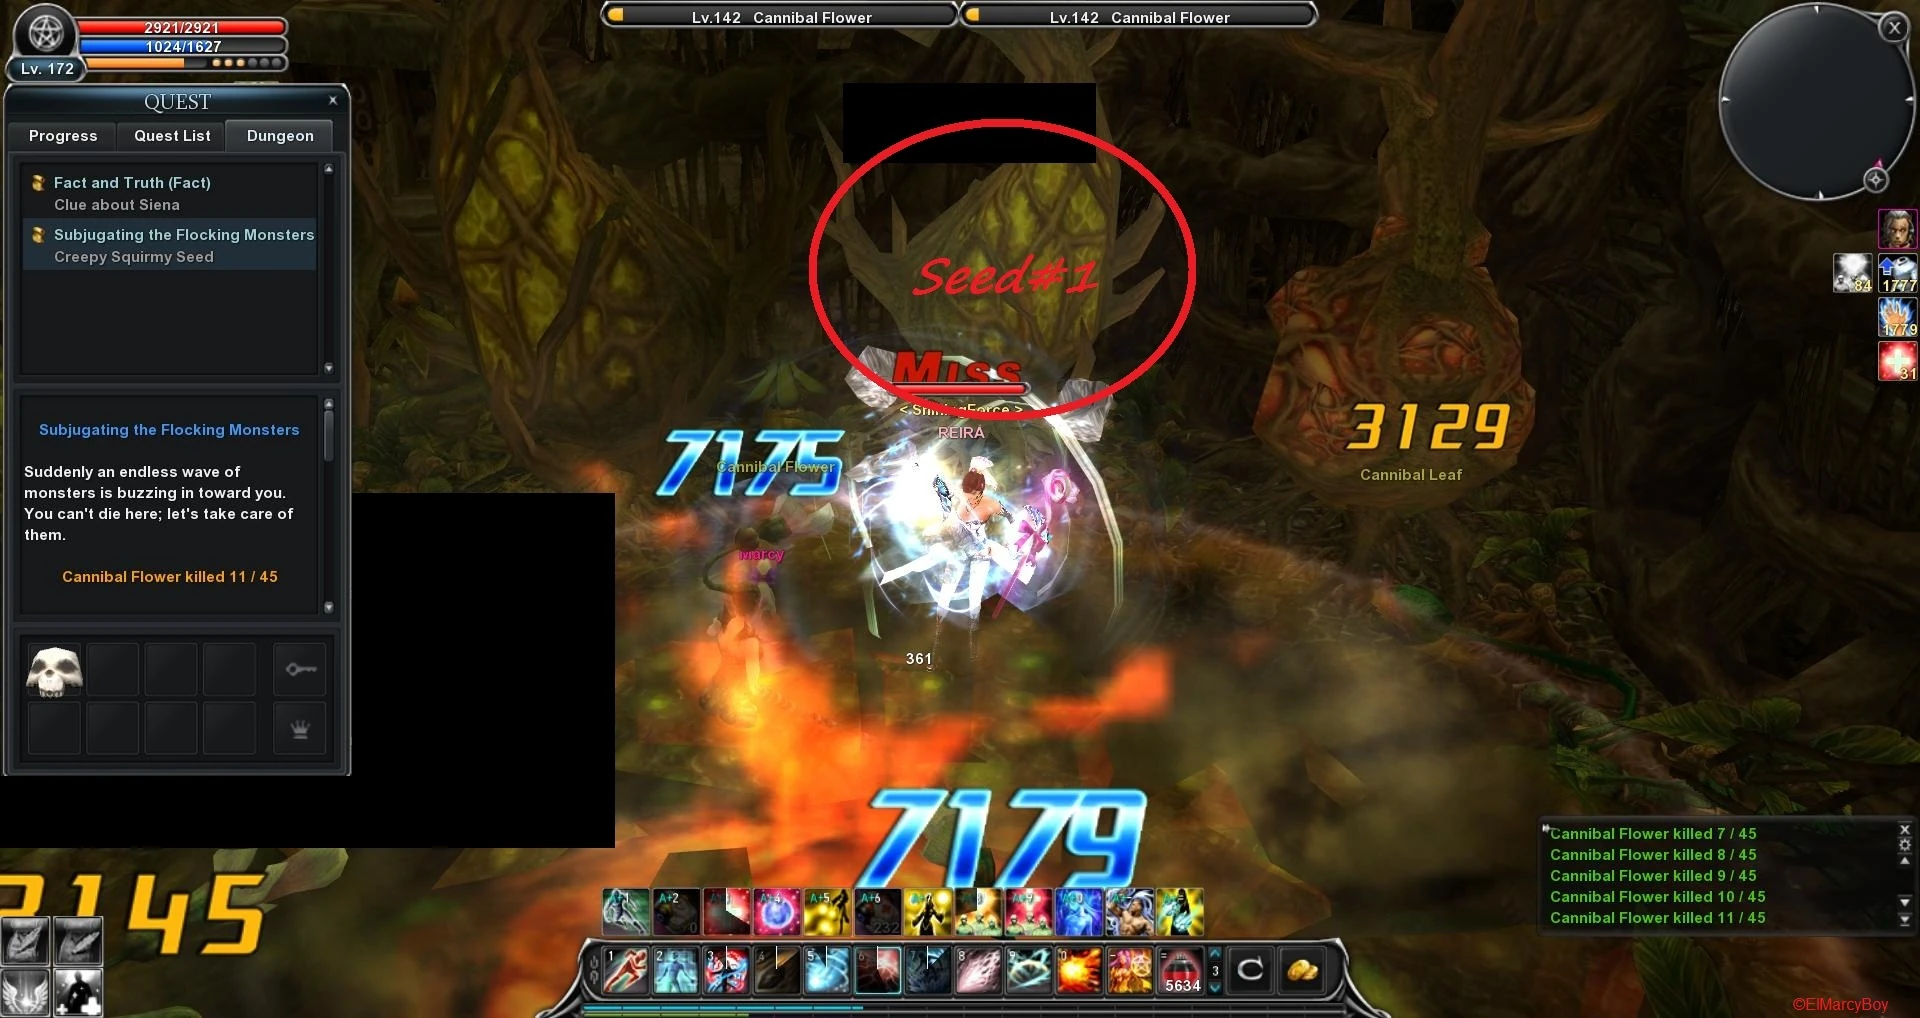
You will find a Seed in the next room, if you click on it a lot of Cannibal Leafs will spawn and you have to collect 5 quest items from them. After you got all 5 go back to the Brazier i marked befor.
Note: If you need to choose the other seed you will have to kill a certain amount of Cannibal Leafs instead of collecting the quest items. |
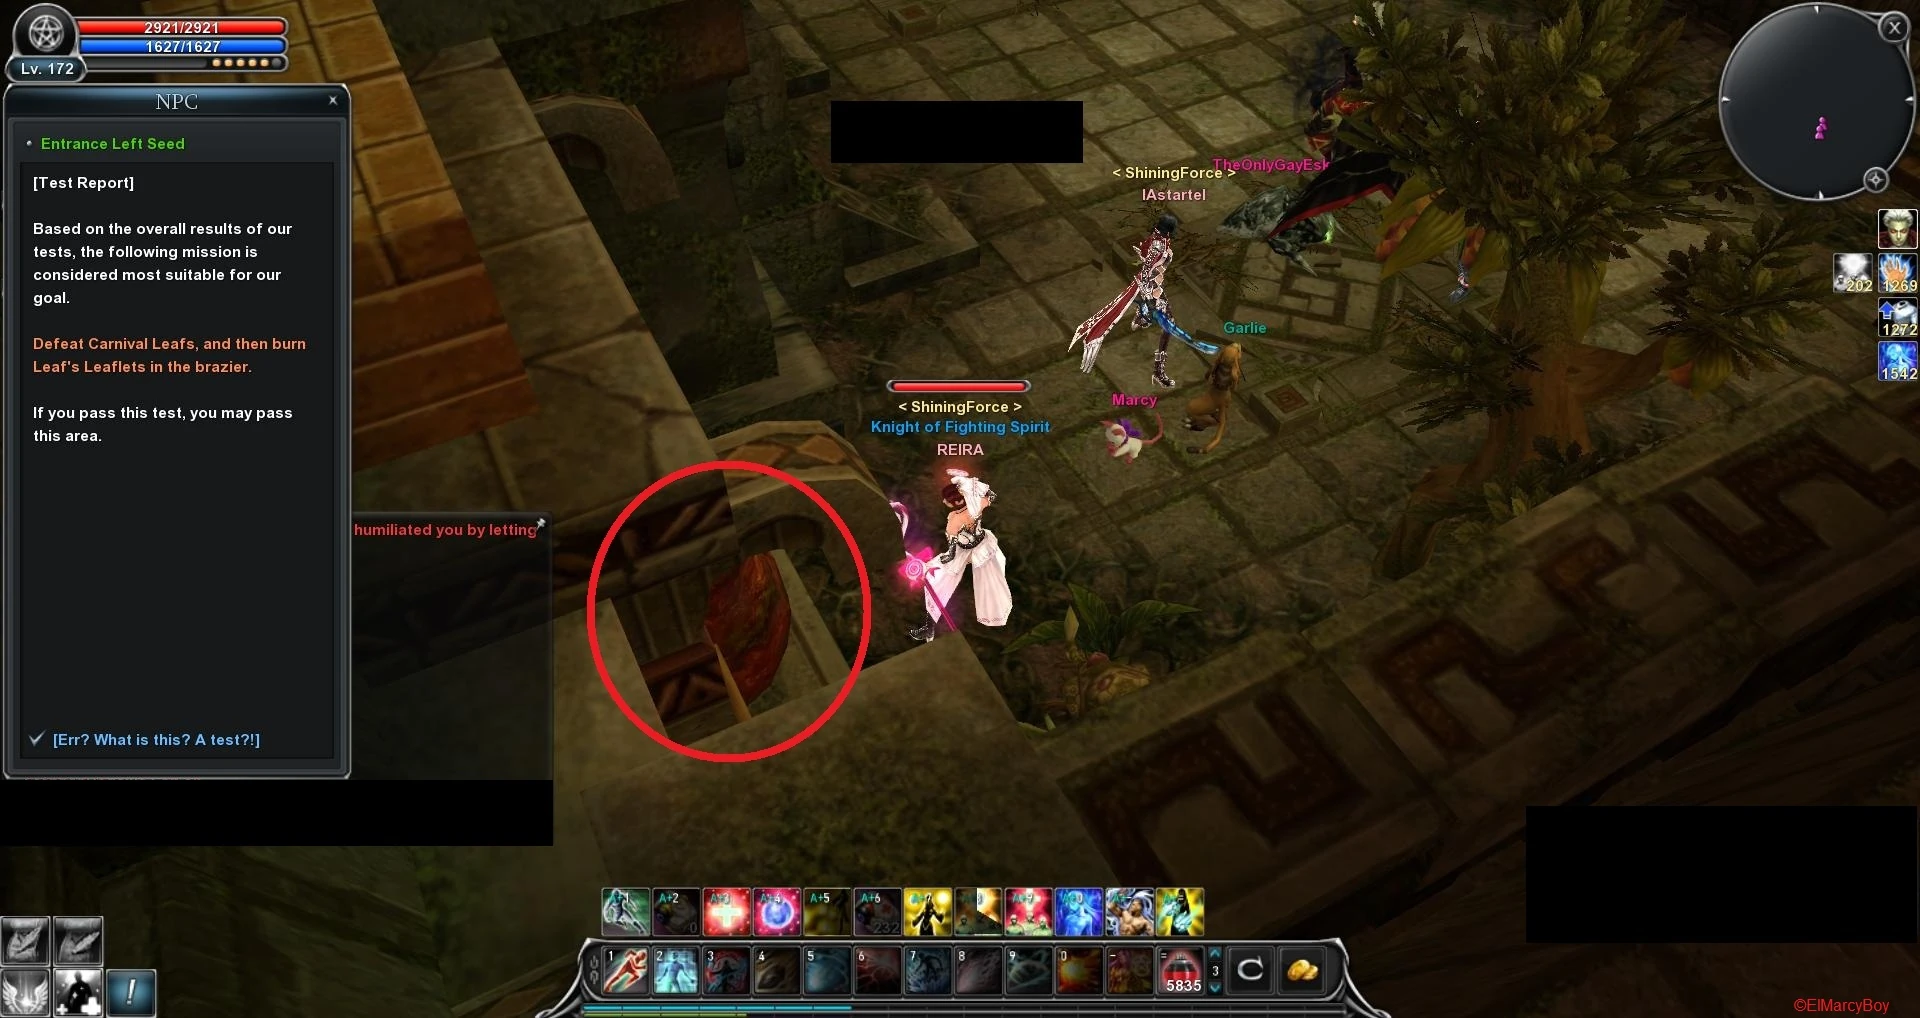
 |
The road block will vanish and you can go on. Stand in the marked area to lure all mobs together.
Around 3 waves will spawn and after you killed a certain Cannibal Leaf, Dorigos and 2 Dorigo Hetas will spawn. |
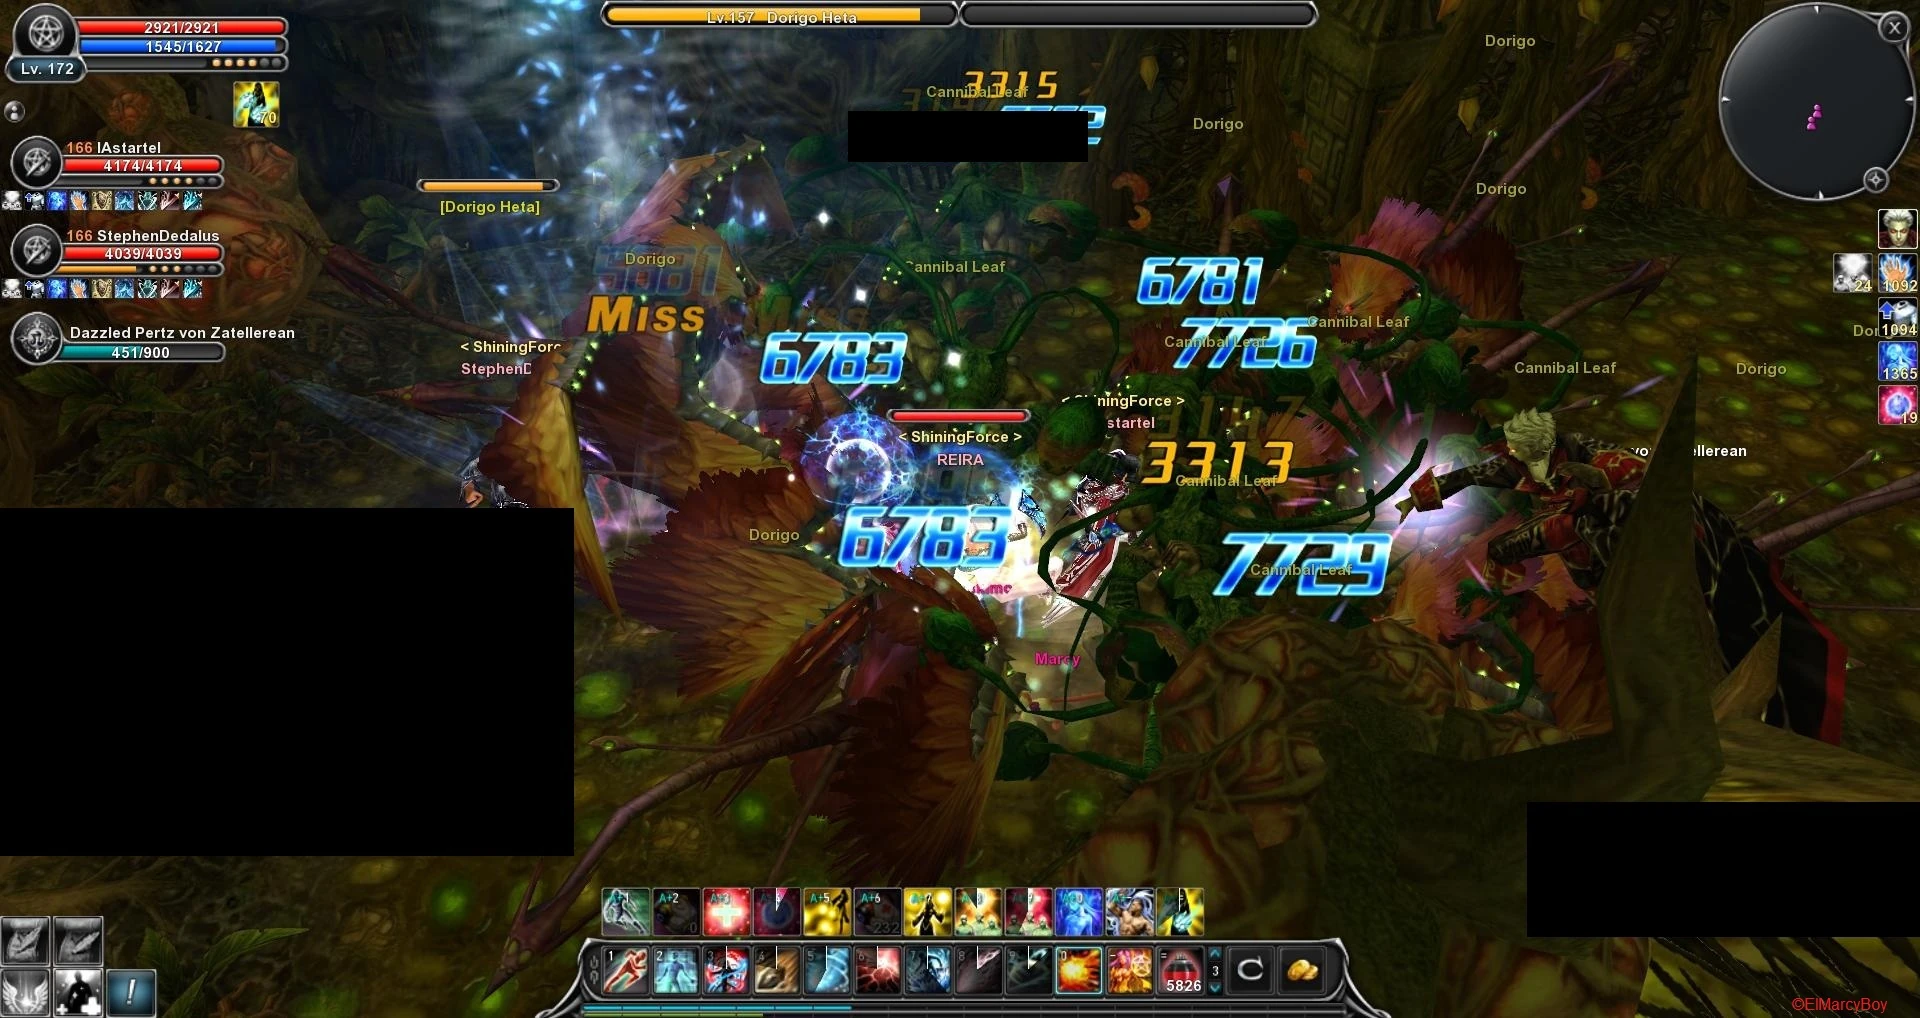 |
Just lure both Doriga Hetas together and defeat them. Go on. |
 |
You will encounter another fire gate, kill it again 3 times so it won’t respawn anymore. |
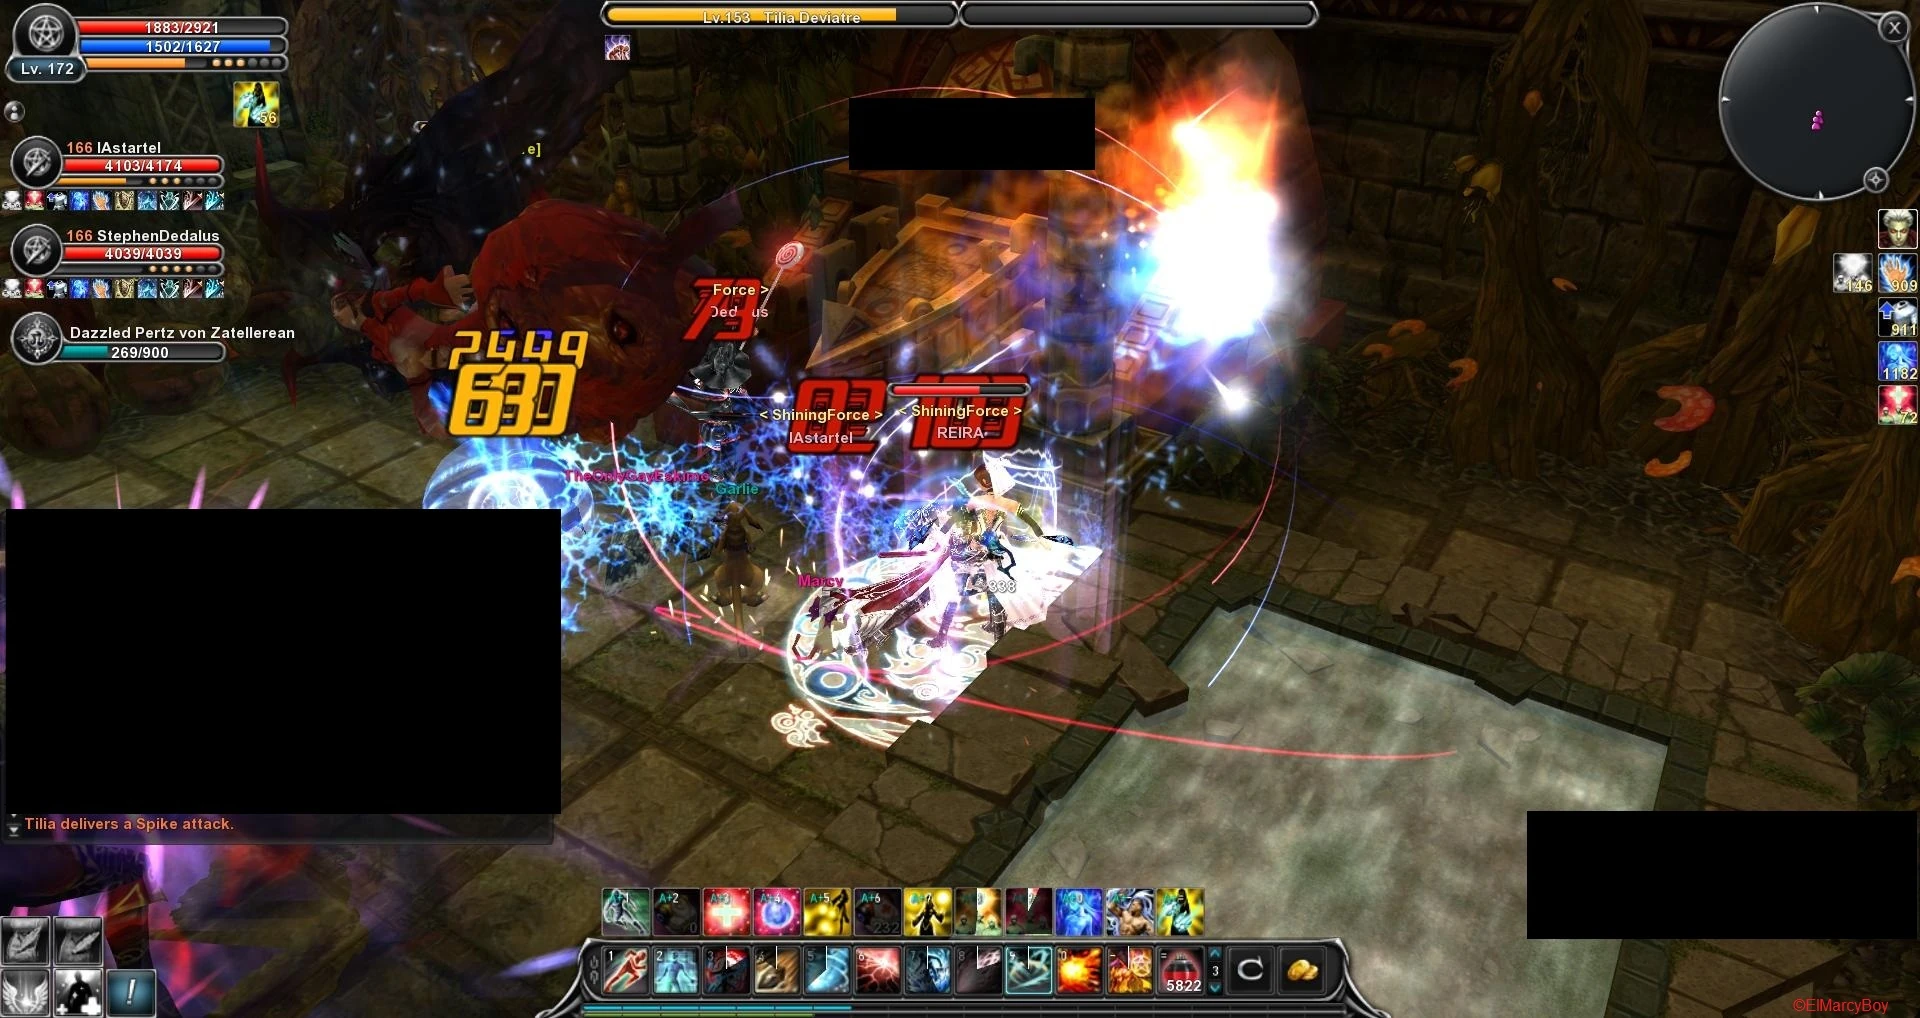 |
Continue until you reach the warp gate, turn on Bm2 and enter. Defeat Tilia Deviatre. |
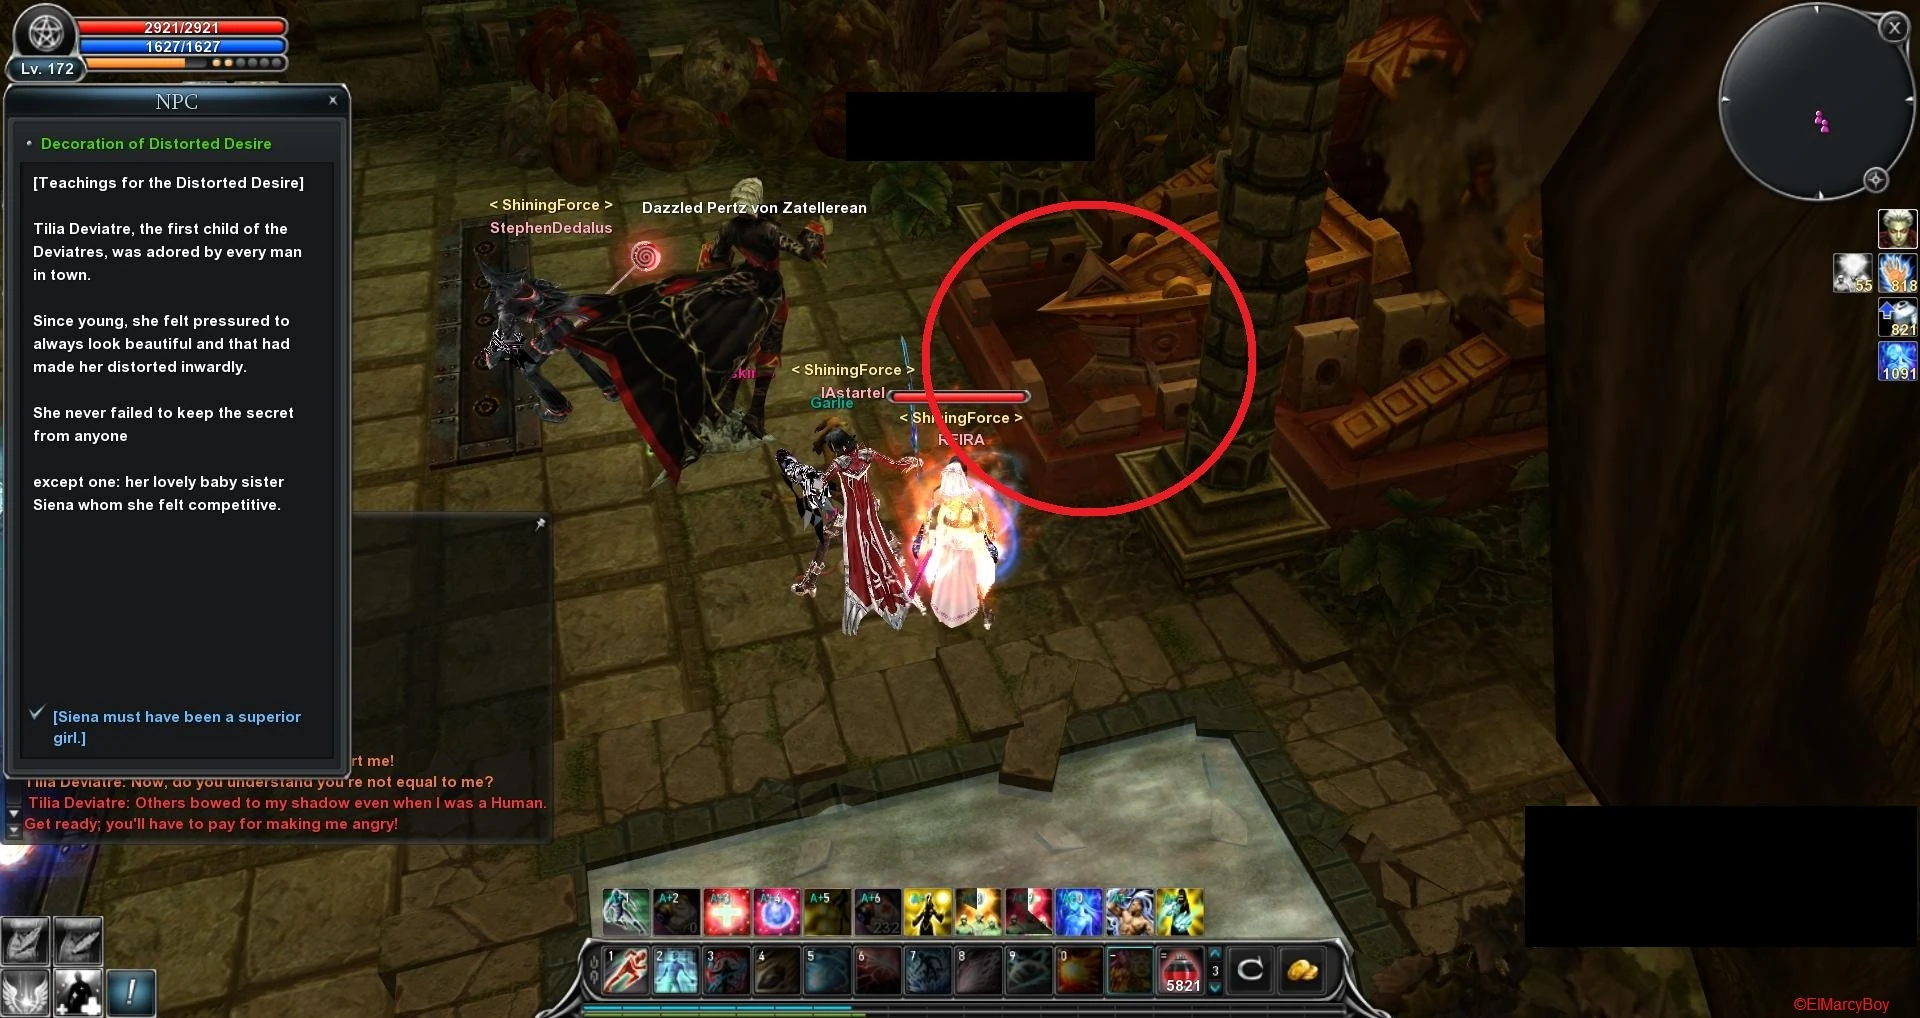 |
Click on the Decoration to spawn the second form of the boss. After you killed the second form click again on it to receive 2.000 honour points. |
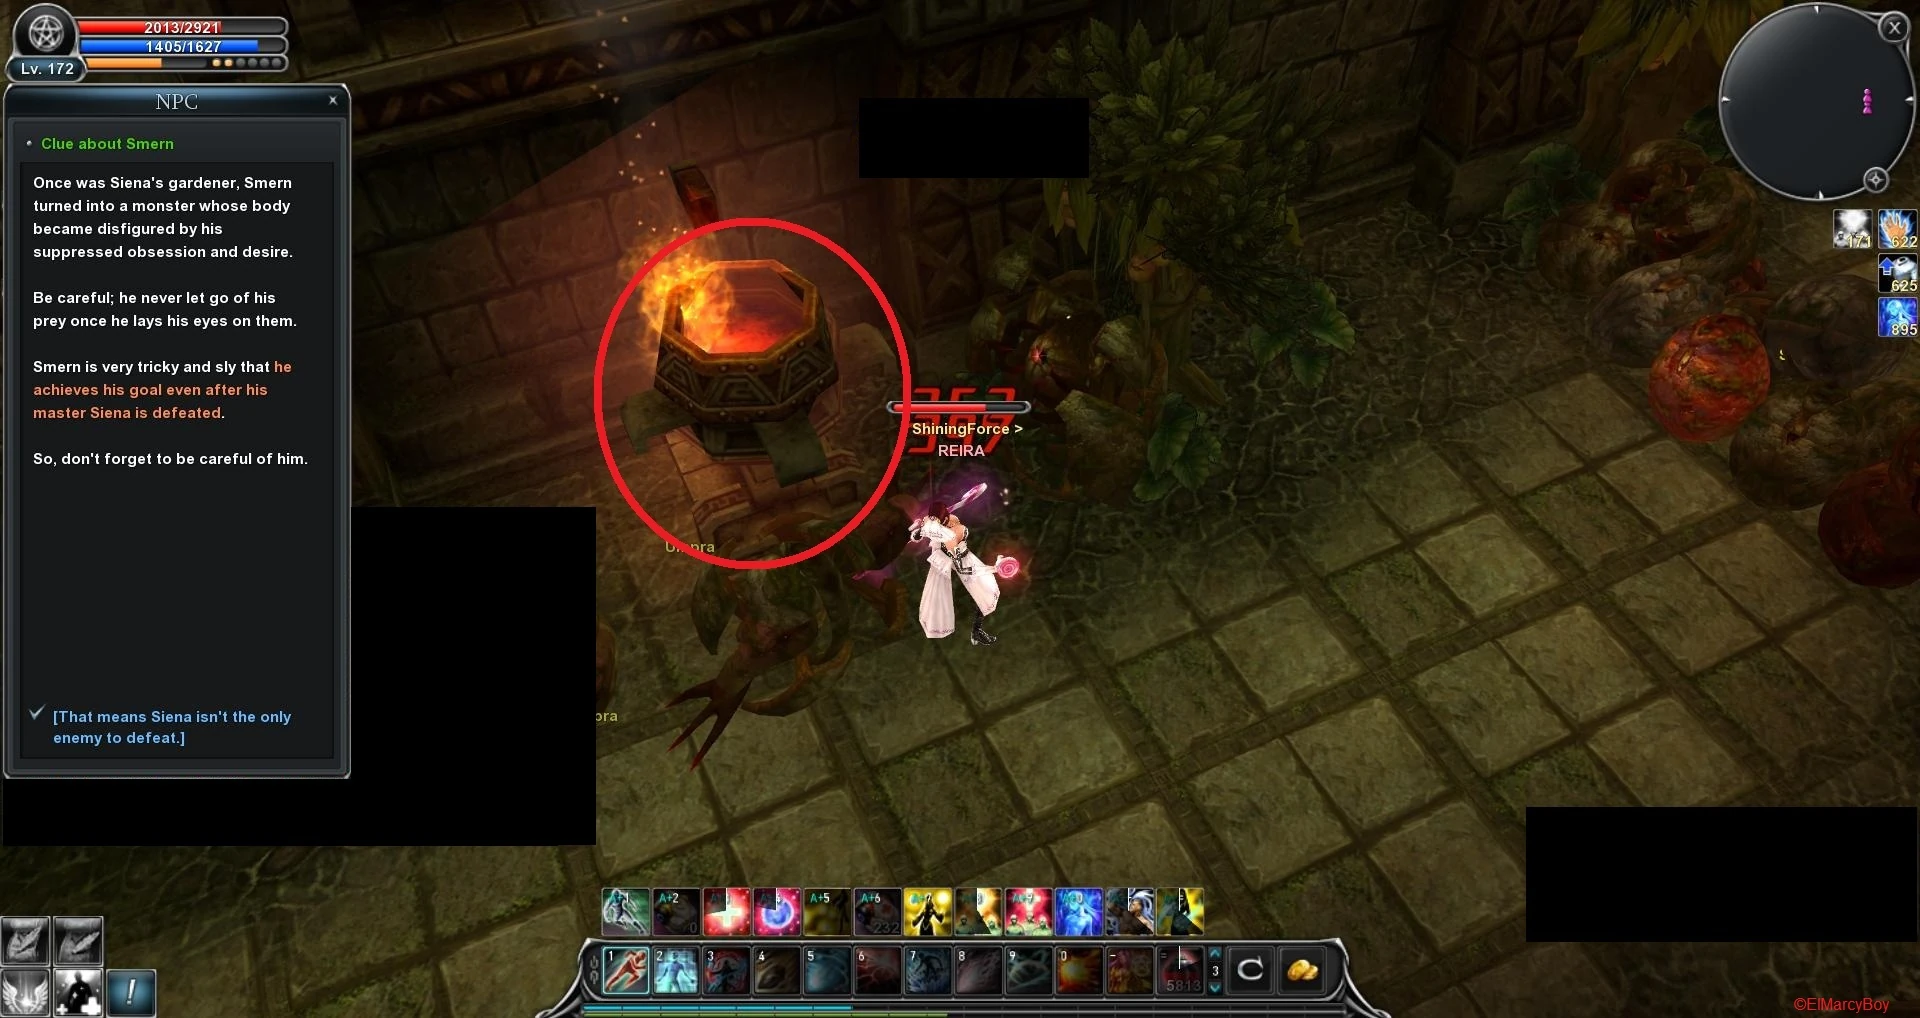 |
Go on until you see a Brazier, just click on it and the road block will disappear. |
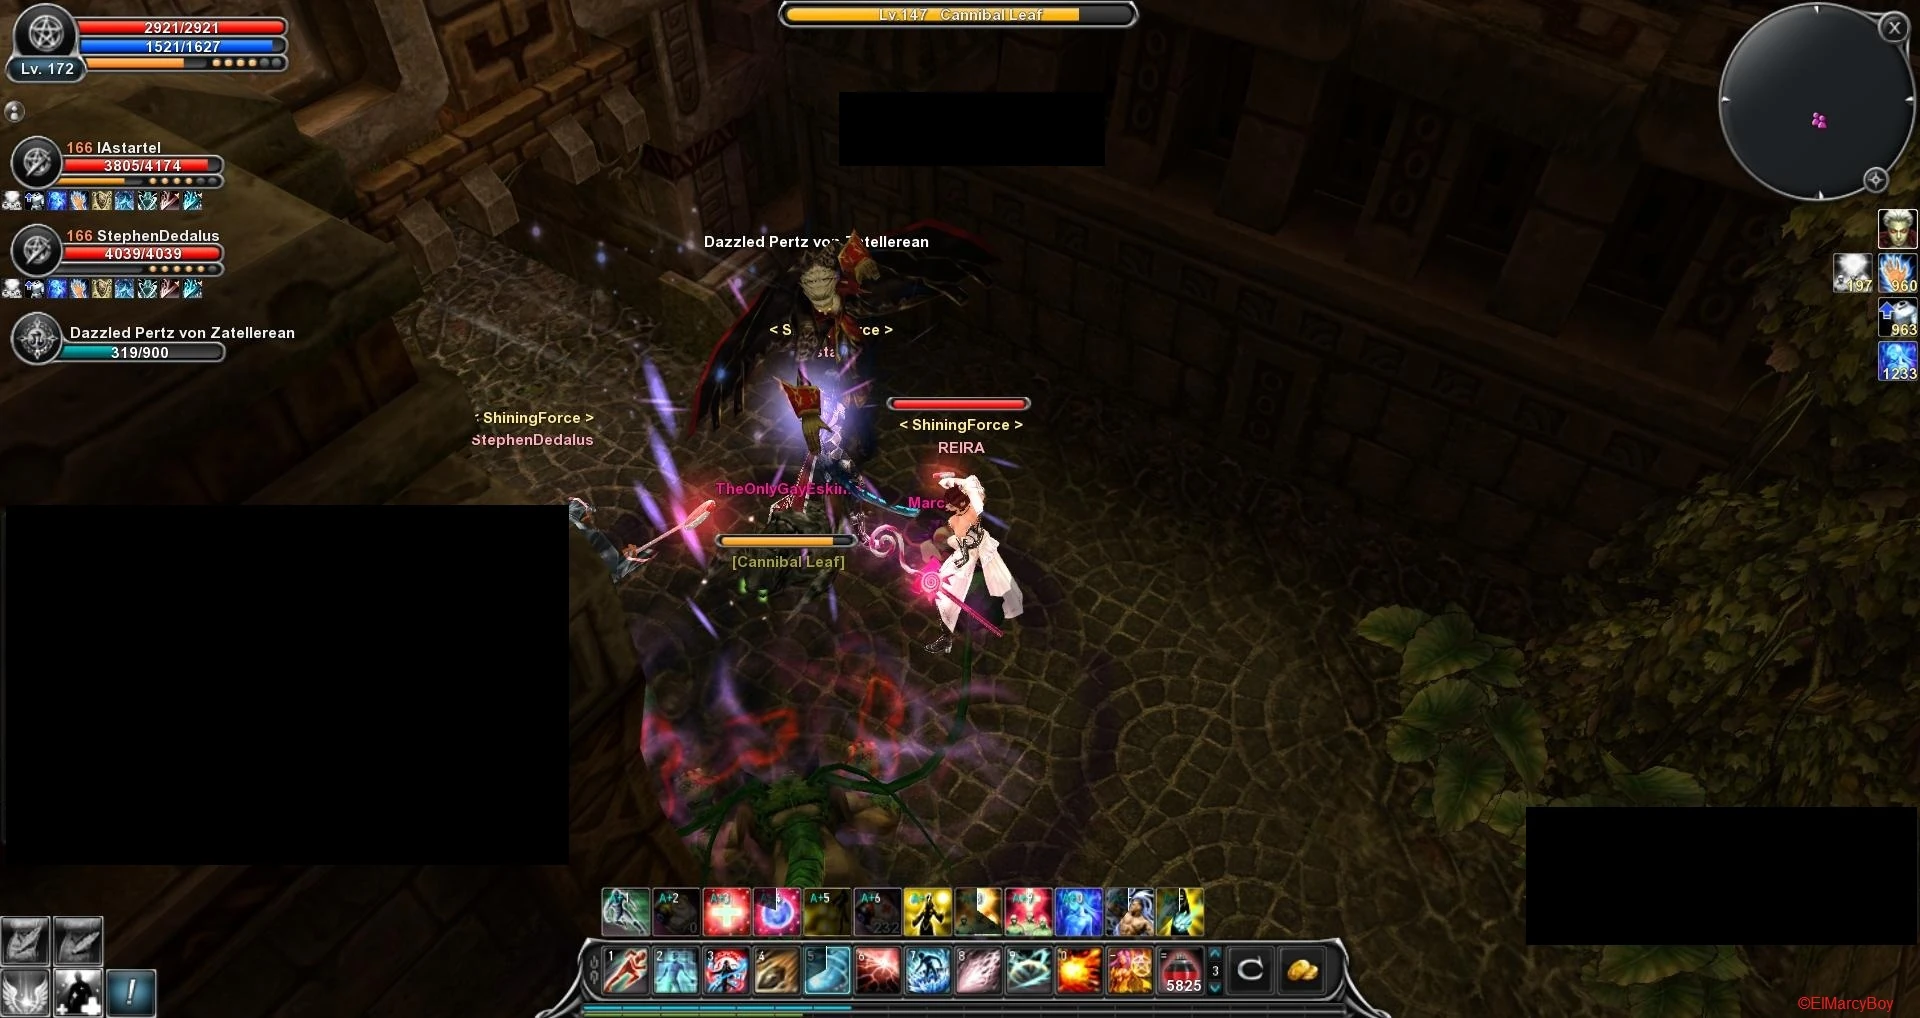
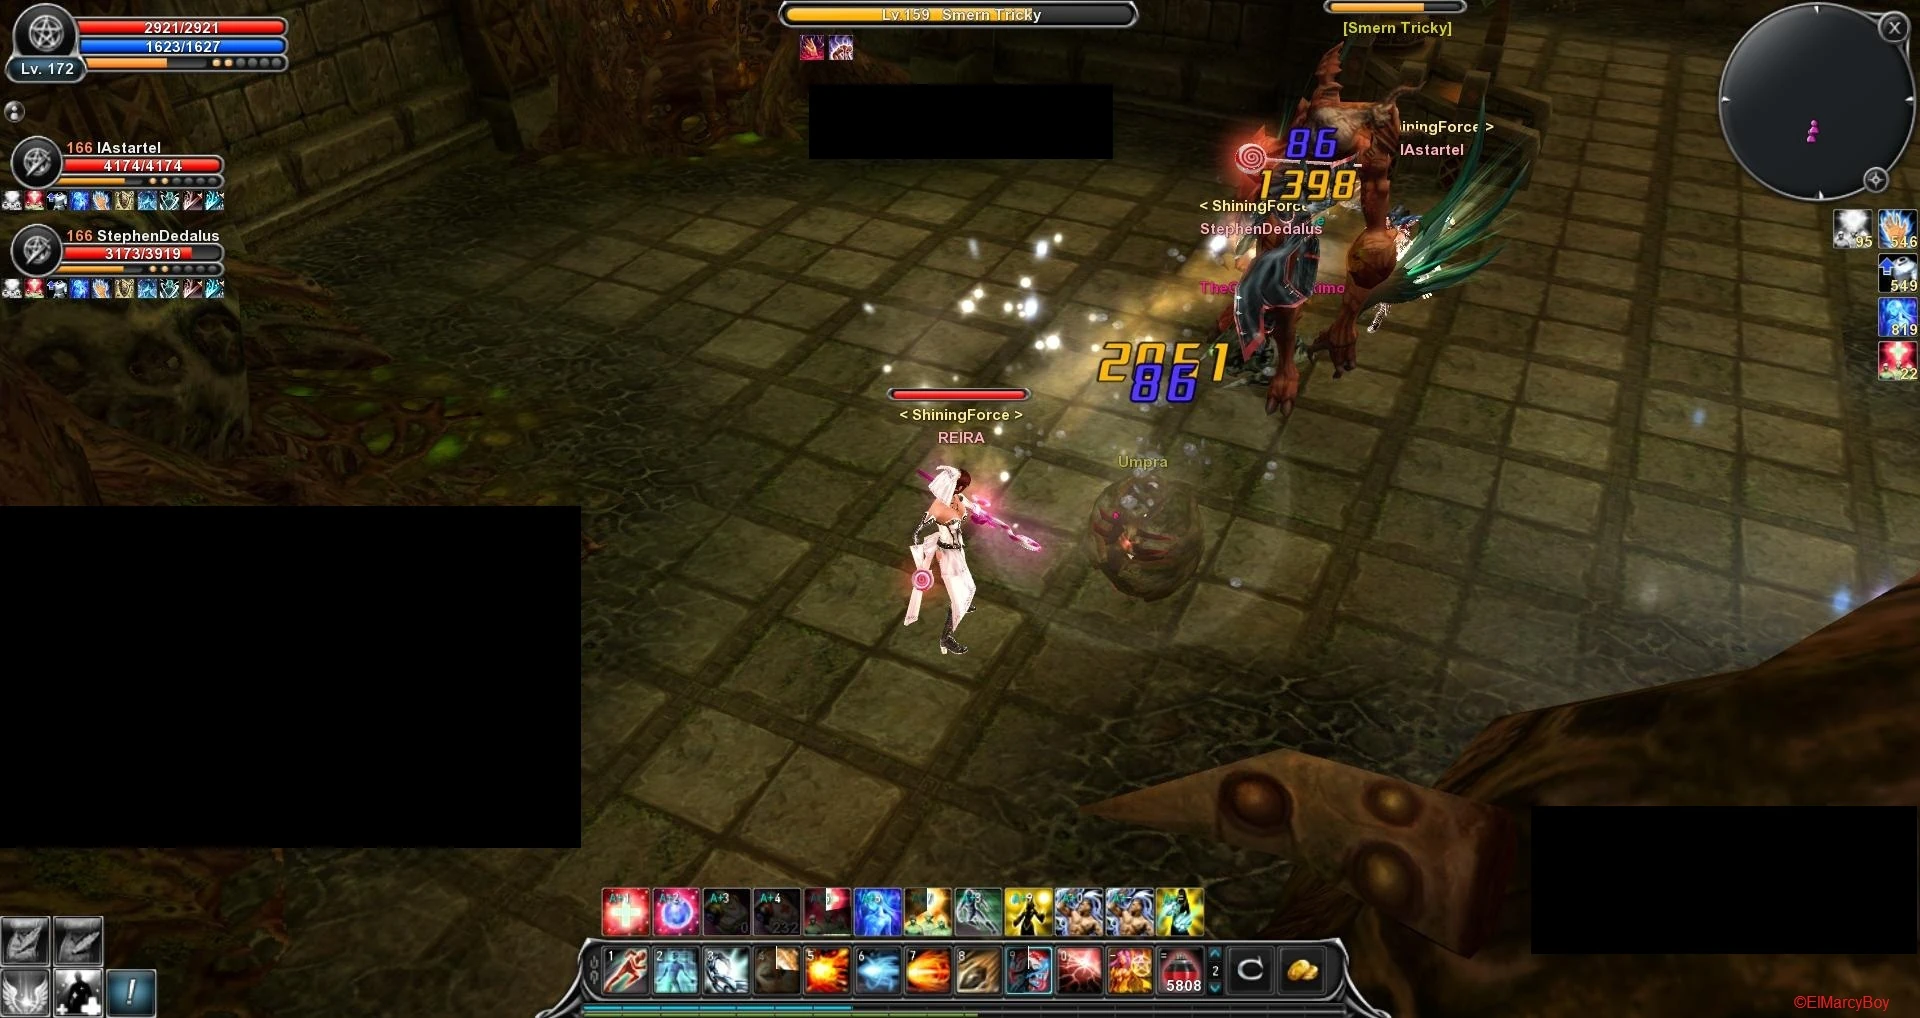 |
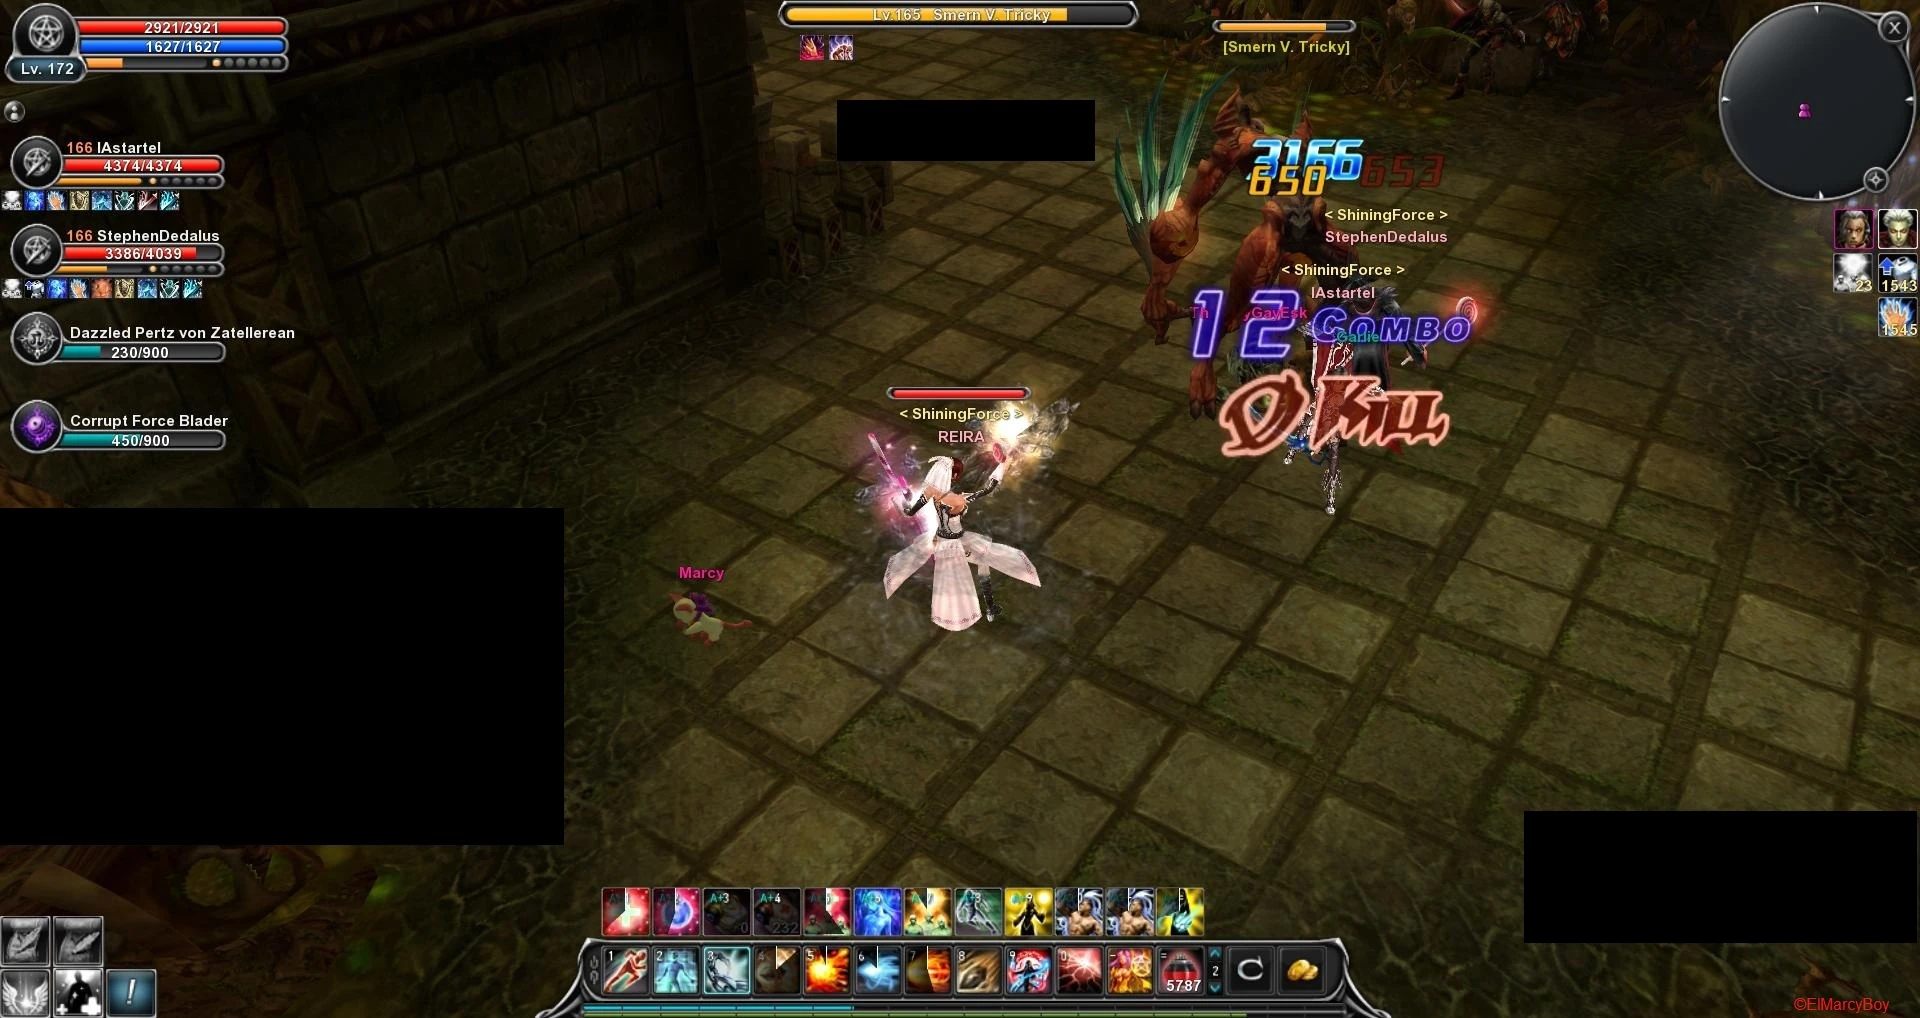
You will encounter Tricky, defeat him. |
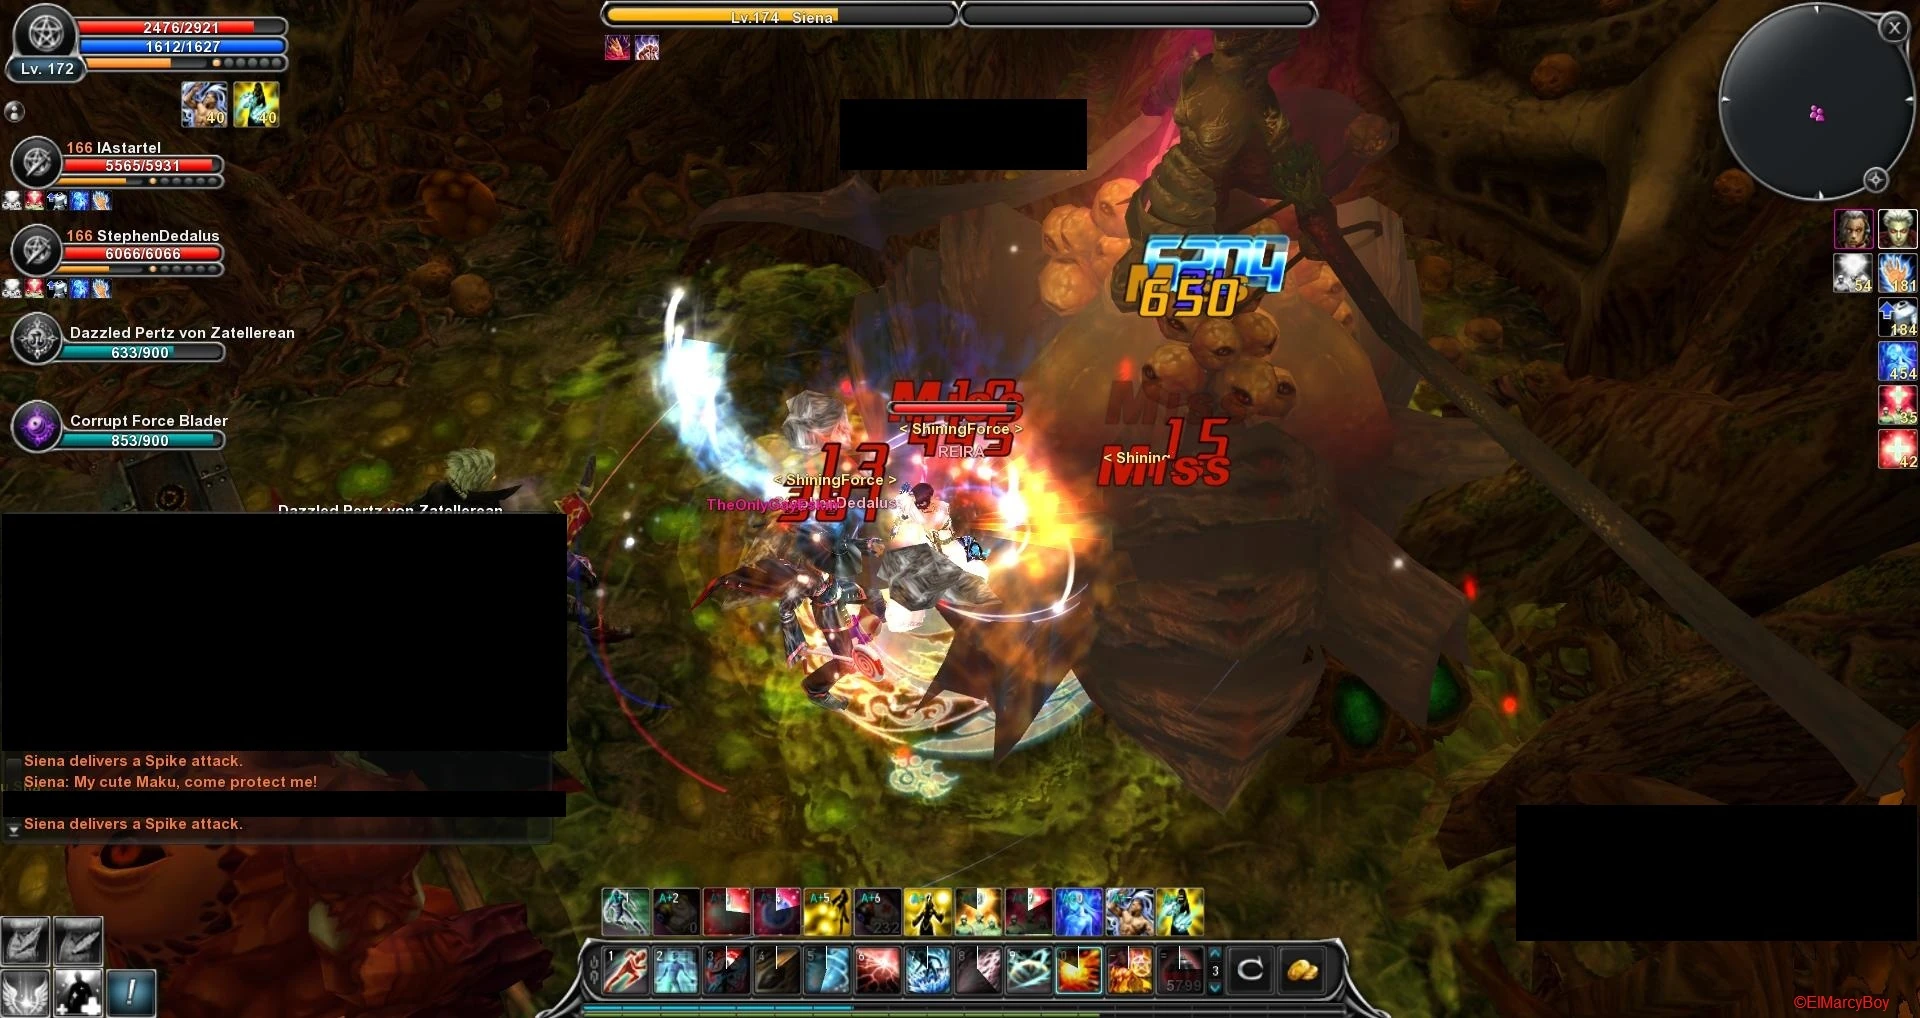 |
Now you are at the big fat endboss, go bm2+all buffs and extend before you enter. Repeat it until
Siena has been defeated. Gratz you are mostly done now but there is still a bit left to do. |
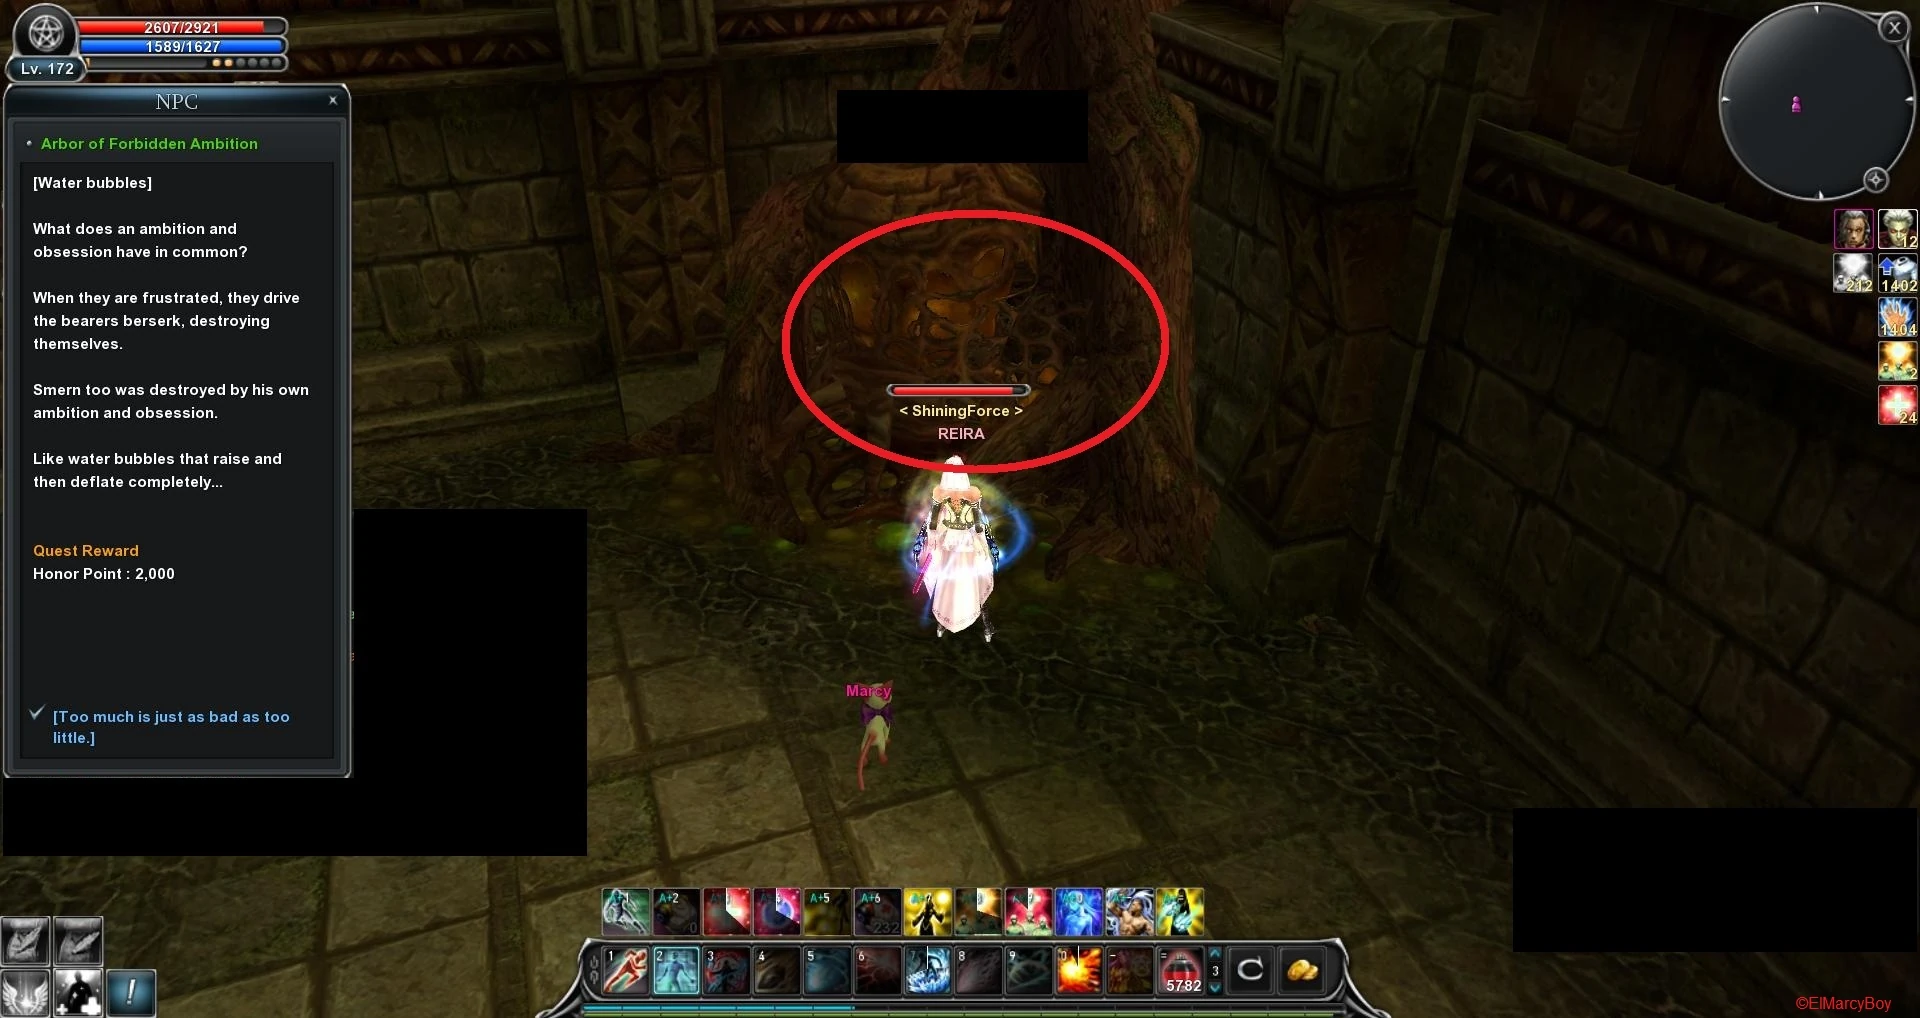 |
Go back out side and click on the “Arbor of Forbidden Ambition” to spawn the second form of Tricky. |
 |
When he is down click on it again to receive 2.000 honour points more and of course another chest. |
 |
Now return to the very beginning and click on the statue again to receive 2.000 more honour points for killing Siena. |
 |
Time for the small Side-Quests
Go to seed number 1 or 2 (they are in the room where the Drogias spawned before to start either a collector quest or a simple killing one. |
 |
You will recieve 500 Honour points more for finishing this quest. |
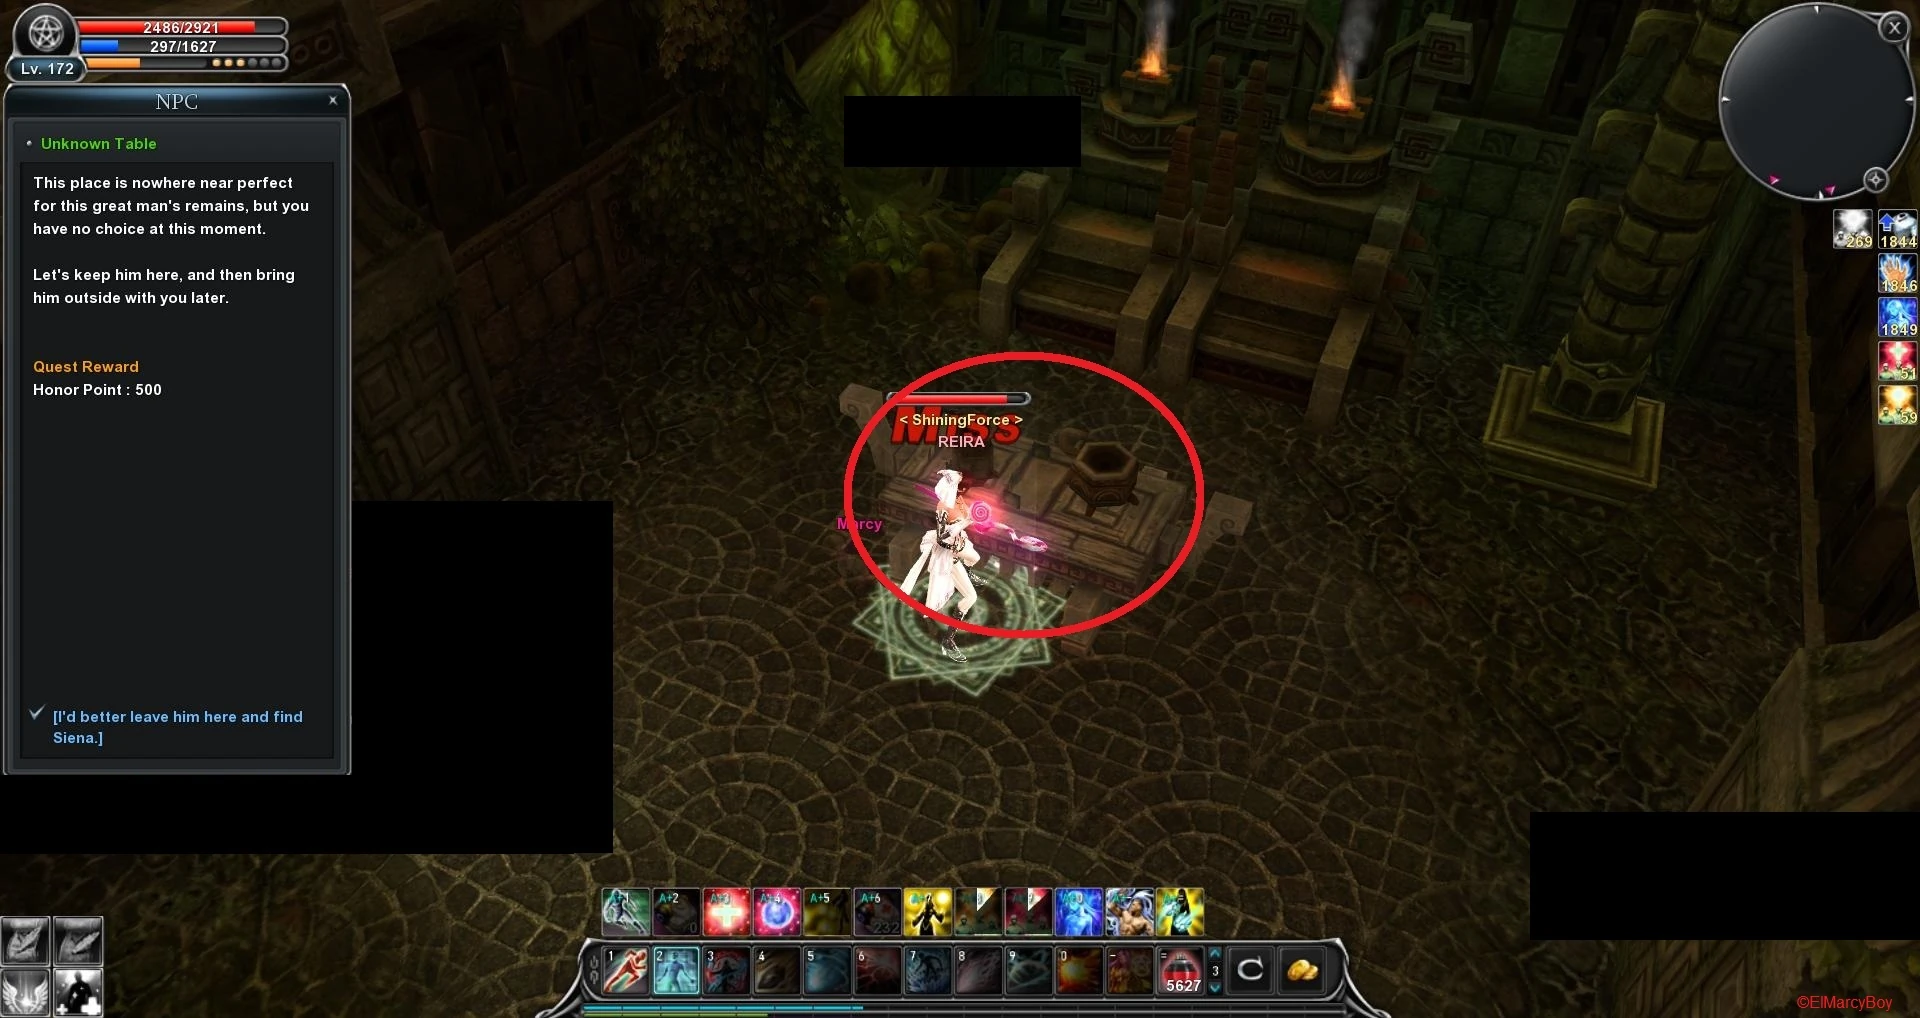 |
After you are done go on (to the place where you killed the one fire gate for 3 times) and in the back there will be a table. Click on it to start the quest. Turn around click first on the first column on the right, then on the left one and after on the last column. Talk again to the table to receive 500 Honour Points more.
Go again to the Siena room to click on the Seed (5.000 Honour Points) and finish the dungeon. |
| Mission Dungeon | Lake in Dusk (W) • Ruina Station (W) • Tower of the Dead (B1F) (W) • Volcanic Citadel • Tower of the Dead (B2F) • Forgotten Temple (B1F) • Forgotten Temple (B2F) (A) • Forbidden Island (A) • Illusion Castle Underworld • Illusion Castle Radiant Hall • Holy WindMill • Altar of Siena (B1F) • Altar of Siena (B2F) • Maquinas Outpost • Holy Keldrasil • Tower of the Undead (B3F) • Flame Dimension • Abandoned City • Legend Arena • Devil's Tower • Glacies Inferna • Edge of Phantom • Forgotten Temple B3F • Acheron Arena • Devi's Tower (Part2) • Pandemonium • Flame Nest • Ancient Tomb • Frozen Canyon • Mirage Island (A) • Labyrinth |
| DX Dungeon | Panic Cave (A) • Steamer Crazy • Catacomb Frost • Lava Hellfire • Hazardous Valley |
| Chaos Arena | Chaos Arena Lv. 1 • Chaos Arena Lv. 2 • Chaos Arena Lv. 3 • Chaos Arena Lv. 4 • Chaos Arena Lv. 5 • Chaos Arena Lv. 6 • Chaos Arena Lv. 7 • Eternal Chaos Arena |
| Related links | Dungeon Entry Items |